Hi everyone! I’m so happy you’re here to practice with me today. Learning how to draw hands used to be my absolute biggest hurdle. When I first started taking my art seriously, I’d literally draw characters with their hands behind their backs or hidden in their pockets just so I wouldn’t have to deal with them! Every time I tried, the fingers ended up looking like weird sausages and the palms were always way too big or too small
I’ve come a long way since those early days, but I’ll be the first to tell you that hands still require a bit of focus and a lot of practice. The big difference now is that I actually understand how to approach them. Most tutorials on hand drawings assume you already know exactly what you’re doing. They have you drawing all these complex circles and wireframes that just make things more confusing and look way too advanced. But hands are actually just a collection of simple parts that fit together like a puzzle.
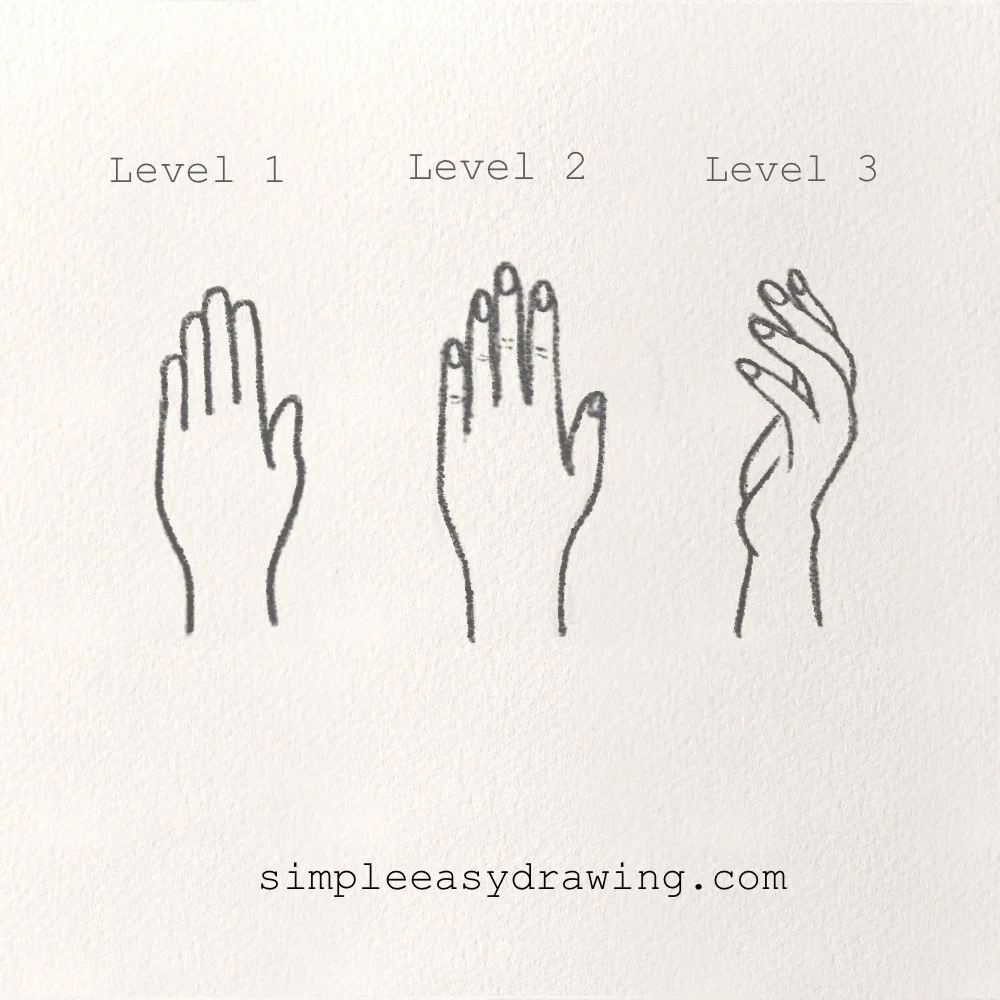
This is a step by step lesson is designed for absolute beginners, and I’ve divided it into three levels. Each level builds on the previous one, and more importantly, each one shows you how the drawing grows better with each step. We aren’t going to dive into advanced anatomy or confusing shapes right away. But just to help you build confidence on a basic hand drawing.
Level 1: Building the basic hand
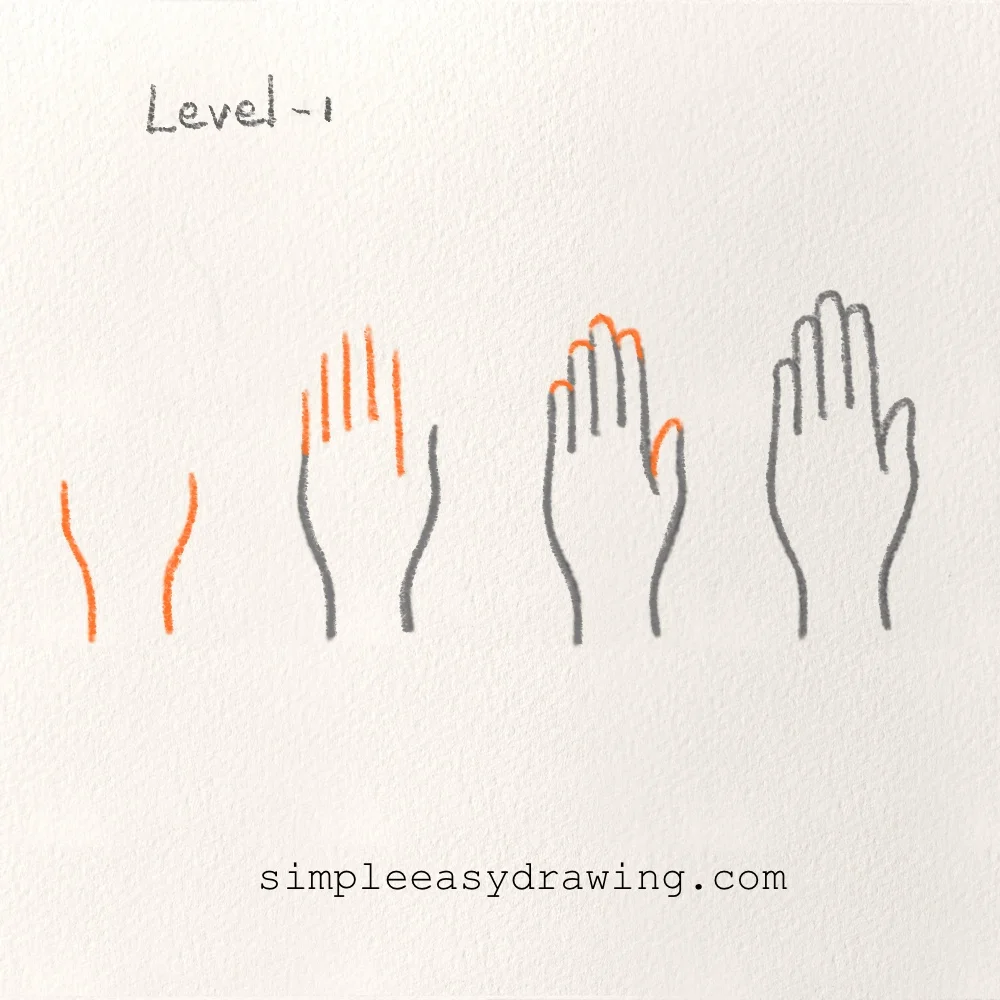
In this level, we are only focusing on structure. Nothing fancy, nothing detailed, just getting the shape right.
Start by drawing two slightly curved extending down narrowly. These will act as the base sides of your palm. Keep them light and simple. Next, begin adding the fingers. Instead of drawing full fingers immediately, draw them as straight, narrow shapes rising from the top of the palm. Don’t worry about curves yet, just place them evenly and keep their heights slightly different so they don’t all look identical.
Once the fingers are in place, connect everything smoothly. Now you can round off the tips of the fingers and slightly adjust their edges so they don’t look too stiff. Finally, refine the outline of the palm and wrist. At this stage, your hand will still look simple, maybe even a little rigid, and that’s exactly what we want. The goal here is clarity, not realism.
Level 2: Adding details and structure to your hand
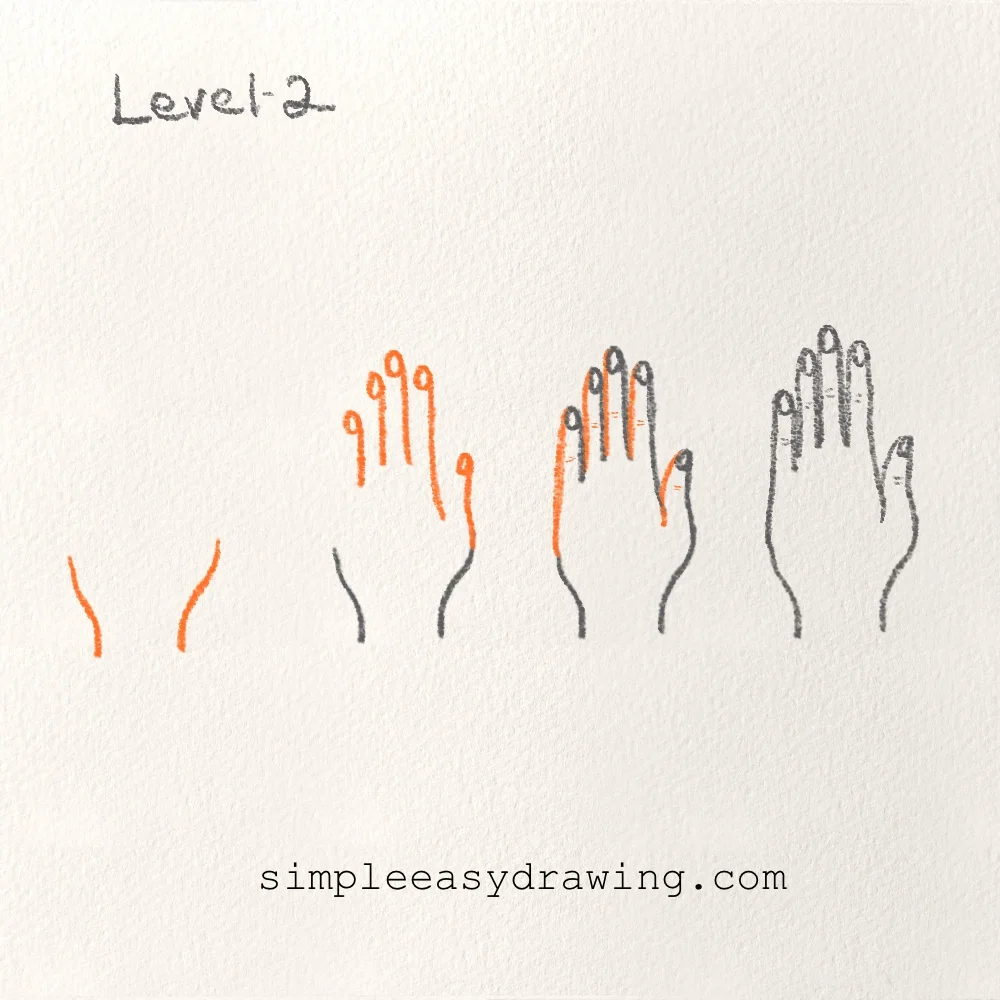
Once you are comfortable with the basic shape, we’ll begin improving it by adding simple details. Start again with the palm base. This time, when you draw the fingers, avoid making them completely straight. Add gentle curves so they feel more natural.
Next, add small oval shapes at the tips of the fingers to represent nails. This small addition makes the hand look more realistic and improves your overall hand drawing.Now refine the shape of each finger. Slightly vary their thickness and spacing so they do not all look identical. Don’t worry if it looks wonky. It gets better with practice.
After that, smooth out the connections between the fingers and the palm. Clean up any rough or uneven lines. At this stage, your drawing should feel more defined. It is still simple, but it now has structure and detail, which is an important step in learning how to draw a hand properly.
Level 3: Drawing a more natural hand

In this level, we move away from a flat hand and create a more natural pose. Start by drawing the fingers and nails in a slightly curved direction instead of straight lines. Let them tilt gently and avoid keeping them perfectly parallel.
Draw each finger one by one, allowing small overlaps where needed. This creates a sense of depth and improves your hands drawing overall. Next, shape the palm based on the direction of the fingers. The hand should now have a natural flow instead of looking stiff.
This helps balance the drawing. Finally, refine the entire shape. Smooth out the curves, adjust the wrist, and clean up your outline. Once you are satisfied, you can darken the final lines.
You’re done! Great job on completing all levels.
What most beginners get wrong how to fix it:
From my own experience and teaching beginners, these are the most common struggles:
- Trying to draw a perfect realistic hand in one go
- Skipping the basic shape
- Pressing too hard while sketching
Instead, follow this simple rule: Start simple → build slowly → repeat often
That’s exactly why these 3 levels exist.
How I recommend you practice
If you want to actually improve (not just copy once), try this:
- Draw Level 1 → 2–3 times
- Move to Level 2 → repeat again
- Then try Level 3
- Come back the next day and try to redraw without looking
You’ll notice a big difference!
If you’d like to strengthen your fundamentals, you can also check out my tutorial on drawing basics here.