Hi everyone, welcome to Simple Easy Drawing! Today, we’re going to learn how to draw wood texture. If you’re looking for a wood grain drawing easy enough for beginners, this tutorial is perfect for you.
Wood textures are something we see almost every day—on doors, furniture, trees, and even picture frames. What makes them special is their swirly, natural pattern that tells a little story of how the tree grew. Learning how to draw it can be a lot of fun and helps you get better at drawing patterns and textures. Plus, once you learn it, you can add it to so many other drawings—like wooden signs, treehouses, floors, or cabins.
Here’s an easy step-by-step tutorial that will help you create a simple and easy wood texture drawing.

Materials you will need:
- A piece of paper
- An HB pencil
- A dust-free eraser
- A black sketch pen for outlines
- Crayons or color pencils for coloring
Let’s get started!
Note: In each step, the new parts of the drawing will be highlighted in orange, while everything you’ve already drawn will stay in black.
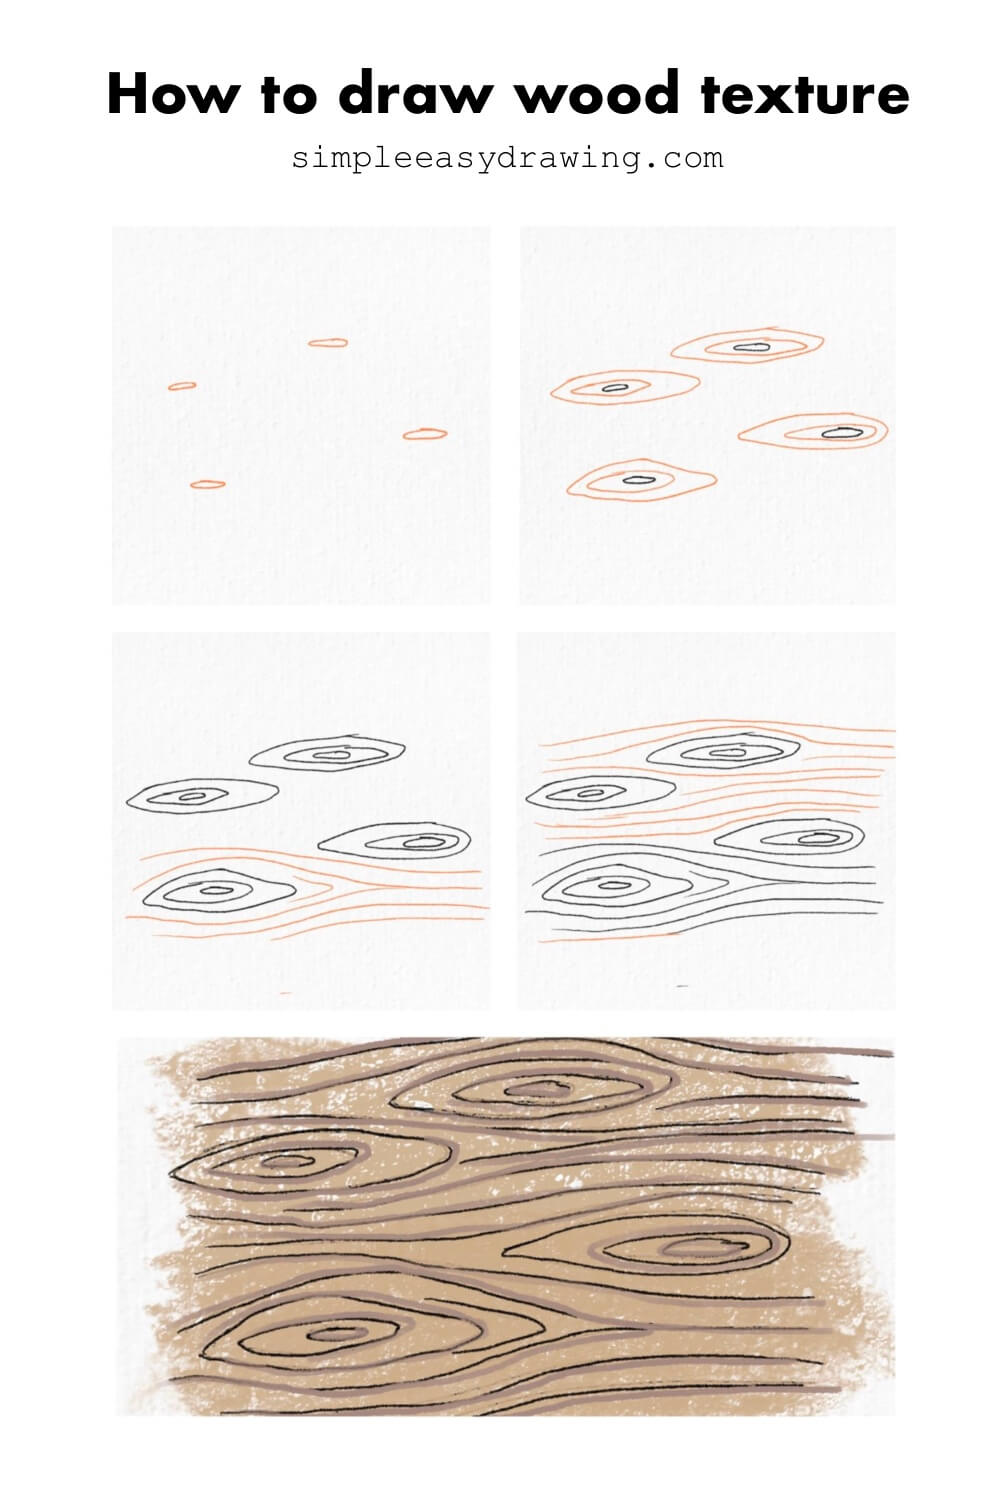
Step 1: Start with small ovals

Start by drawing four or five small oval shapes spaced across your page. These are going to be the knots in the wood—little spots where the wood grain circles around. Try not to place them too close to each other or in a perfect line. Wood is random, and so is its texture!
Step 2: Add more rings around the ovals
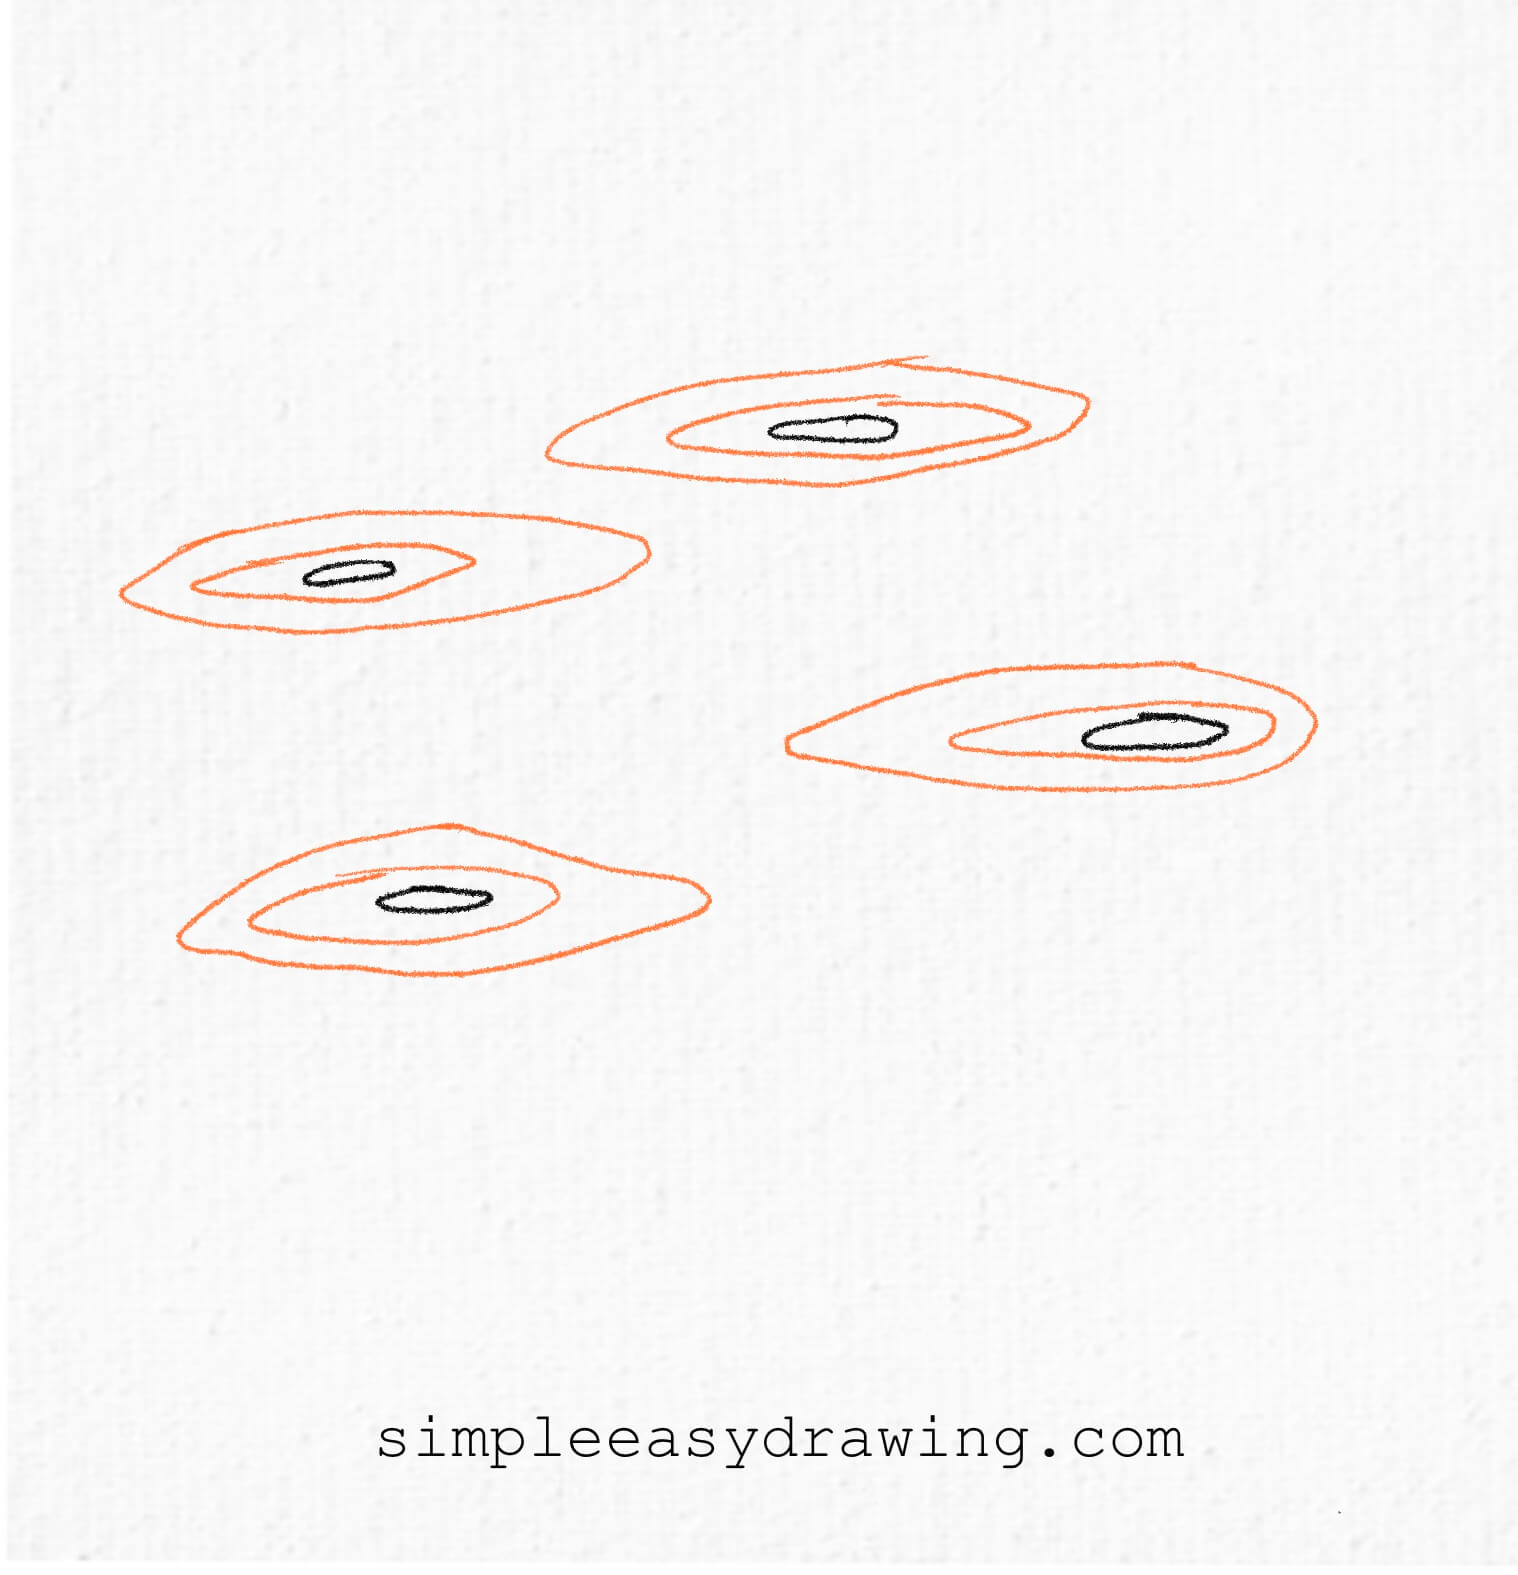
Next, draw larger ovals around each small oval you just made. These rings don’t have to be perfect. In fact, the more wobbly they are, the more they look like real wood! These rings show the pattern that forms around the knots in a piece of wood.
Step 3: Build up the rings
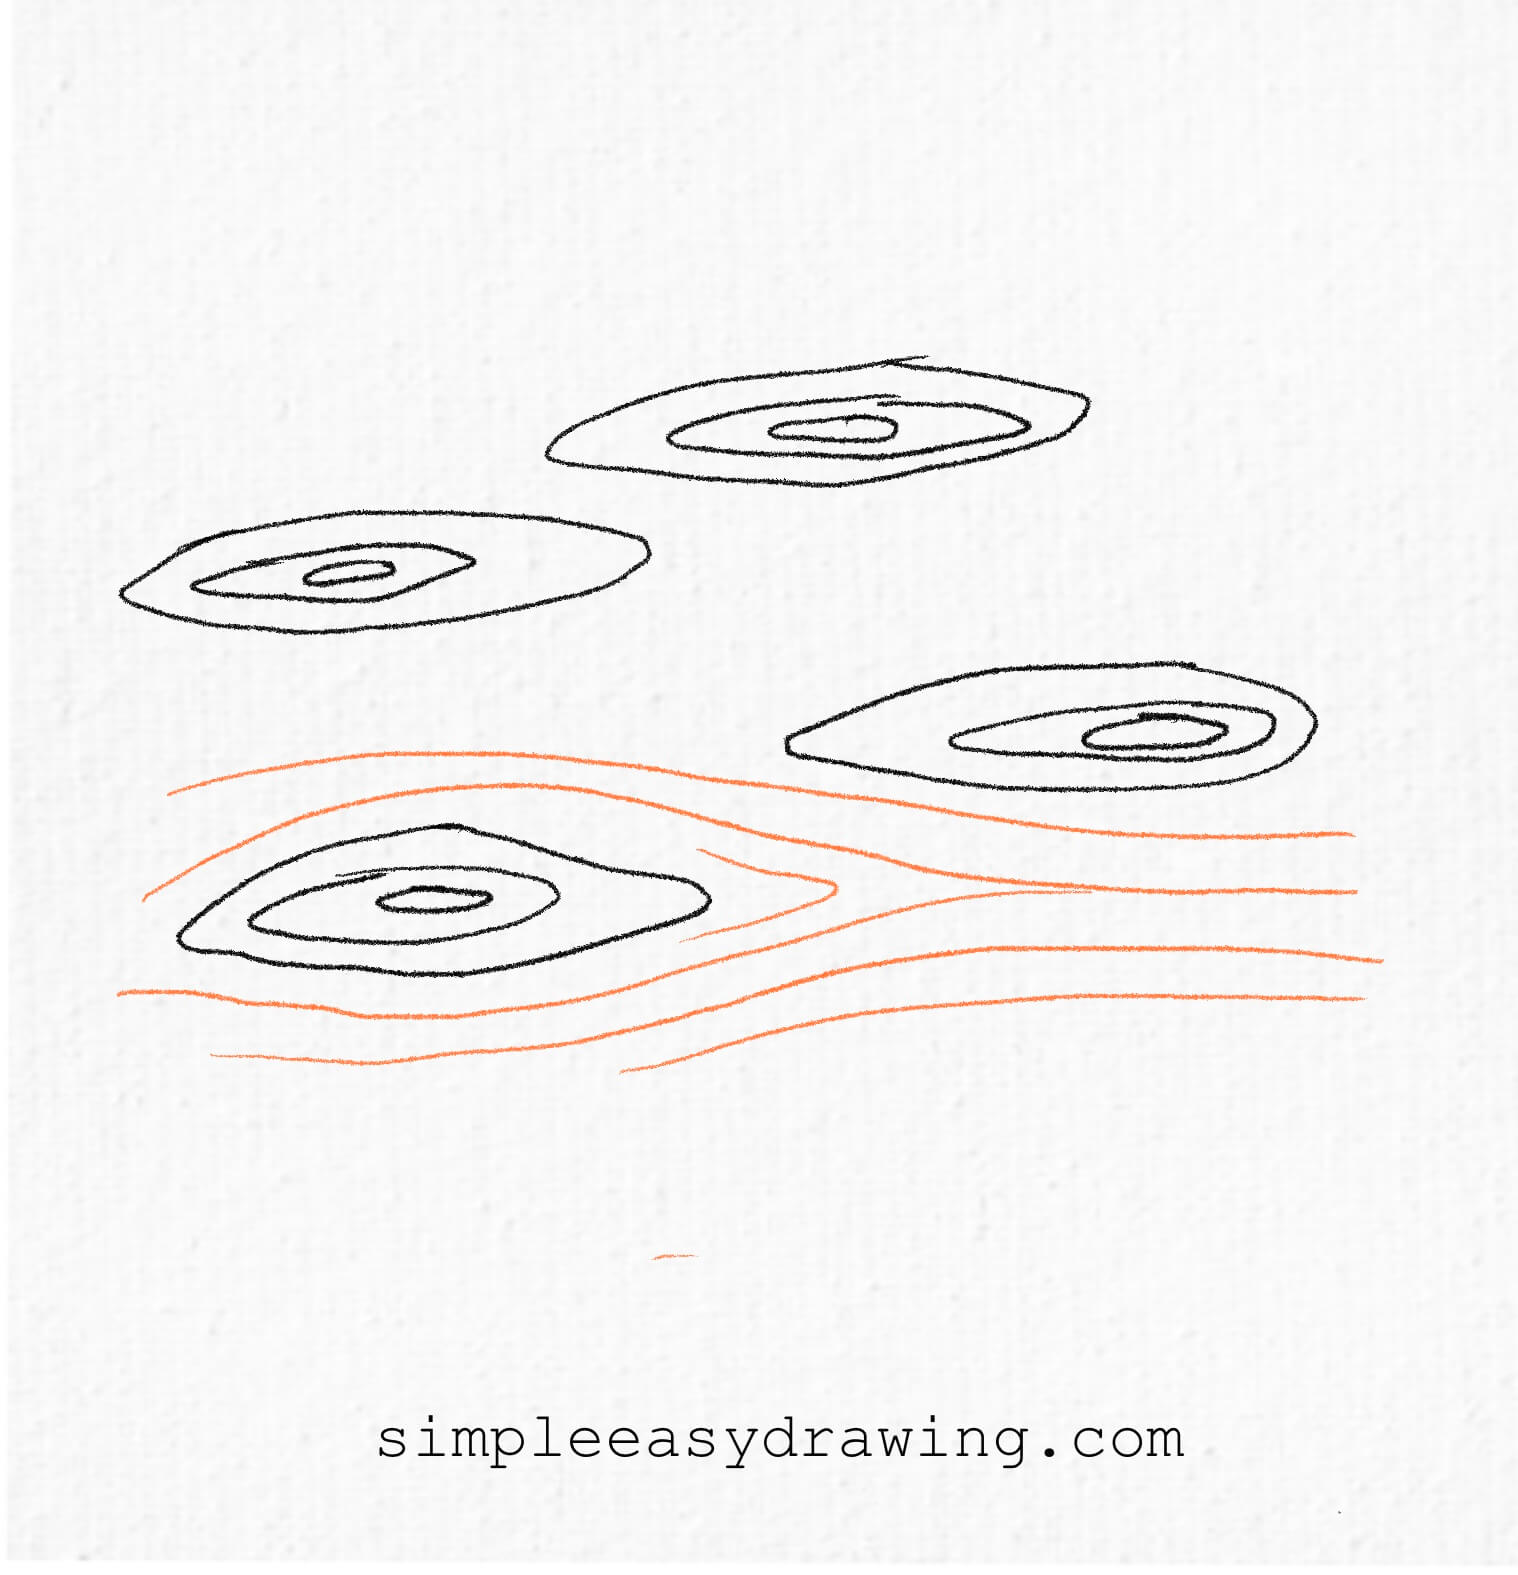
Keep going! Add more layers of wavy rings around each knot. Each ring should follow the shape of the one inside it, but they don’t have to be smooth. Let your pencil flow naturally—this is what gives your drawing the “wood look.” Stop when each knot has 3 to 5 layers.
Step 4: Add flowing grain lines
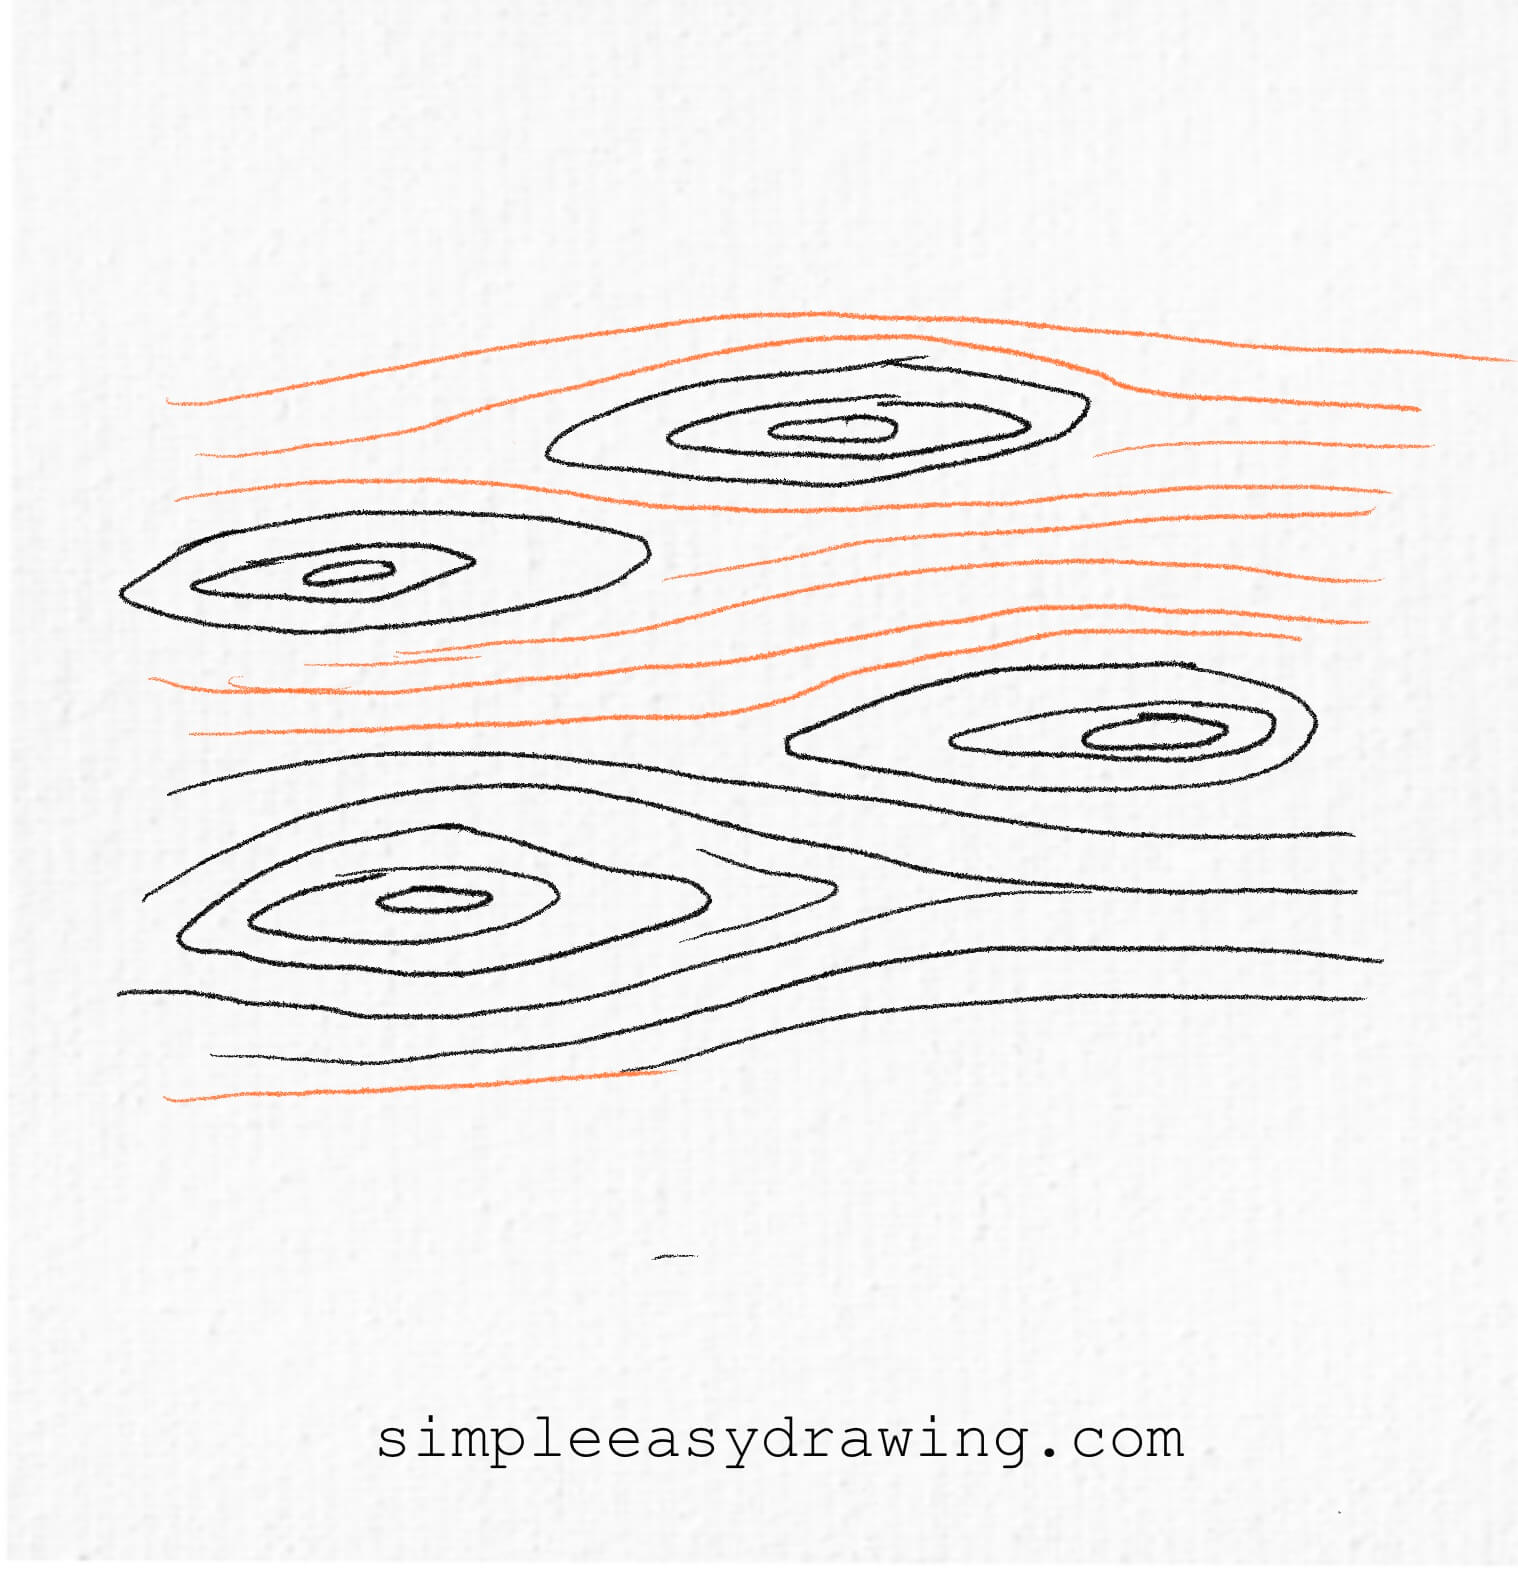
Now it’s time to draw the lines that move through the wood. Starting at one edge of the paper, draw long, curvy lines that weave through and around the knot patterns. These lines should be smooth and wavy, like gentle rivers flowing past rocks. Let them wrap around the ovals you’ve already drawn, and keep them fairly close together.
Step 6: Color and outline the drawing
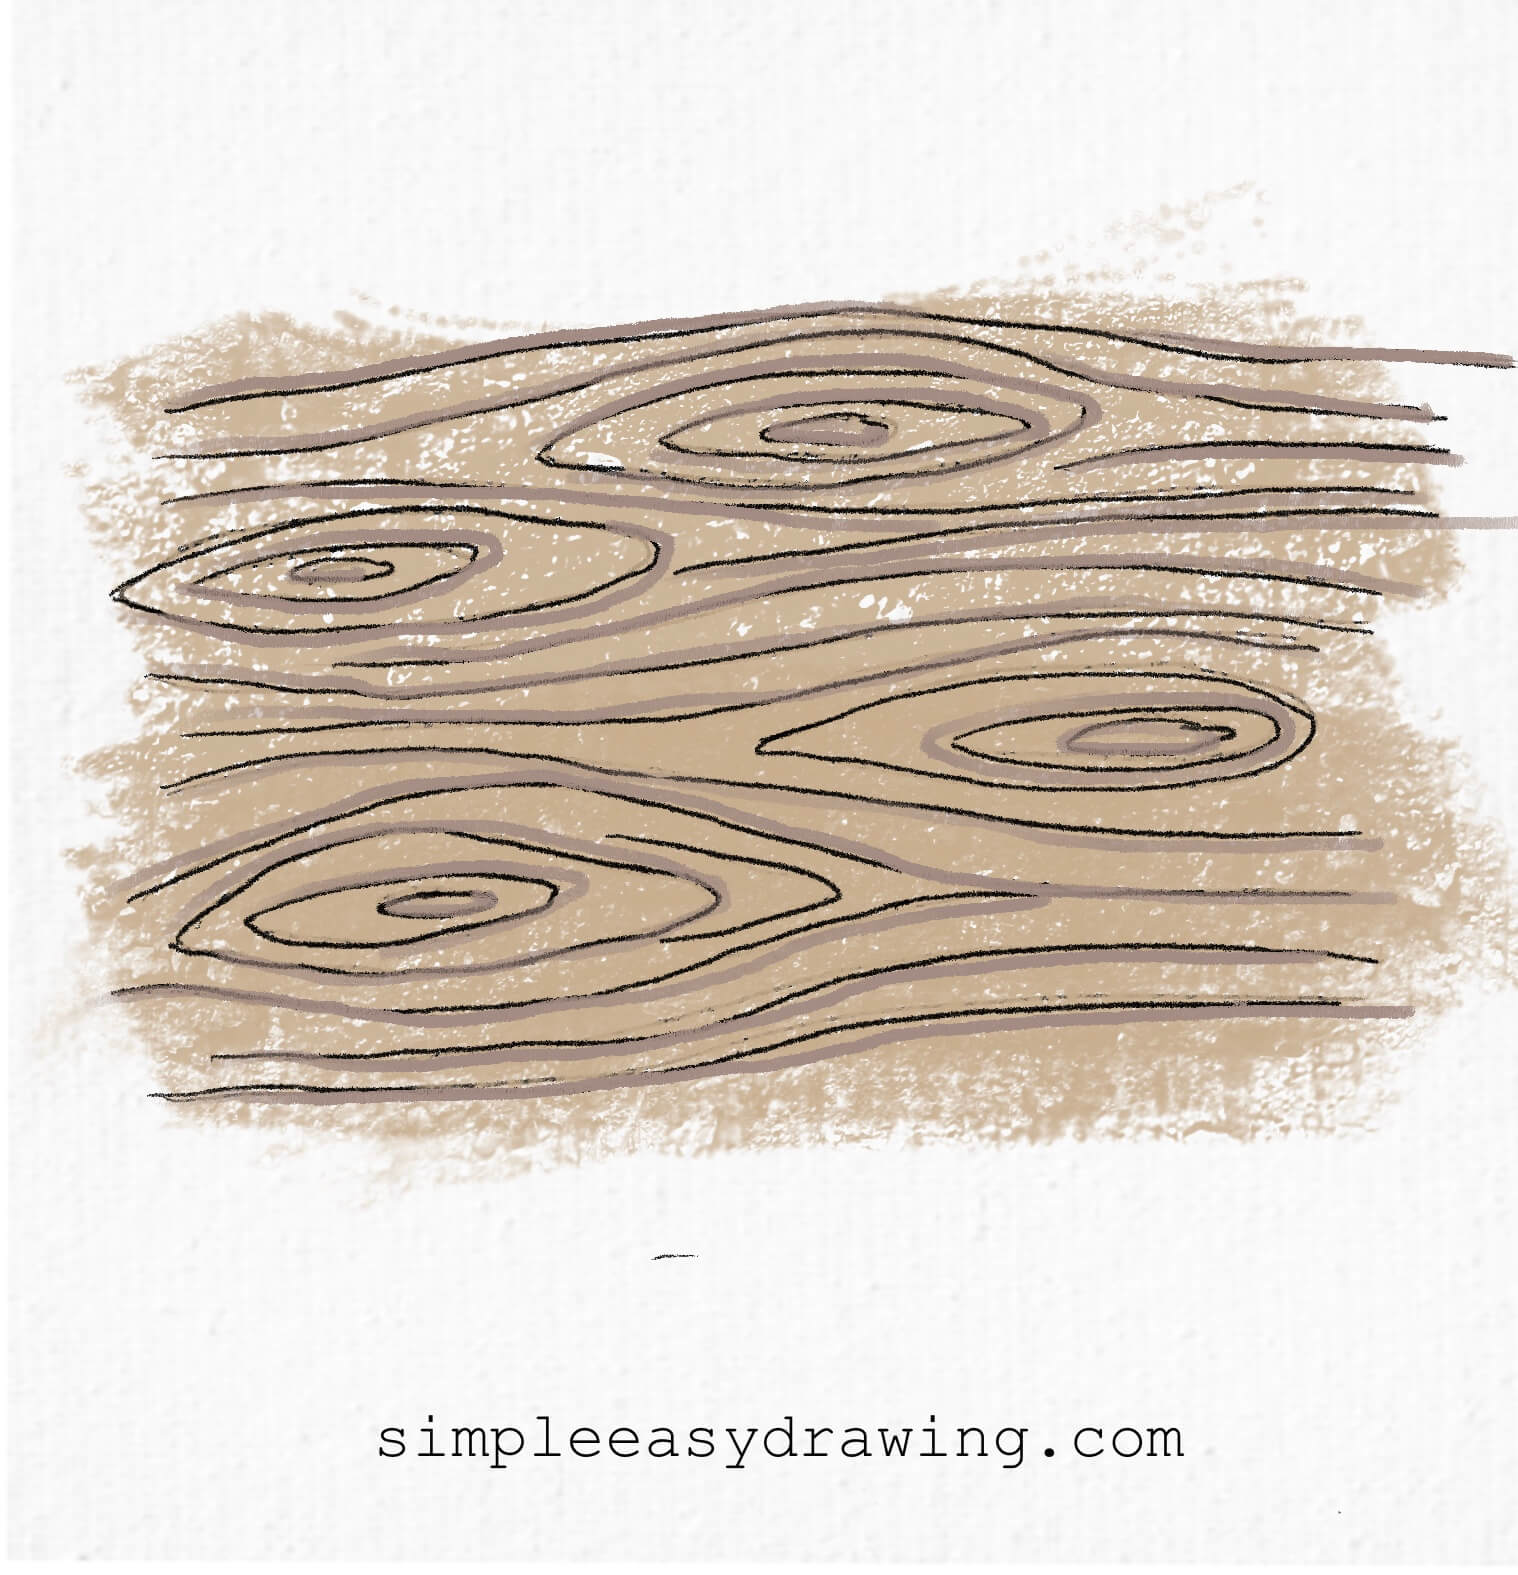
Now it’s time to color your wood! Use different shades of brown to bring it to life. A light brown can be used for the base, and a darker brown can go around the knots or along some of the grain lines for extra texture. A hint of gradiation in between the lines would make the sketch more realistic. Use gentle, even strokes with your crayons or colored pencils so the color blends nicely. Once you’re happy with your sketch, use your black sketch pen to trace over the main lines.
We’re all done!
And that’s it—you’ve just learnt how to draw wood texture. If you liked this tutorial, don’t forget to share it with your friends.
I’ve attached a full step-by-step picture so you can save it and draw later at your own pace. Keep practicing, and soon, you’ll be able to master how to draw the texture of wood. Happy drawing!
Want to keep drawing more? Explore more easy drawing tutorials here and learn how to sketch cool, fun things step by step.