Hi everyone, welcome to Simple Easy Drawing! Today, we’re going to learn how to draw a giraffe step by step. Are you ready?

This is one of those fun little drawings you can finish in under two minutes. I’ve taught this method to kids before, and it always gets smiles. It’s super easy and turns out really cute. If you’ve never drawn a giraffe before, you’ll be surprised how simple it is when you break it down into steps.
Giraffes are truly special animals. With their long necks, unique spots, and gentle faces, they’re fun to watch and even more fun to draw. Did you know giraffes only need about 30 minutes of sleep a day? That’s wild, right? Let’s try drawing one ourselves!
Here’s an easy step by step tutorial that will help you create a simple and easy giraffe drawing.
Materials you will need:
- A piece of paper
- An HB pencil
- A dust-free eraser
- A black sketch pen for outlines
- Crayons or color pencils for coloring
Let’s get started with our easy giraffe drawing!
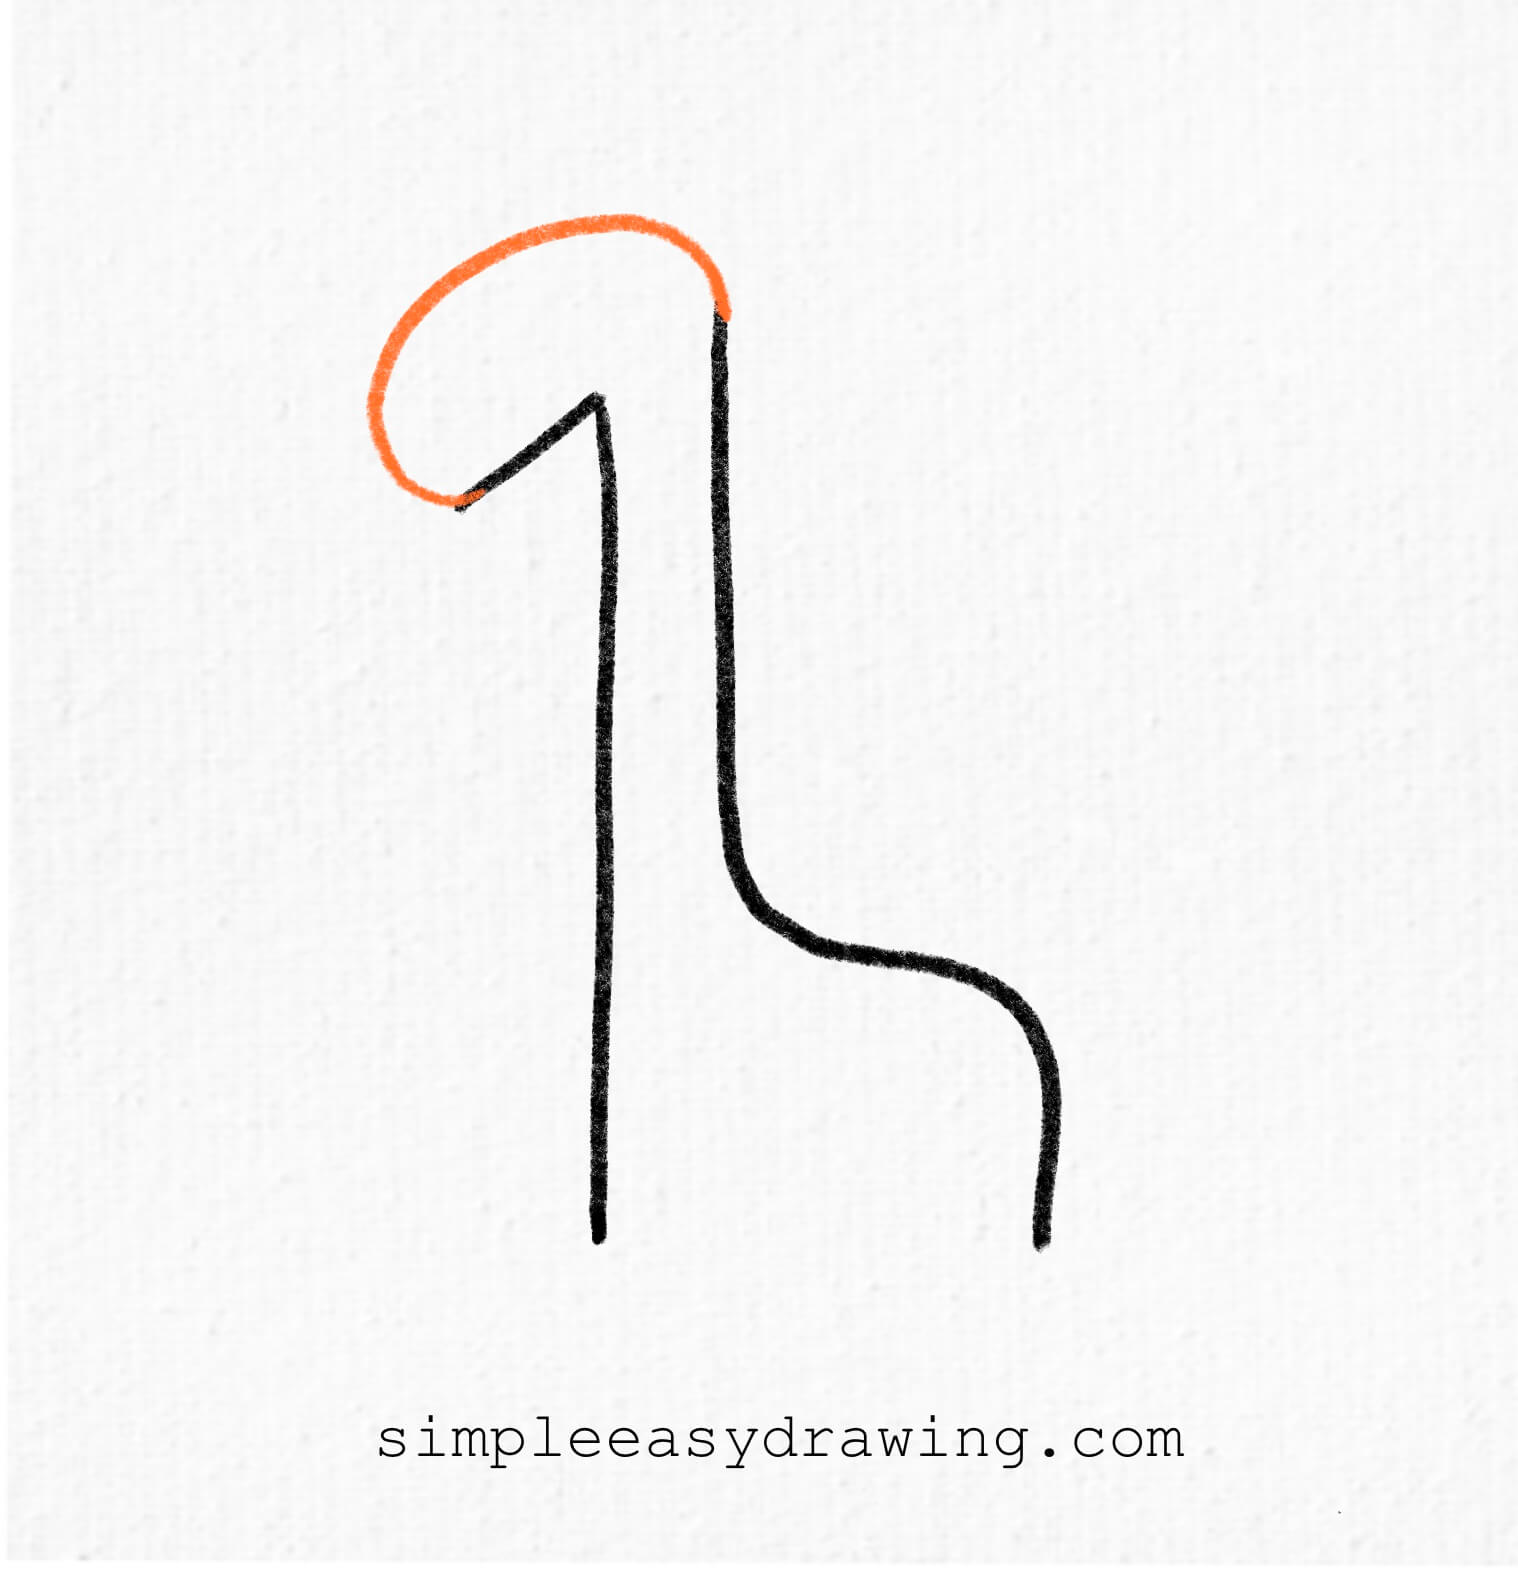
Please note: In each step, the new parts of the drawing will be highlighted in orange, while everything you’ve already drawn will stay in black.
/
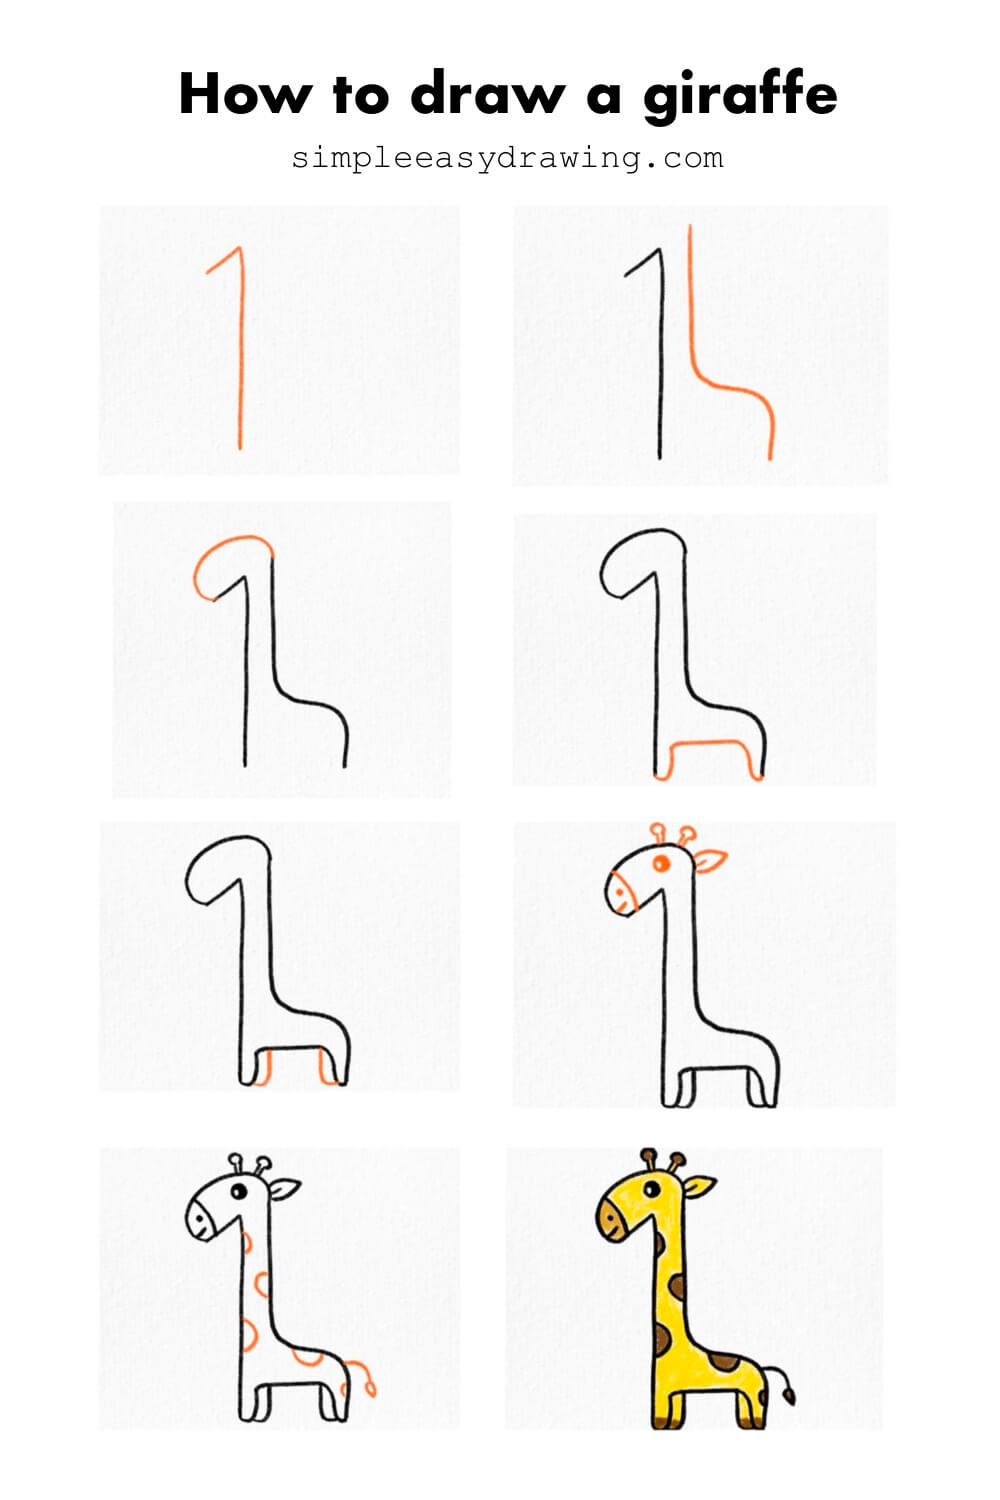
Step 1: Draw a number 1

Begin by drawing a big number “1” right in the center of your paper. This line will become the giraffe’s neck. Keep it straight and tall—just like a giraffe!
Step 2: Add a parallel line and curve it

Next, draw a line starting at the top left of your “1”—make it slant in the same way so it’s parallel. Then take that line down, and gently curve it outward to the right to form the back and beginning of the leg.
Step 3: Draw the head curve
Now go back to the top of your “1”. From the tip, draw a big rounded bump over to the left, then curve it down to meet the top of the line you drew in the last step. This forms the top and bottom of the head.
Step 4: Complete the legs and tummy
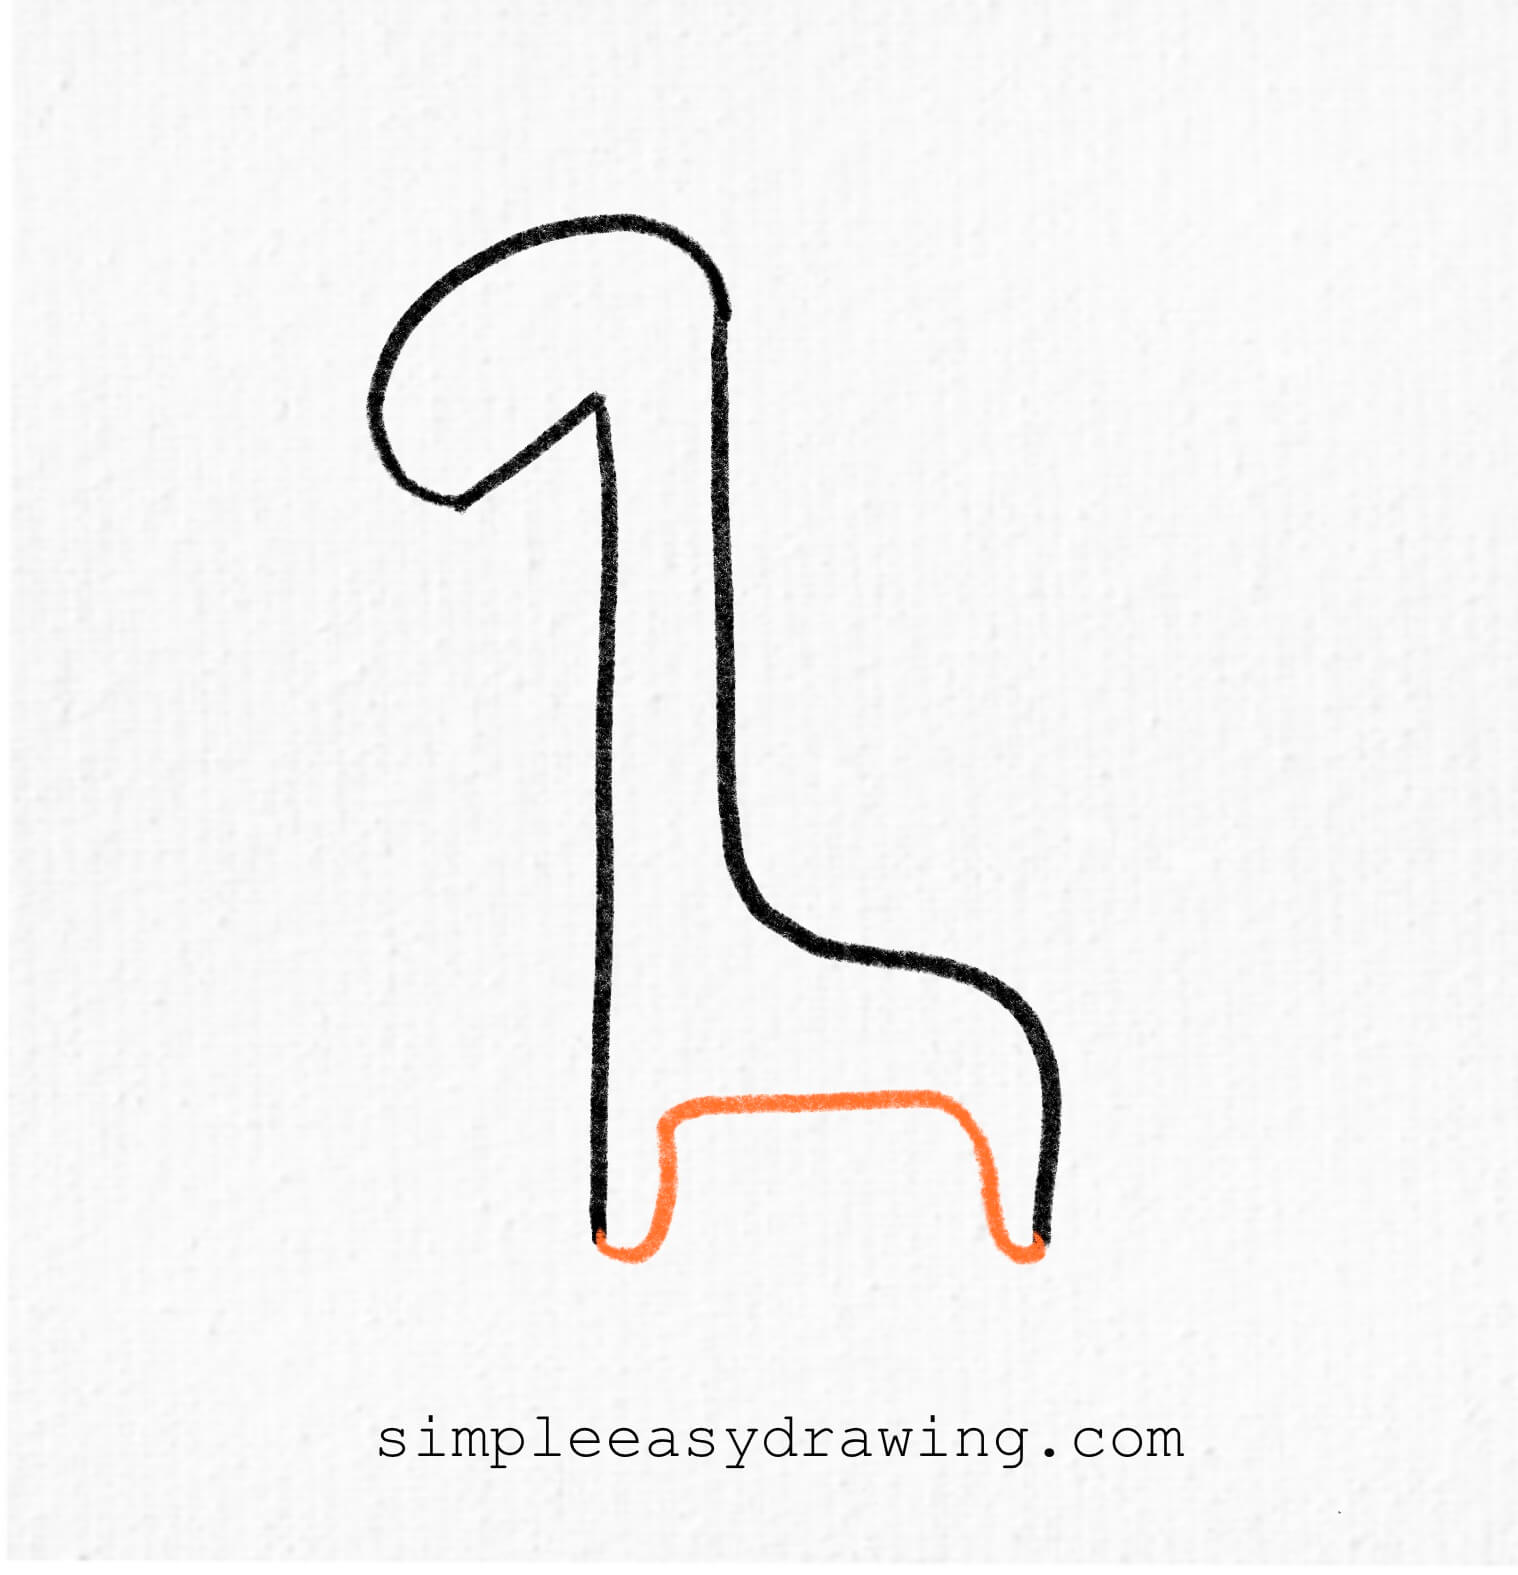
From the end of the curve you just made, draw a line down and back toward the left to complete the front leg. Then connect the front and back legs with a smooth line for the belly.
Step 5: Add the other set of legs

Draw two short lines inside the legs to separate them. Then, curve the bottoms of the legs to make them look like feet. Now your giraffe is standing!
Step 6: Add ears, eyes, and horns

Draw a triangle ear sticking out to the right side of the head. Add two small horns (ossicones) on top using short lines with circles on the ends. Then, add a small circle for the eye and a little half-circle for the nose spot.
Step 7: Draw the spots and the tail
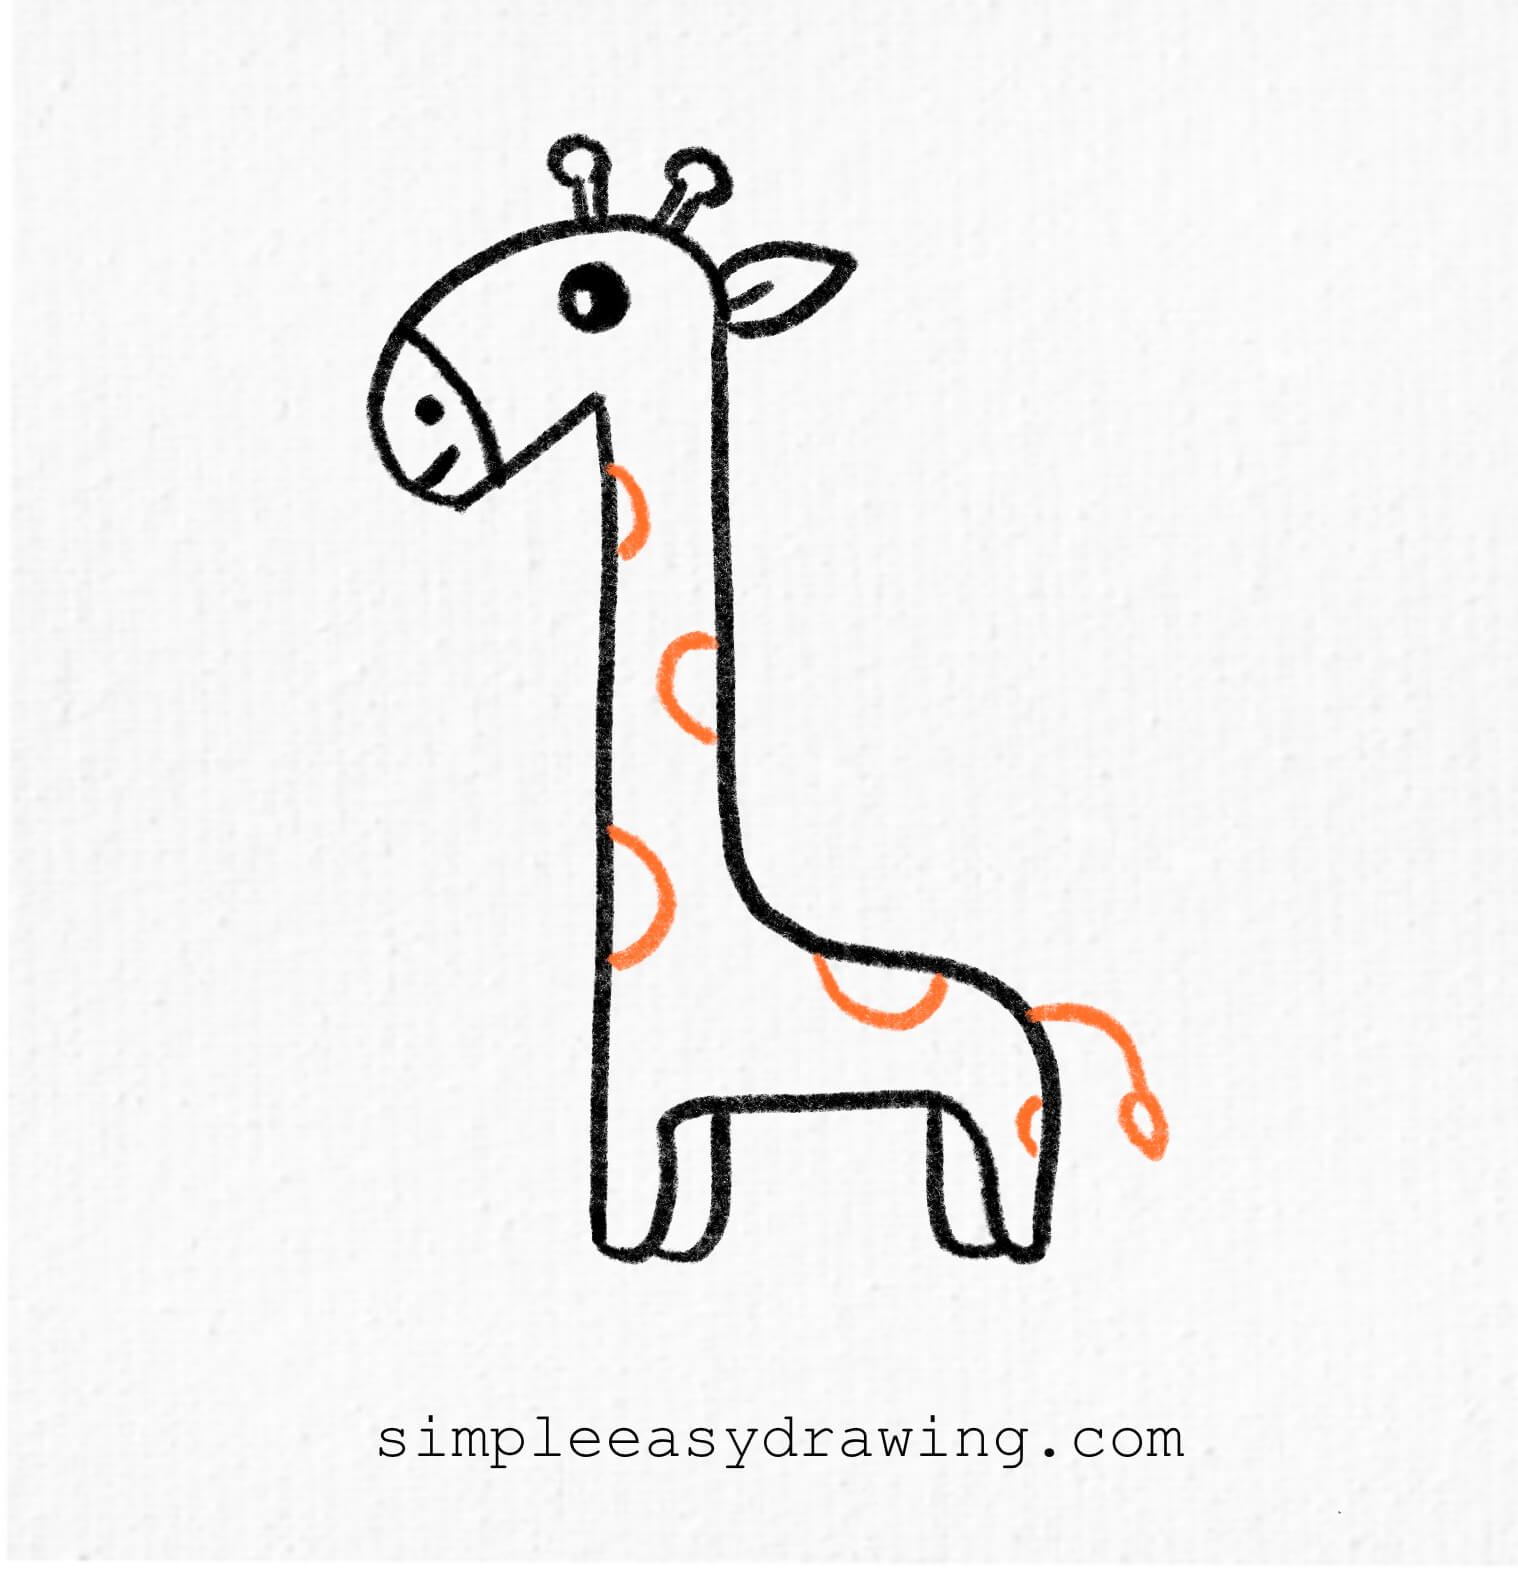
Give your giraffe its famous look by adding circles and ovals all over its neck and body. Then, draw a curly little tail poking out from behind.
Step 8: Time to color!

Use yellow for the body and brown for the spots, tail, horns, and hooves. Color in the nose spot too. Feel free to use any colors you like—giraffes look great no matter what!
We’re all done
And that’s it—you’ve just learnt how to draw cute giraffes. If you liked this tutorial, don’t forget to share it with your friends.
I’ve attached a full step by step picture so you can save it and draw later at your own pace. I’ve also added a free printable giraffe coloring page. It’s a clean outline version of the drawing that you can print and use to color in.

Keep practicing, and soon, you’ll be able to draw giraffes without needing any guide at all. If you enjoyed this drawing tutorial, you can also try my elephant drawing lesson next or explore more easy drawing tutorials here.