Hi everyone, welcome to Simple Easy Drawing! Today, we’re going to learn how to draw a hamster. It’s time-tested, super fun, and so quick that you can finish your drawing in under a minute! Whether you’re picking up a pencil for the first time or just want something relaxing to try, this is a great way to begin.
Hamsters are small, fluffy animals with chubby cheeks and twitchy whiskers. They’re fun to watch and even more fun to draw. If you’ve ever wanted to draw a cute hamster but didn’t know where to start, you’re in the right place. This guide will show you how to draw hamster step by step.

Materials you will need:
- A piece of paper
- An HB pencil
- A dust-free eraser
- A black sketch pen for outlines
- Crayons or color pencils for coloring
Ready to begin? Here’s an easy to draw hamster!
Please note: In each step, the new parts of the drawing will be highlighted in orange, while everything you’ve already drawn will stay in black.
Step 1: Start with the sides of the head

Begin by drawing two short curved lines, one on the left and one on the right. These lines form the chubby sides of your hamster’s fluffy face. Think of these as the top part of a big puffy cheek.
Step 2: Connect the top

Now, join the tops of the two lines using one smooth curve. This round line forms the top of the hamster’s head. Already looking fluffy!
Step 3: Draw the body

From under the cheeks, draw a big oval going down to create the body. Hamsters have round, cuddly bodies—so don’t worry about being too perfect! The bottom should be wider and connect nicely to the head.
Step 4: Add the ears

Add two little ears on top of the head. Just draw two round shapes, like tiny loops—one on the left and one on the right. These give your hamster a sweet and playful look.
Step 5: Draw the arms and legs

Draw two small curved arms toward the middle of the body. They should curve inward slightly, like the hamster is holding its tiny paws close to its chest. Now draw two small feet at the bottom of the body. These can just peek out a little bit, like two small curves. That’s all you need to make your hamster look like it’s sitting up happily.
Step 6: Add the face

This is the fun part! Inside the face area, draw two small round eyes. Then make a little “u” shape for the nose and connect a line going down into a smile. Add some small dots and whisker lines on each cheek to give your hamster more personality.
We’re all done!

Step 7: Color your hamster (Additional!)
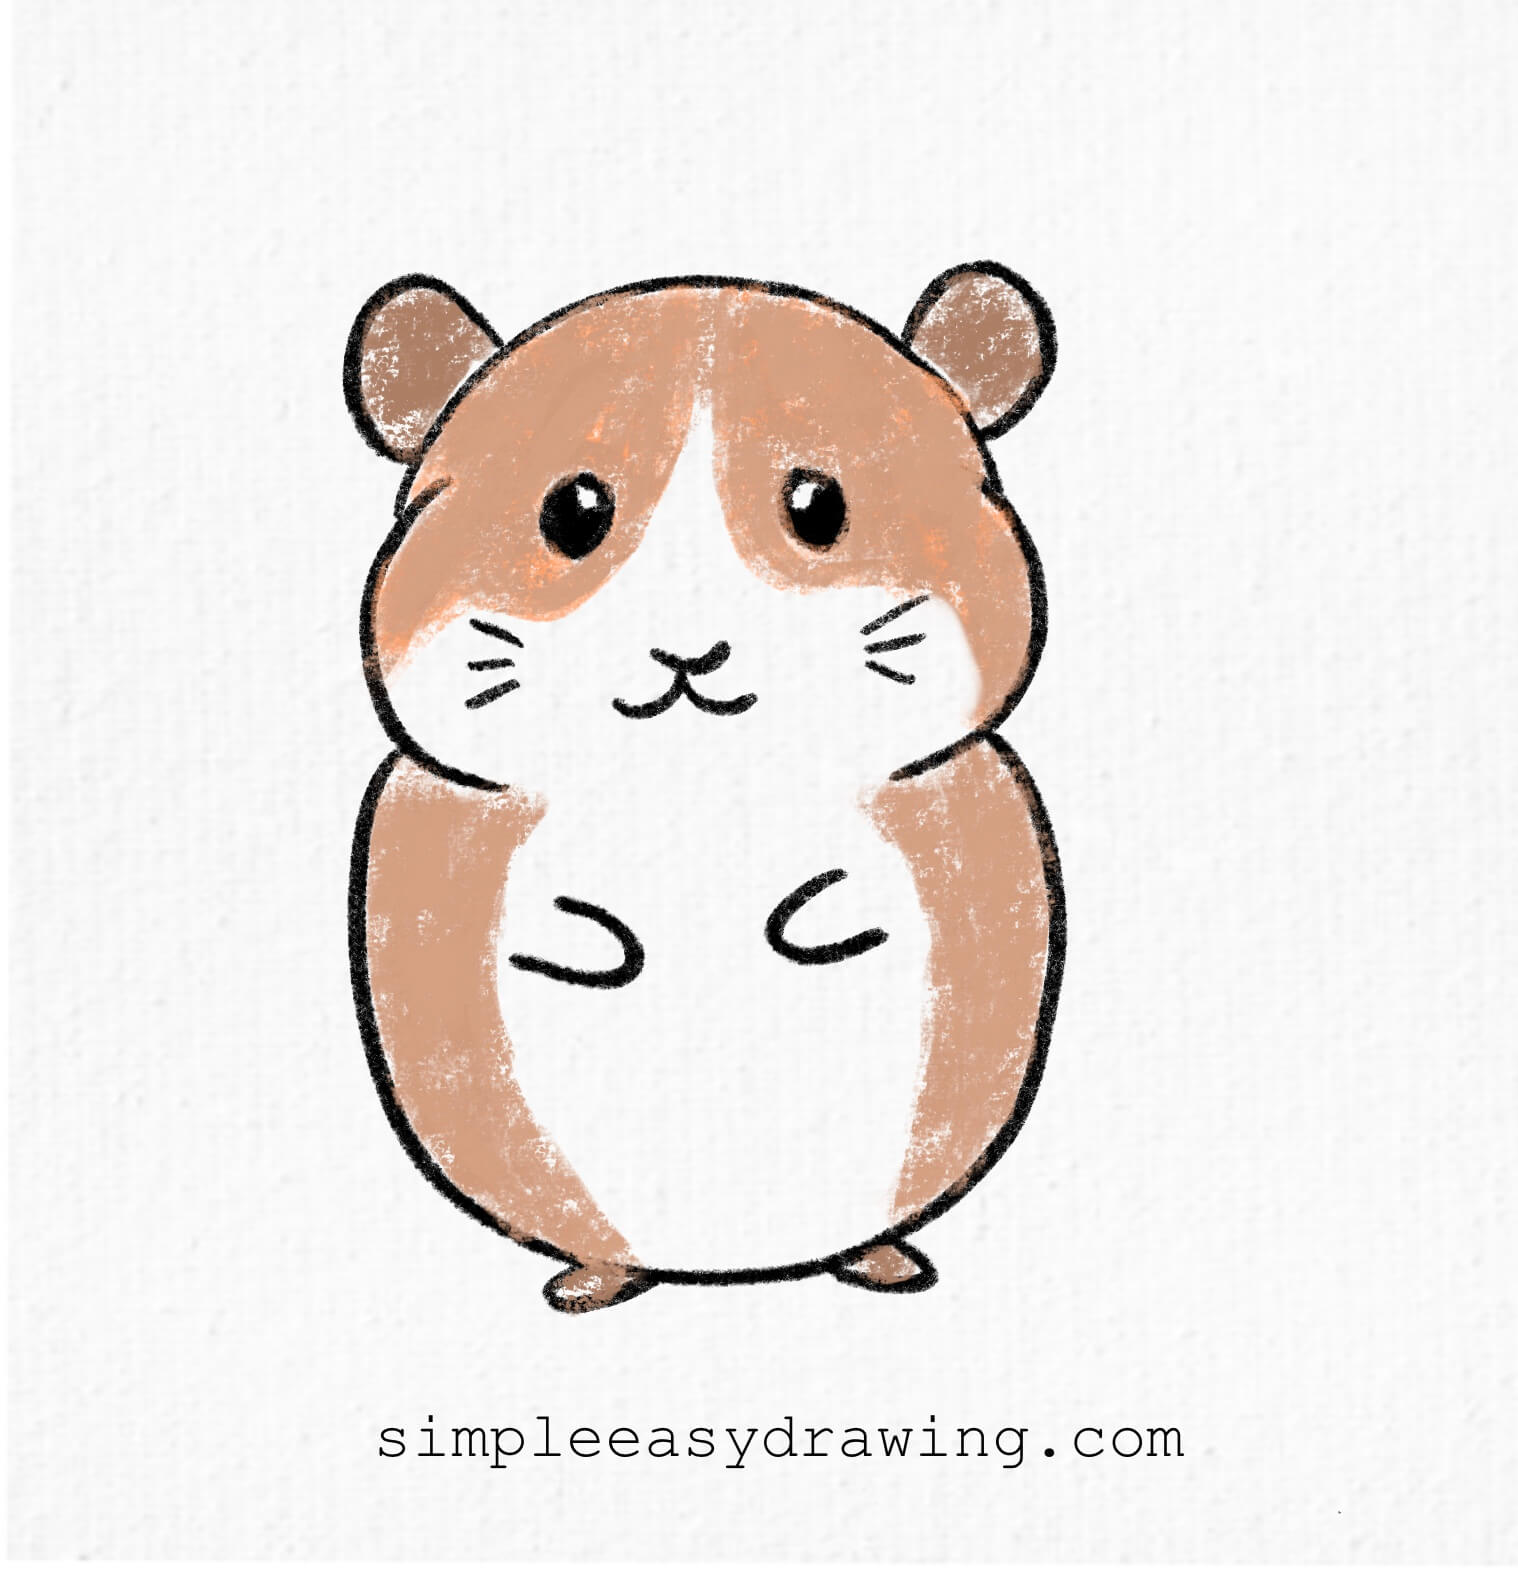
Use your crayons or colored pencils to color in your hamster. In our example, we used brown for the sides and ears, pink for the cheeks, and kept the middle part of the body white. But don’t be afraid to experiment—hamsters come in all kinds of colors, so have fun with it!
And that’s it—you’ve just learnt how to draw a hamster. If you liked this tutorial, don’t forget to share it with your friends and family.

I’ve attached a full step by step picture so you can save it and draw later at your own pace. I’ve also added a free printable hamster coloring page. It’s a clean outline version of the drawing that you can print and use to color in.

Keep practicing, and soon, you’ll be able to draw a cute hamster anytime you like. Happy drawing!
Want to keep drawing? Explore more step by step and beginner-friendly art lessons here on Simple Easy Drawing.