3, 2, 1… Lift off! Rockets are impressive because they are basically big, powerful engines. I will show you how to draw the long body and the fins so it looks ready for space. I’ve taught this exact method to so many kids, and it’s always a hit because it’s simple, fun, and works every single time.
Before we start, here’s something cool: rockets travel faster than the speed of sound, and they are the only vehicles humans have built that can leave Earth and reach outer space. Pretty amazing, right? Even though real rockets are HUGE and extremely powerful, drawing one is super simple when you break it into small steps.
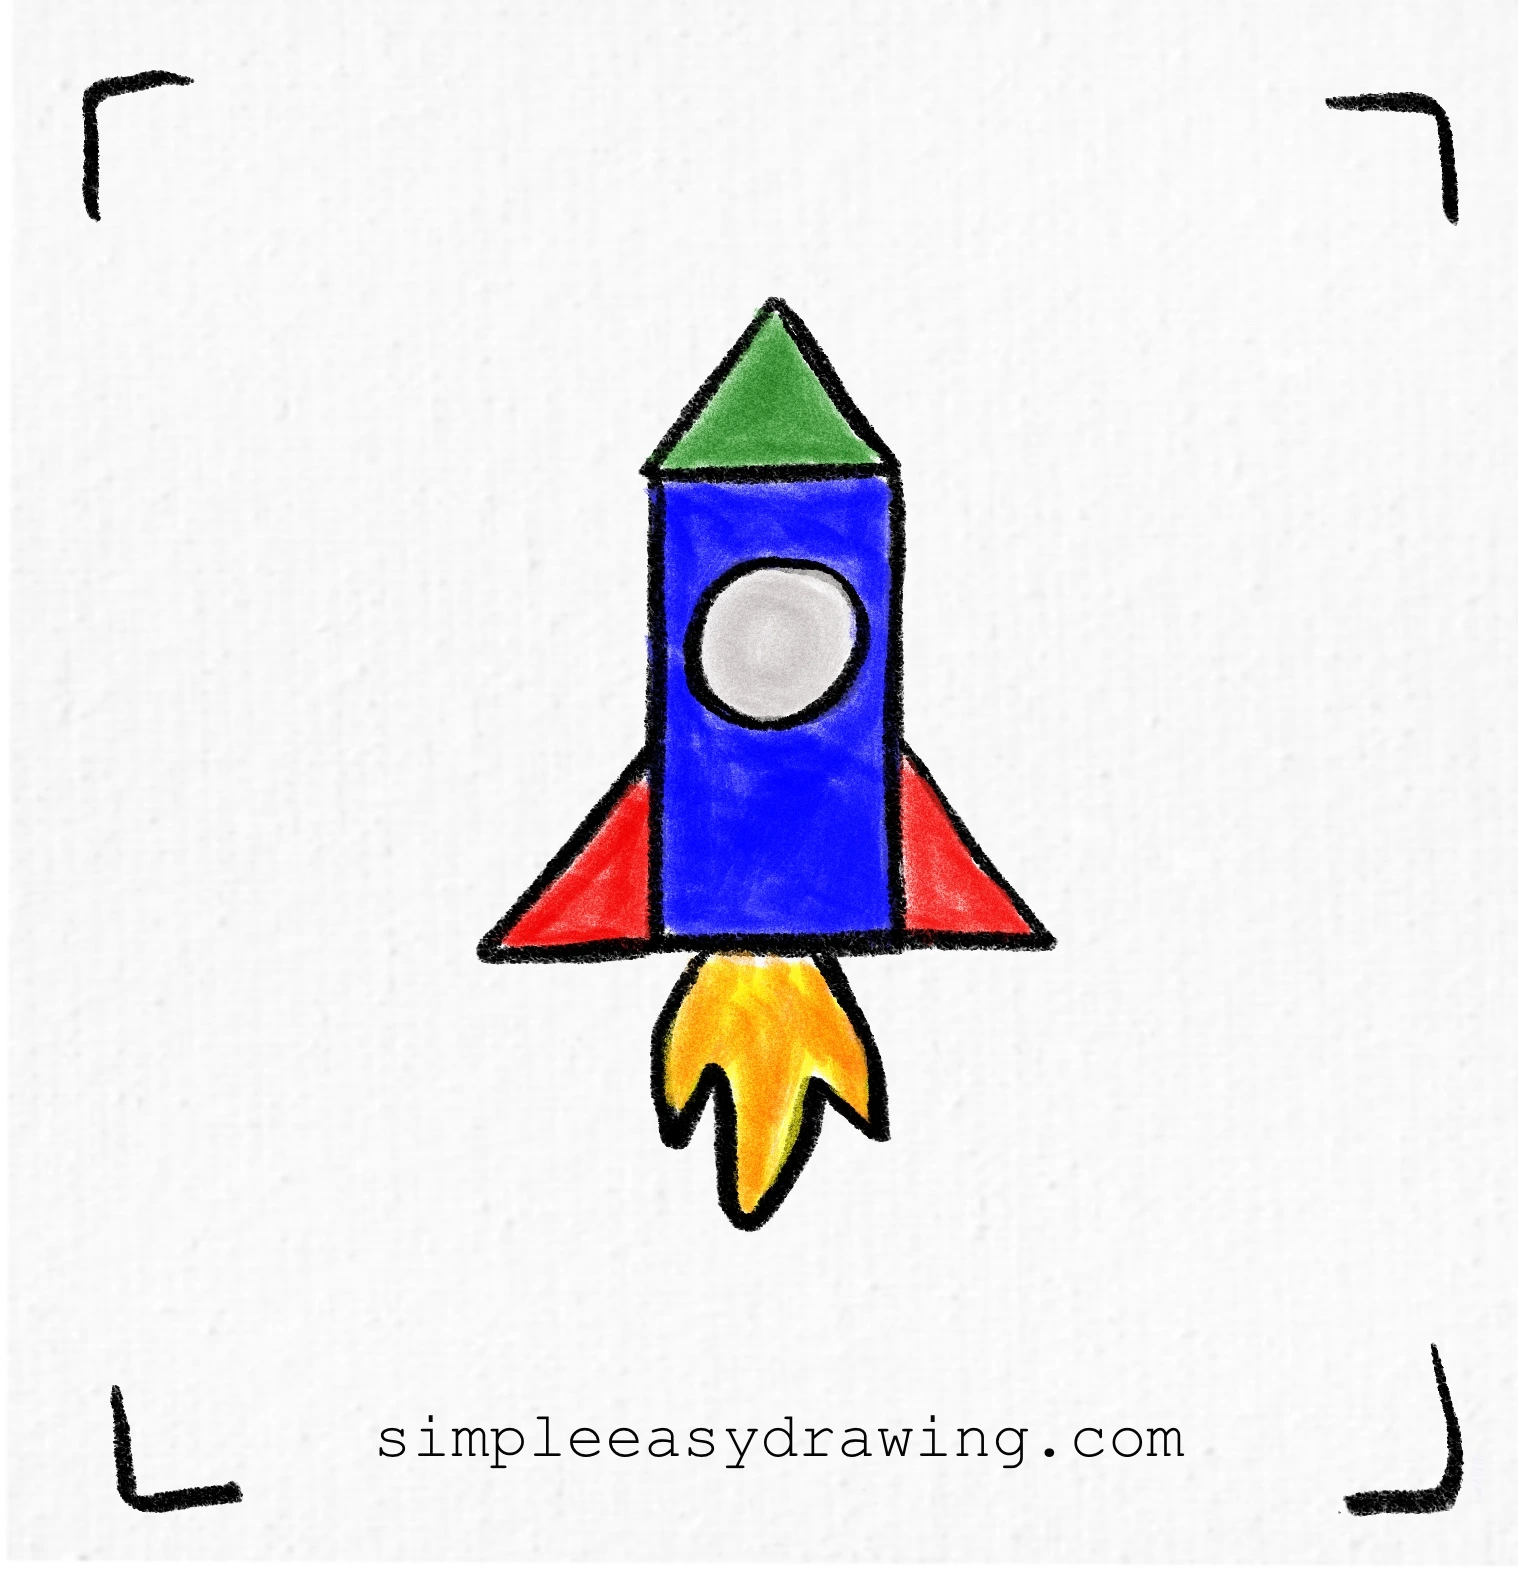
Here’s an easy step by step tutorial that will help you create a simple and easy rocket ship drawing.
Materials you will need:
- A piece of paper
- An HB pencil
- A dust-free eraser
- A black sketch pen for outlines
- Crayons or color pencils for coloring
Let’s get started!
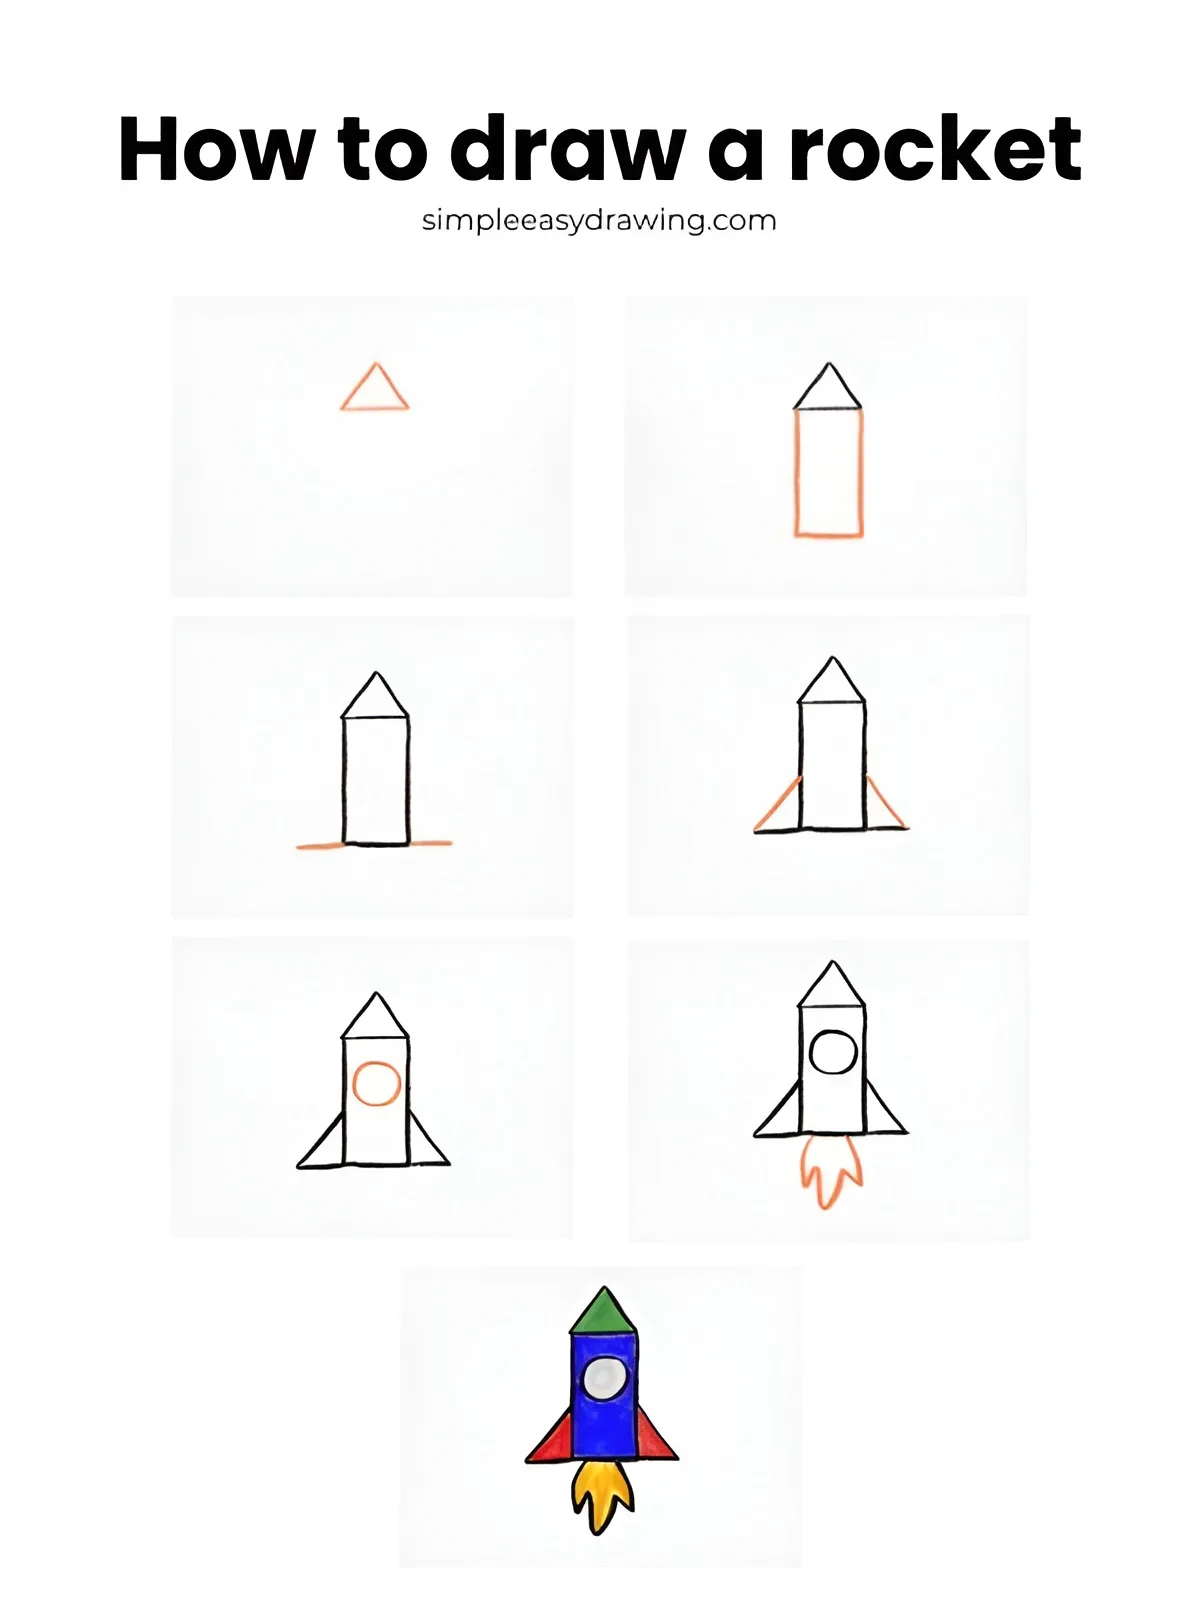
Please note: In each step, the new parts of the drawing will be highlighted in orange, while everything you’ve already drawn will stay in black.
Step 1: Draw the top cone
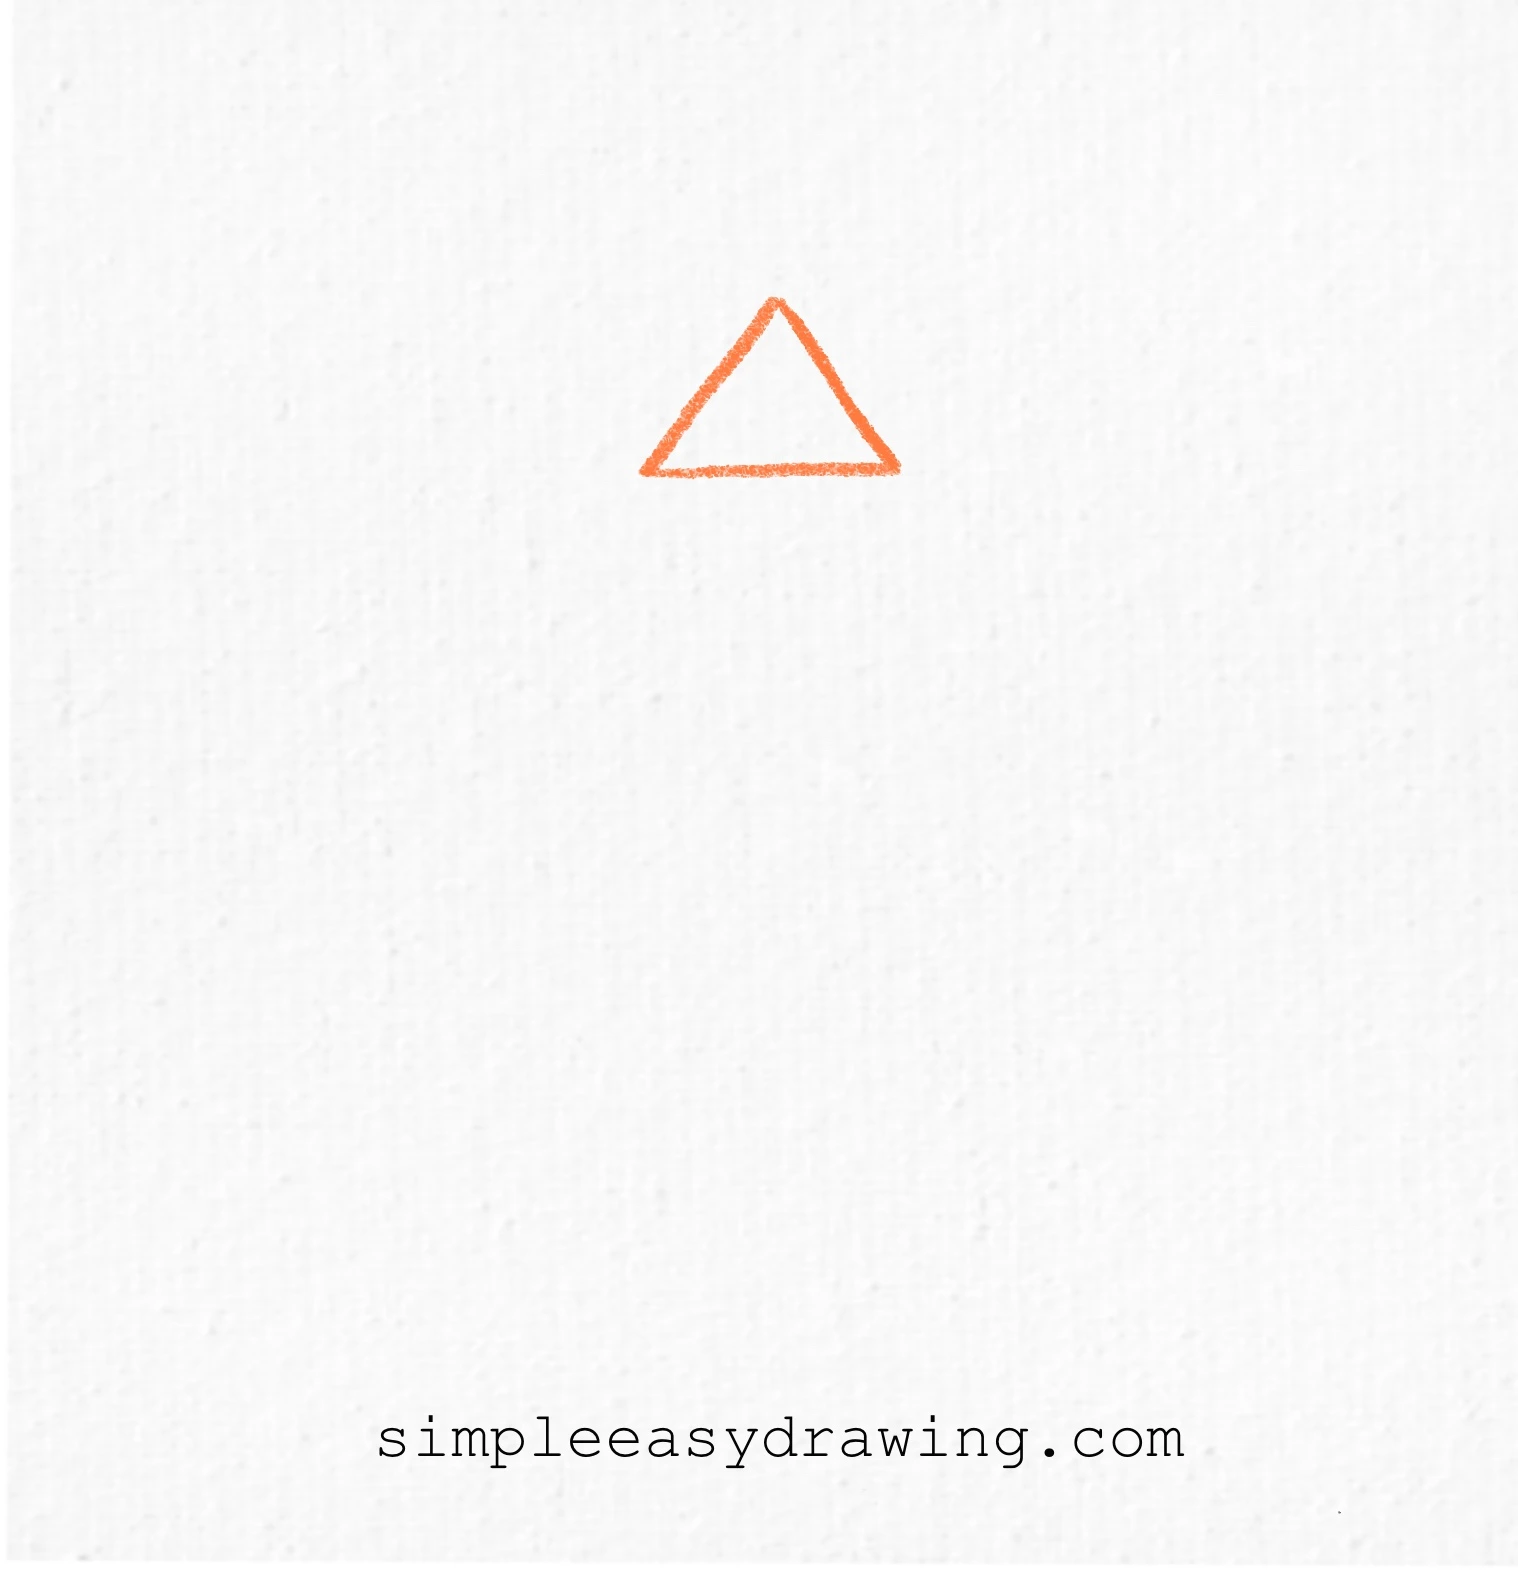
Start by drawing a small triangle near the upper part of your page. This triangle will be the very top of your rocket—its nose cone. Keep the lines straight and neat, and try to make both sides equal so it looks balanced.
Step 2: Add the rocket body
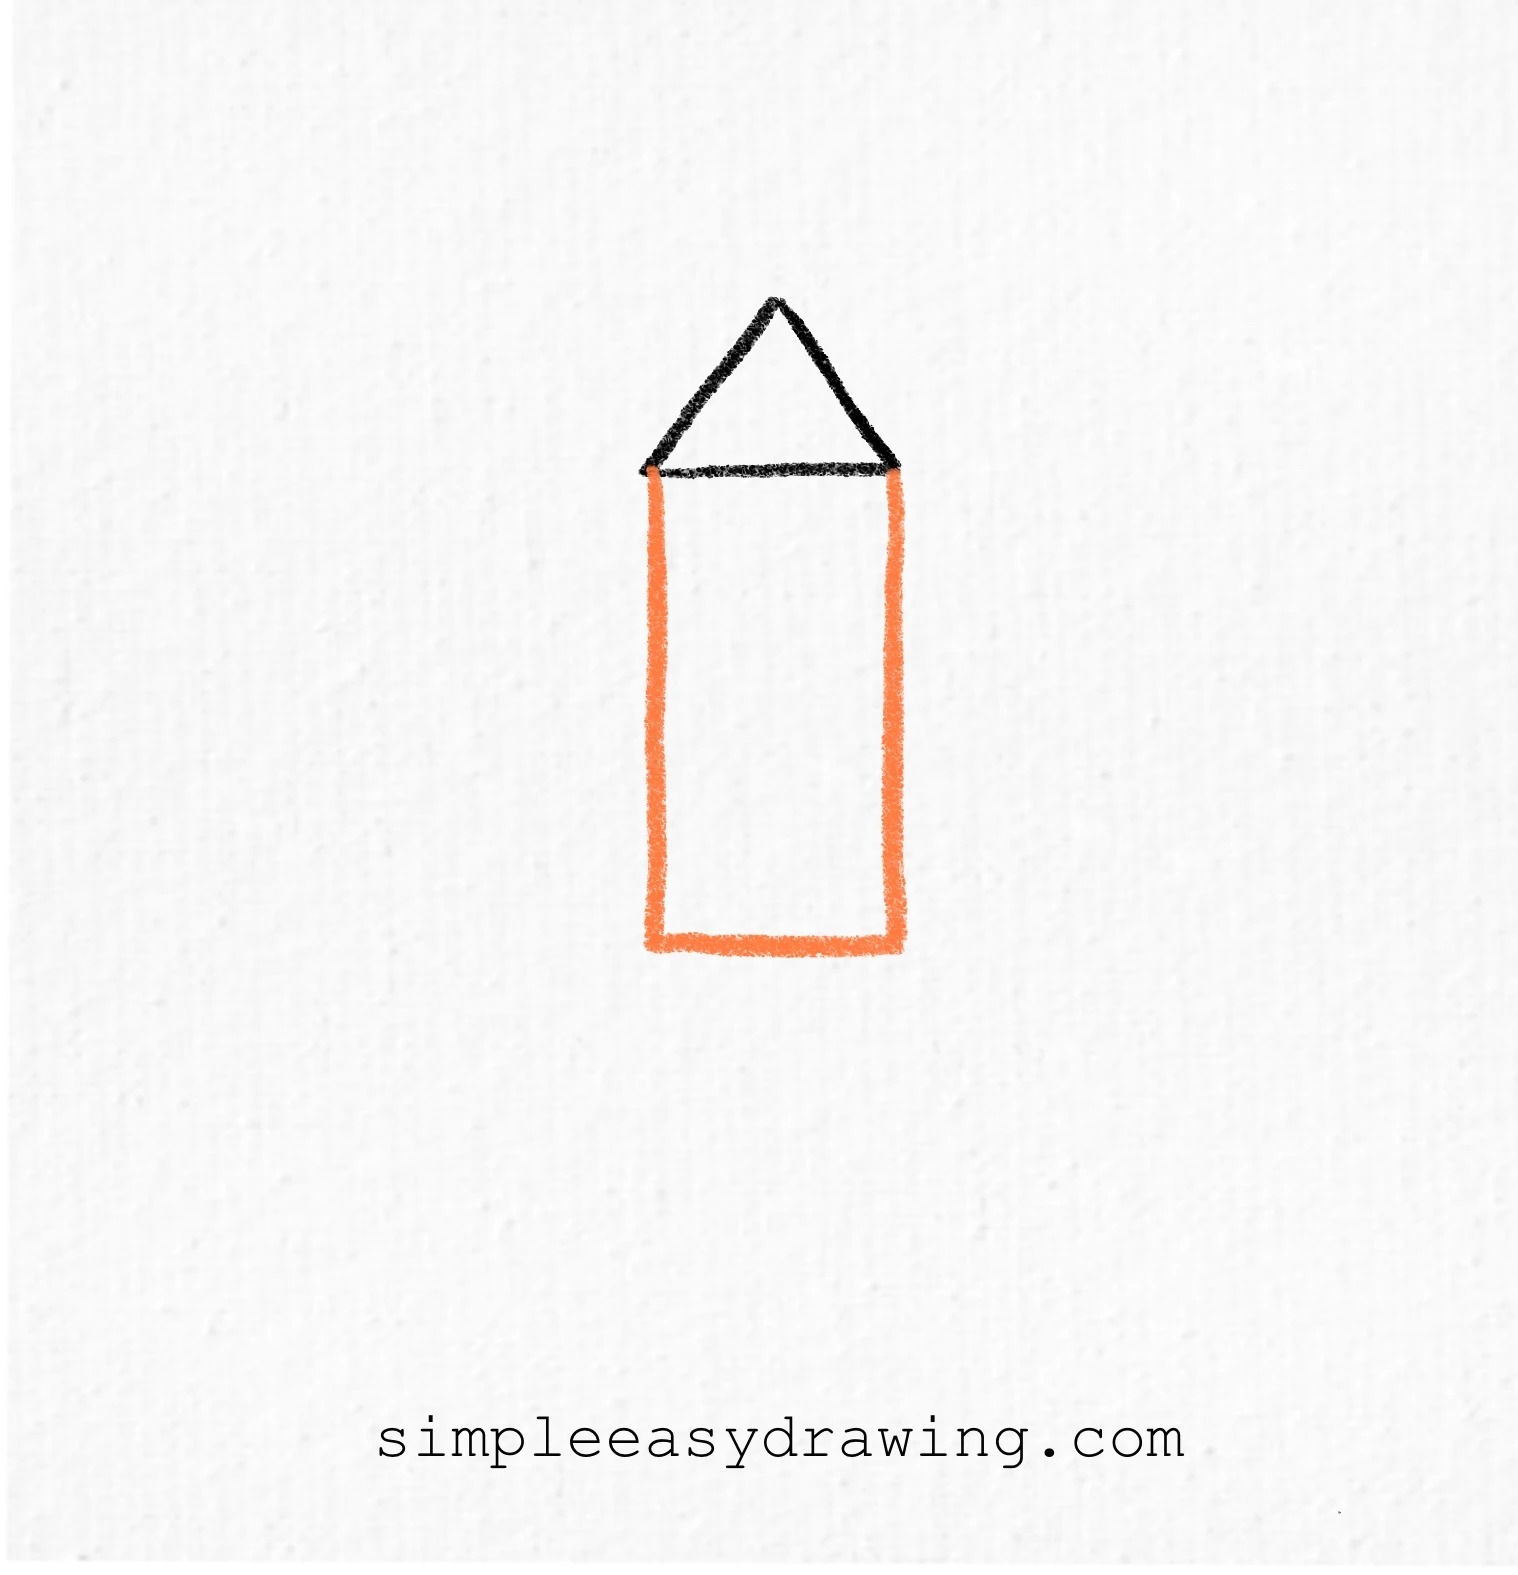
From the bottom two corners of the triangle, draw two long straight lines going downward. These should be parallel to each other. Then, connect these lines at the bottom with a straight horizontal line. You now have a tall rectangle attached to your triangle—this forms the main rocket body.
Step 3: Complete the base line
Extend the bottom line slightly wider on both sides. This small extension will help us place the rocket fins correctly in the next step. It also makes the rocket stand upright and look neat.
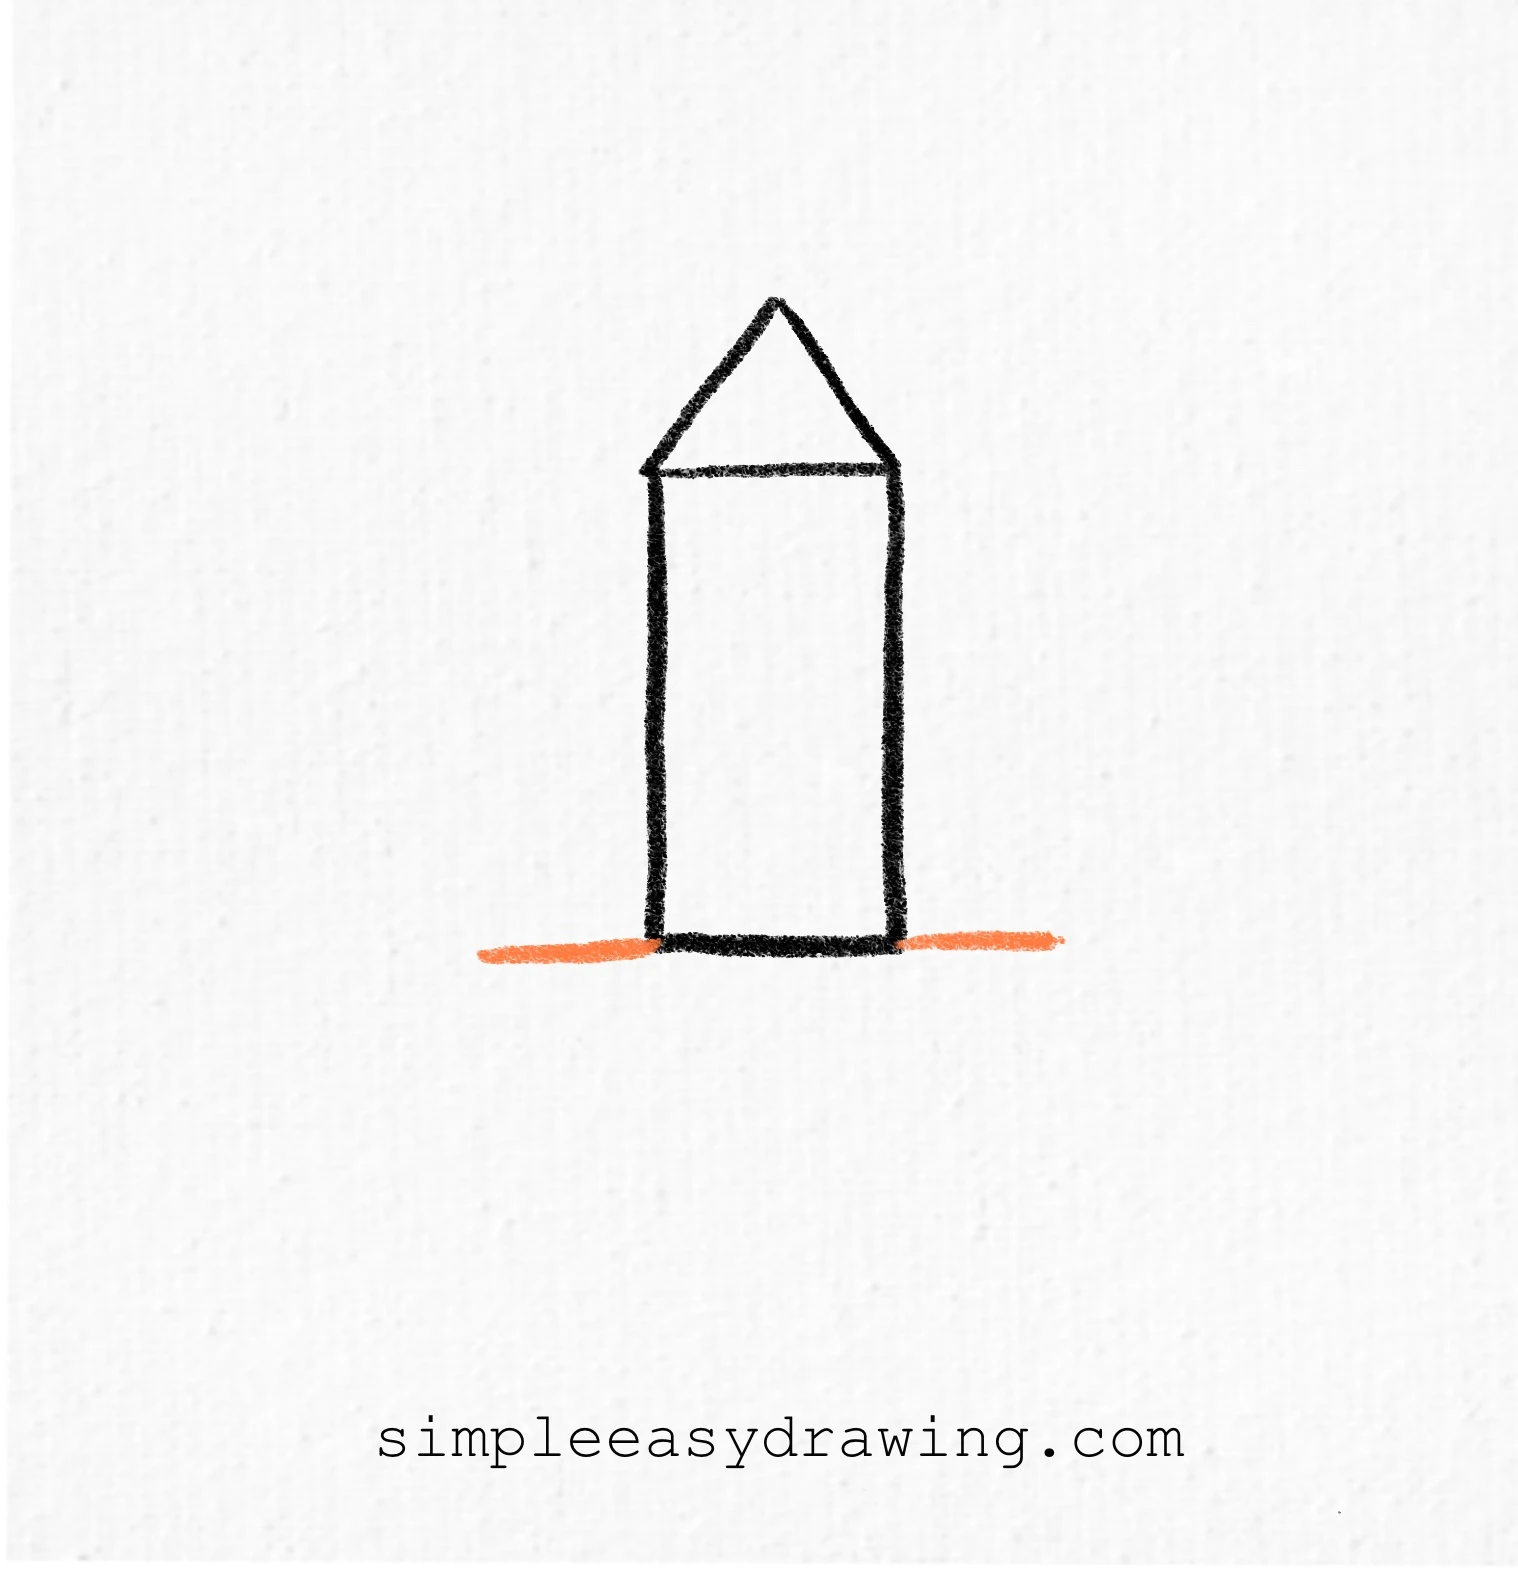
Step 4: Draw the side fins

Now add two fins, one on each side of the rocket body. To draw a fin, start at the extended bottom line, angle a line upward toward the rocket body, and then connect it back with another angled line. Repeat this on the opposite side. These fins help real rockets stay balanced during takeoff.
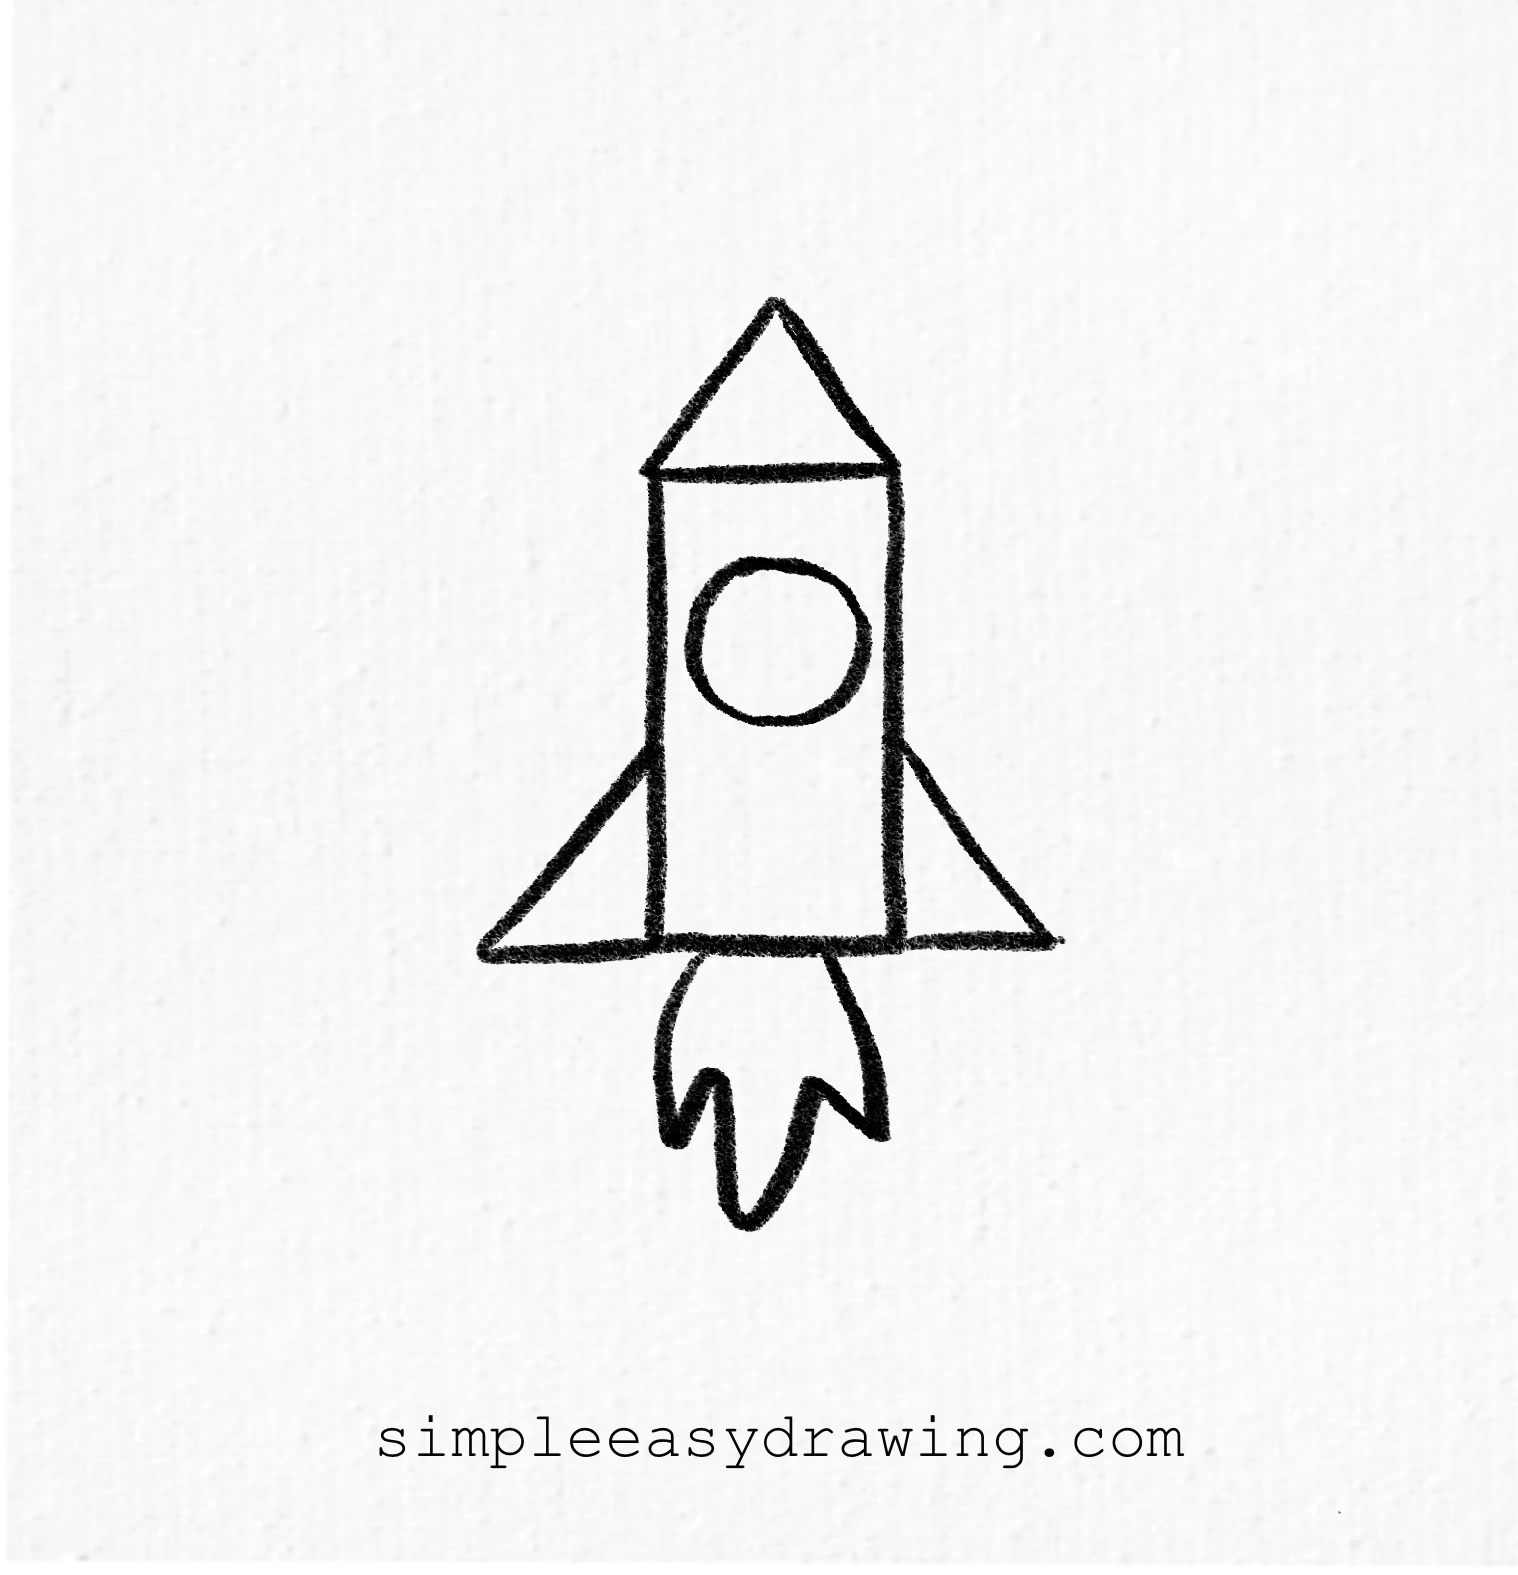
Step 5: Add the window
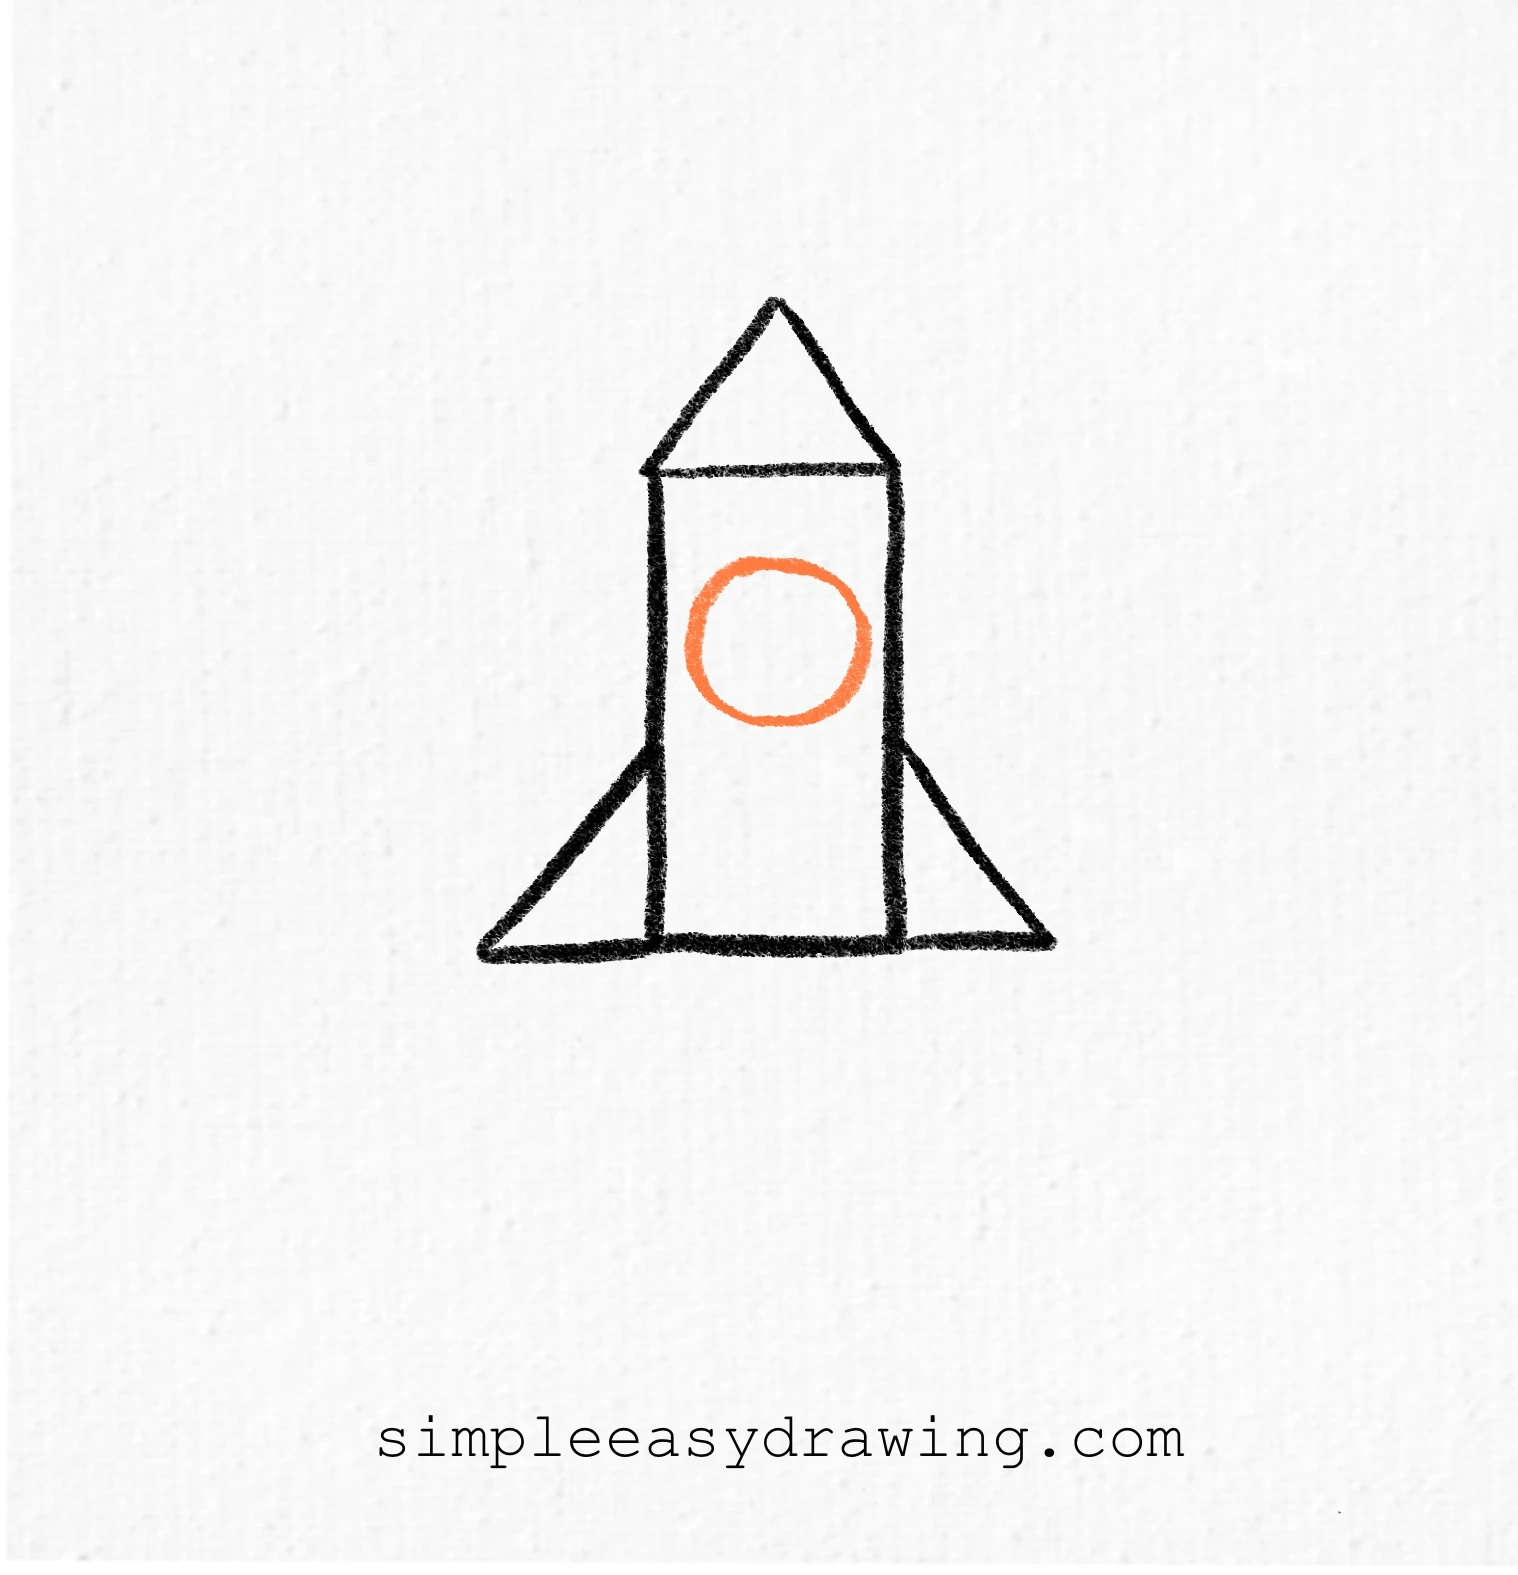
Every cool rocket needs a window! Draw a neat circle in the upper part of the rocket body. This round window makes the rocket look more animated and fun—almost like an astronaut could peek out and wave at you!
Step 6: Draw the flames
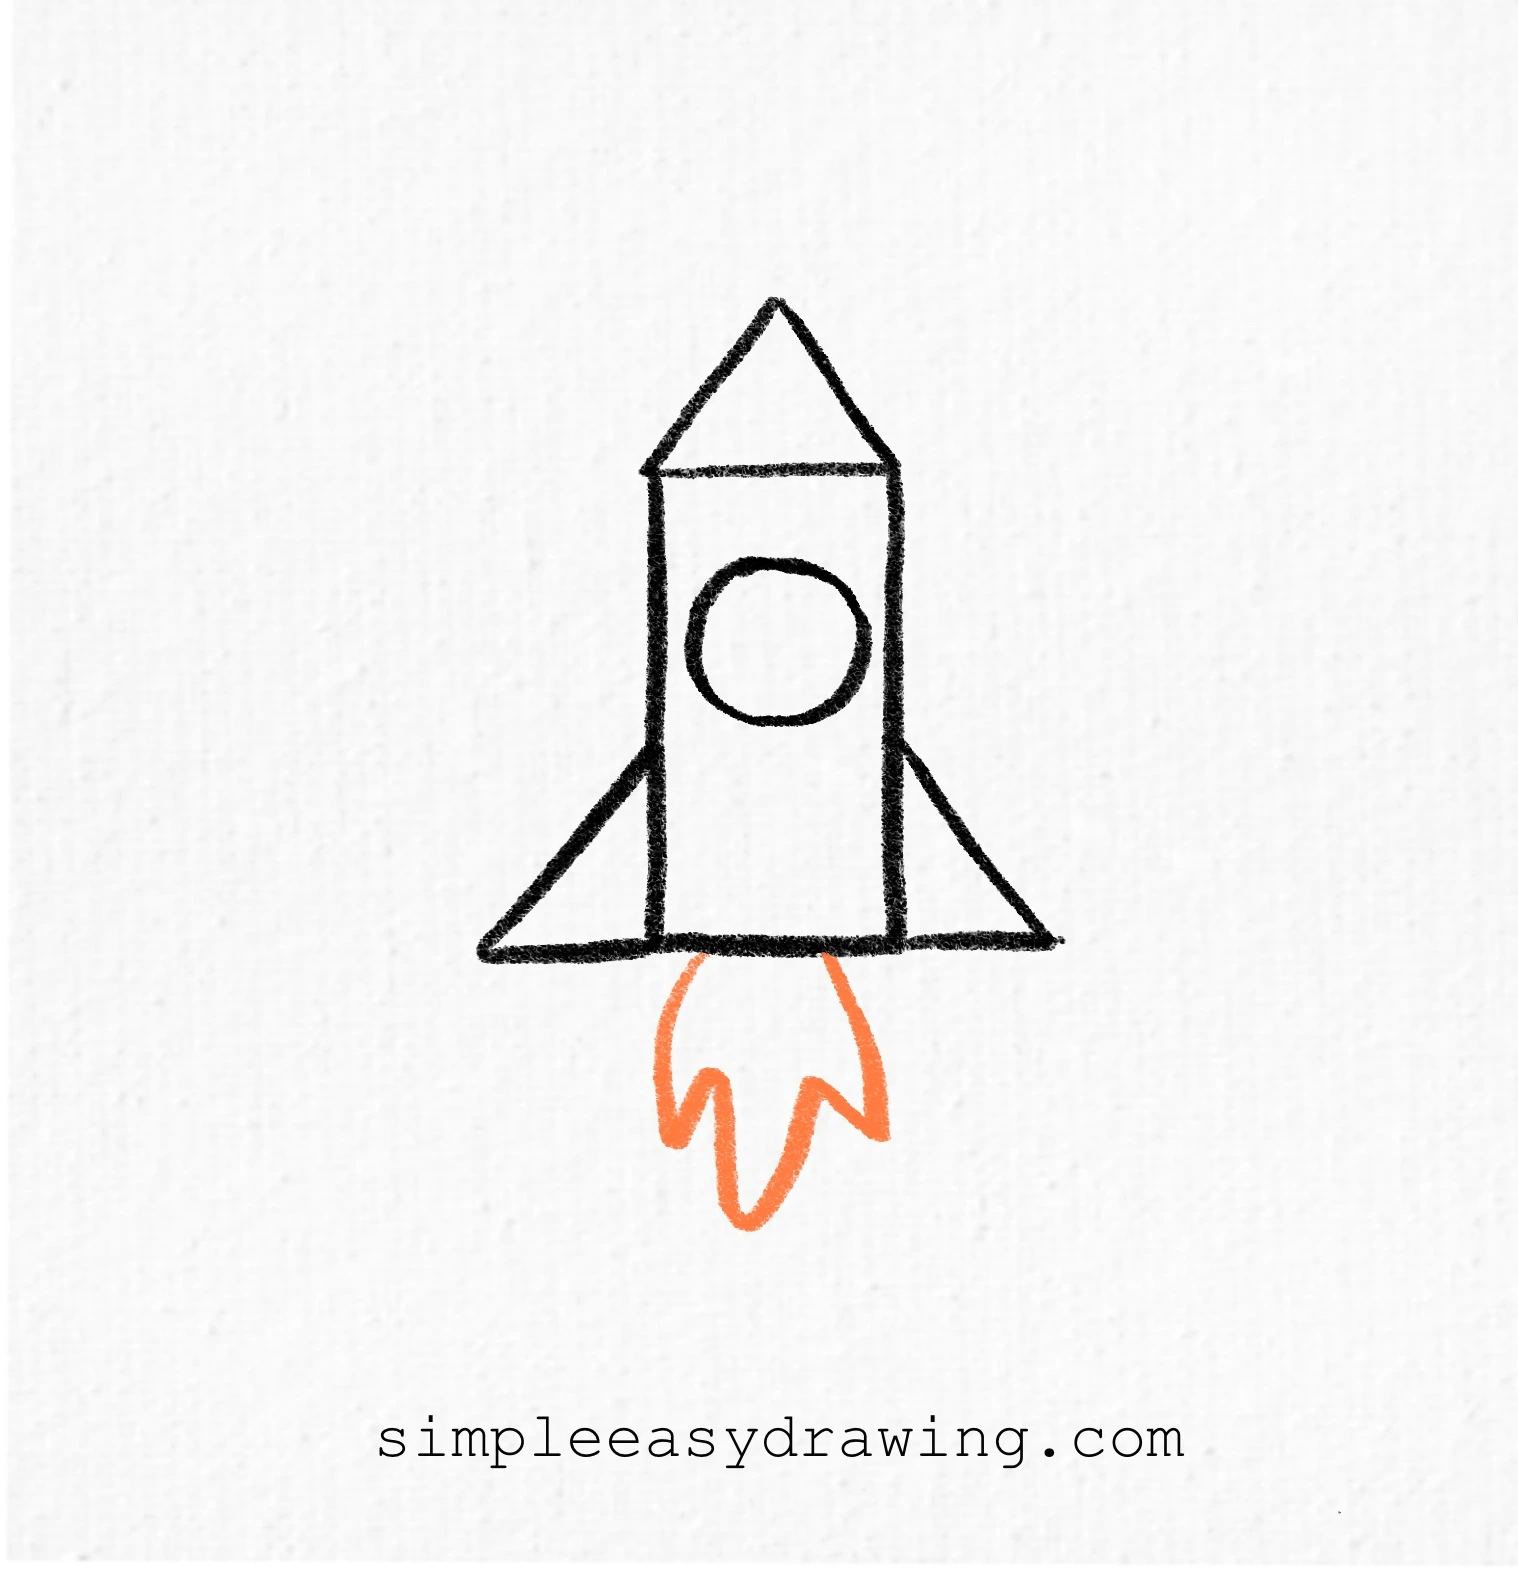
Time for the most exciting part: the fiery flames!
Under the rocket body, draw three wavy, flowing shapes coming downward. These shapes should look like dancing flames bursting out from the rocket engine. This shows the rocket taking off and adds lots of energy to your drawing.
Step 7: Color and outline your rocket
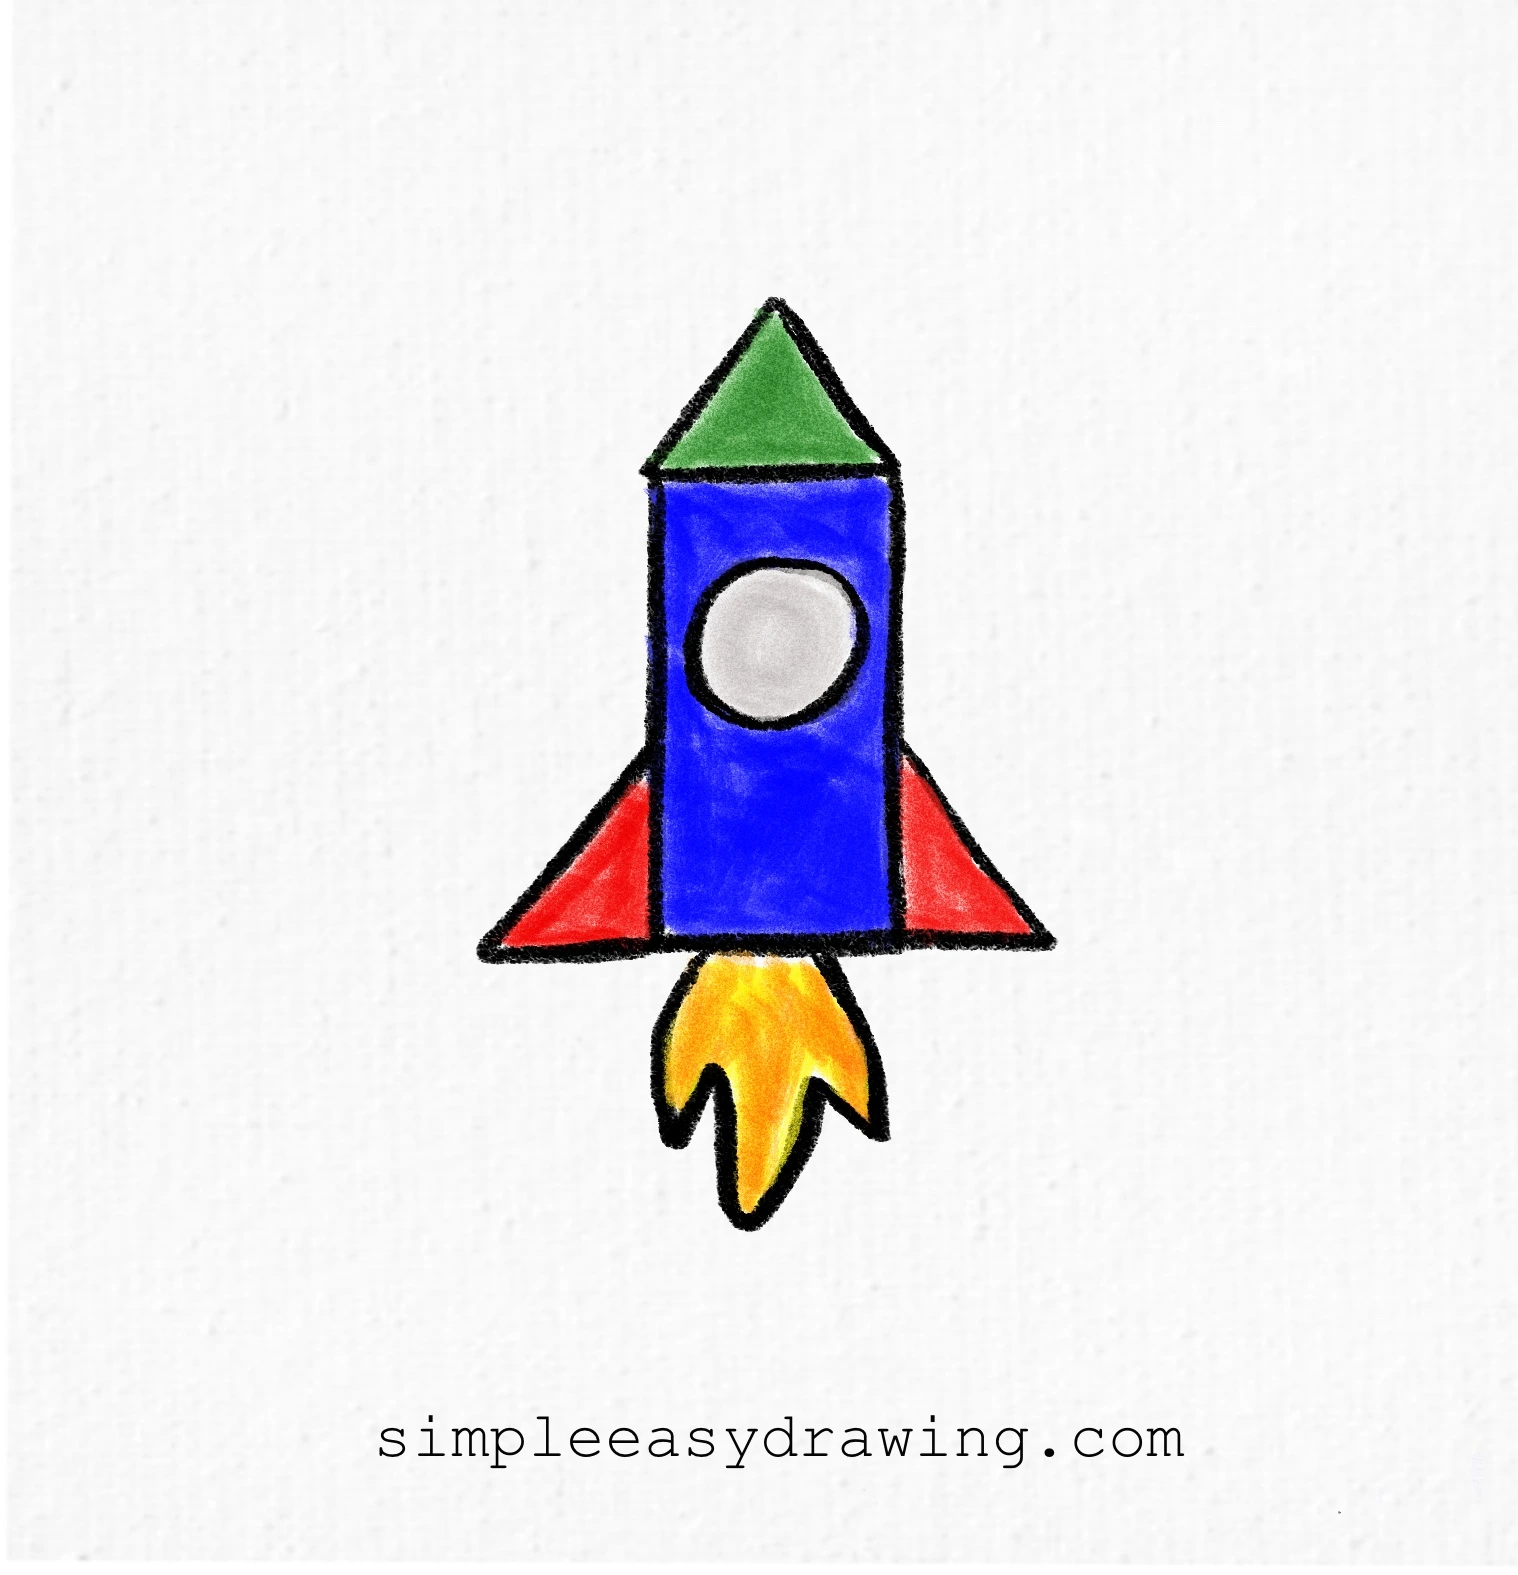
Now color your rocket any way you like! You can use bright reds, blues, yellows, or greens. Rockets look amazing in bold colors, so don’t be shy—make it pop! Once you’re happy with your coloring, take your black sketch pen and carefully outline all the parts.
We’re all done
And that’s it — you’ve just learnt how to draw a rocket. If you liked this tutorial, don’t forget to share it with your friends. It’s always more fun when everyone draws together!
I’ve attached a full step by step picture so you can save it and draw later at your own pace. I’ve also added a printable rocket coloring page. It’s a clean outline version of the drawing that you can print and use to color in.
Drawing is a wonderful hobby, and the more you practice, the better you get. Keep practicing, and soon, you’ll be able to draw a rocket easily.
If you had fun drawing this rocket, you’ll probably enjoy my car drawing or house tutorial next. Browse more easy drawing lessons here on Simple Easy Drawing.
Explore more simple easy drawing tutorials here.