When summer arrives, I always notice how much brighter everything feels. Whether you’re spending the day at the beach in San Diego, playing in the backyard, or heading to the park with your family, the sunshine seems to make every day a little more fun.

That’s exactly why I wanted to draw the sun today. It’s one of the very first things many of us learn to draw as kids, and it’s a great little drawing to add to almost any scenery. You can place it above a beach, a house, some mountains, a rainbow, or even a simple field. Best of all, it’s made from just a few easy shapes, so it’s perfect for kids and anyone who’s just starting to draw.
Before we start the tutorial, here is a fun fact: Even though the Sun looks small in the sky, it’s so big that about 1.3 million Earths could fit inside it! How amazing is that. Don’t worry if you’ve never drawn a sun before. I’ll show you exactly what to do, one step at a time, and by the end you’ll have your own happy little sunshine.
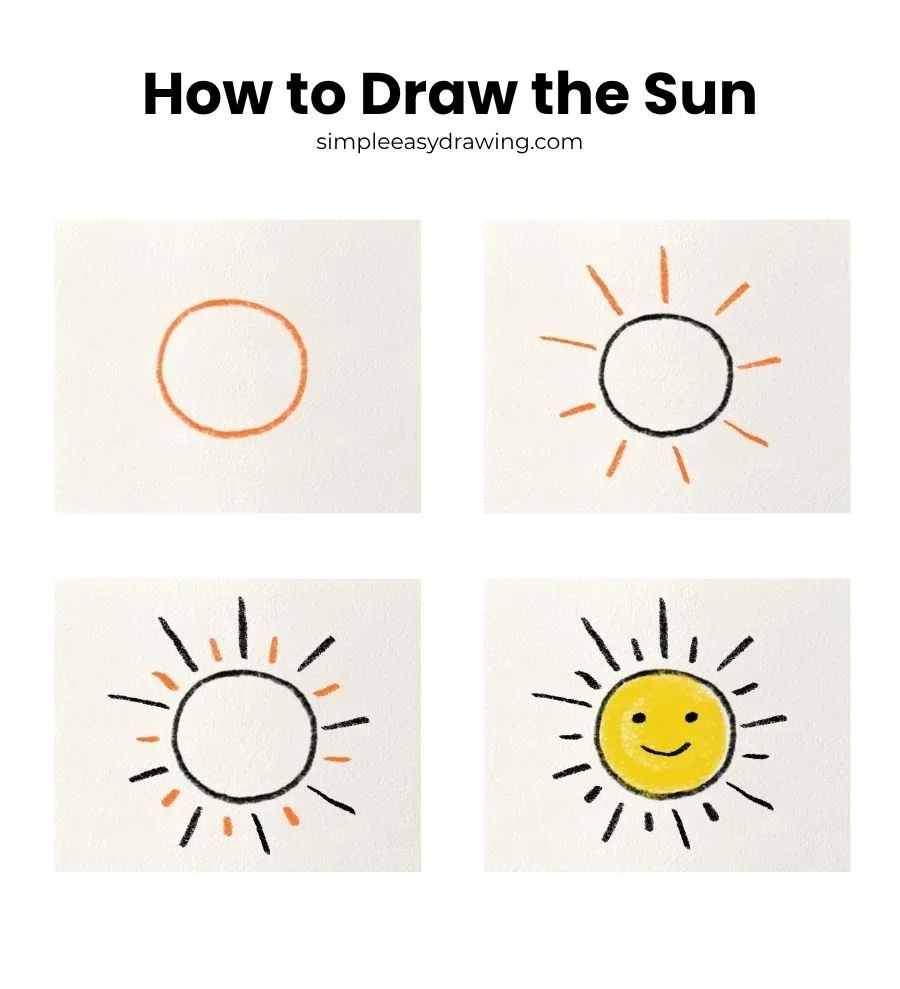
Here’s an easy directed drawing tutorial that will help you create a simple and easy sun drawing.
Let’s get started!
Please note: In each step, the new parts of the drawing will be highlighted in orange, while everything you’ve already drawn will stay in black.
Step 1: Draw the sun’s circle
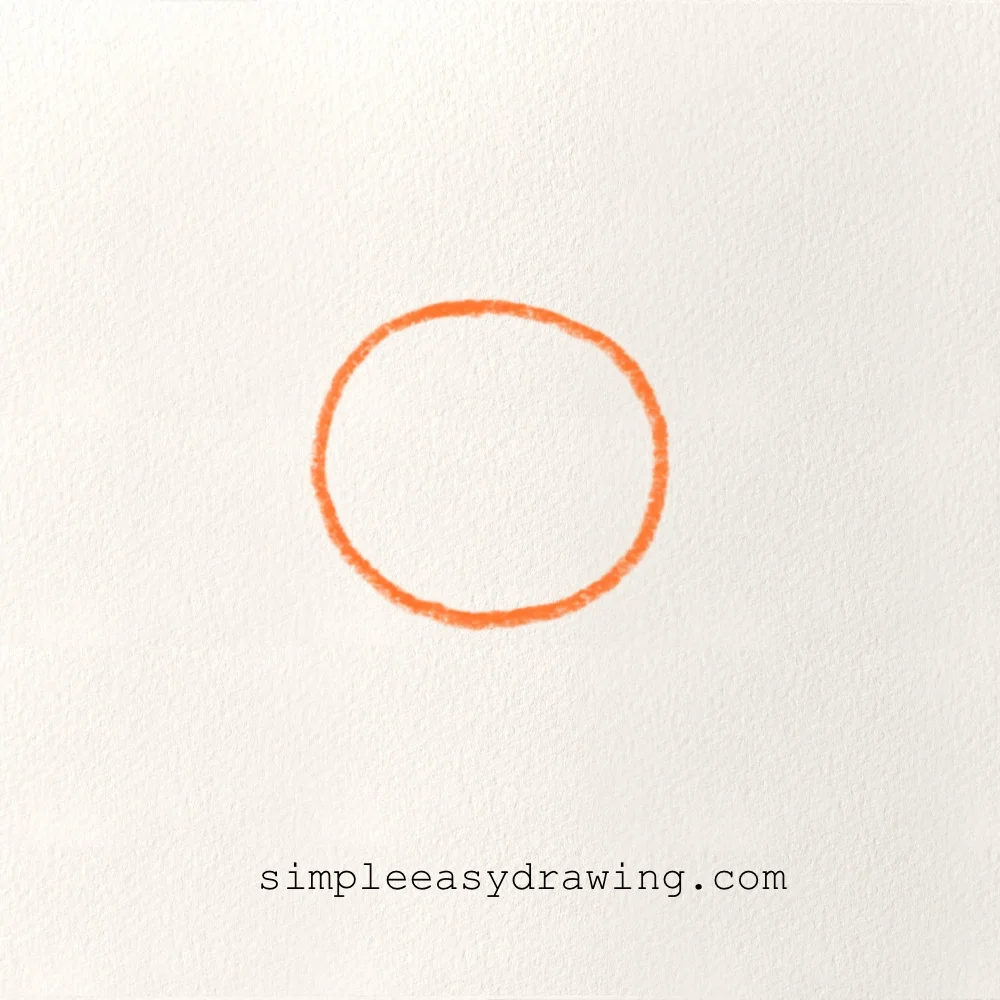
Let’s start with the easiest part. Draw a nice big circle near the middle of your paper. It doesn’t need to be perfectly round, so don’t worry if it’s a little wobbly. Leave some space all around it because we’ll be adding bright rays of sunshine next.
Step 2: Draw the sun’s first rays
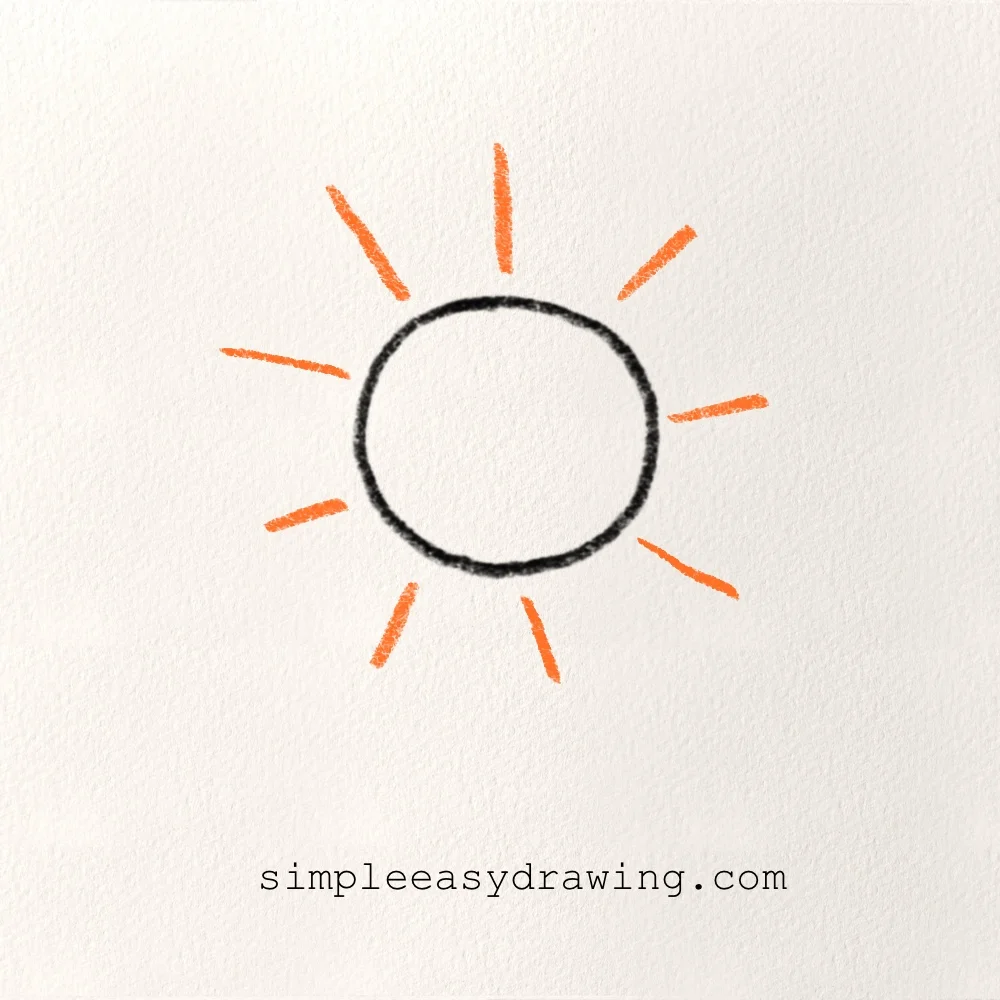
Now let’s make the sun shine! Draw a few short lines sticking out from the circle. Try to spread them out evenly so the sunshine reaches in every direction. Don’t rush here. Adding the rays one at a time makes it much easier to keep them nicely spaced.
Step 3: Finish the sun’s rays
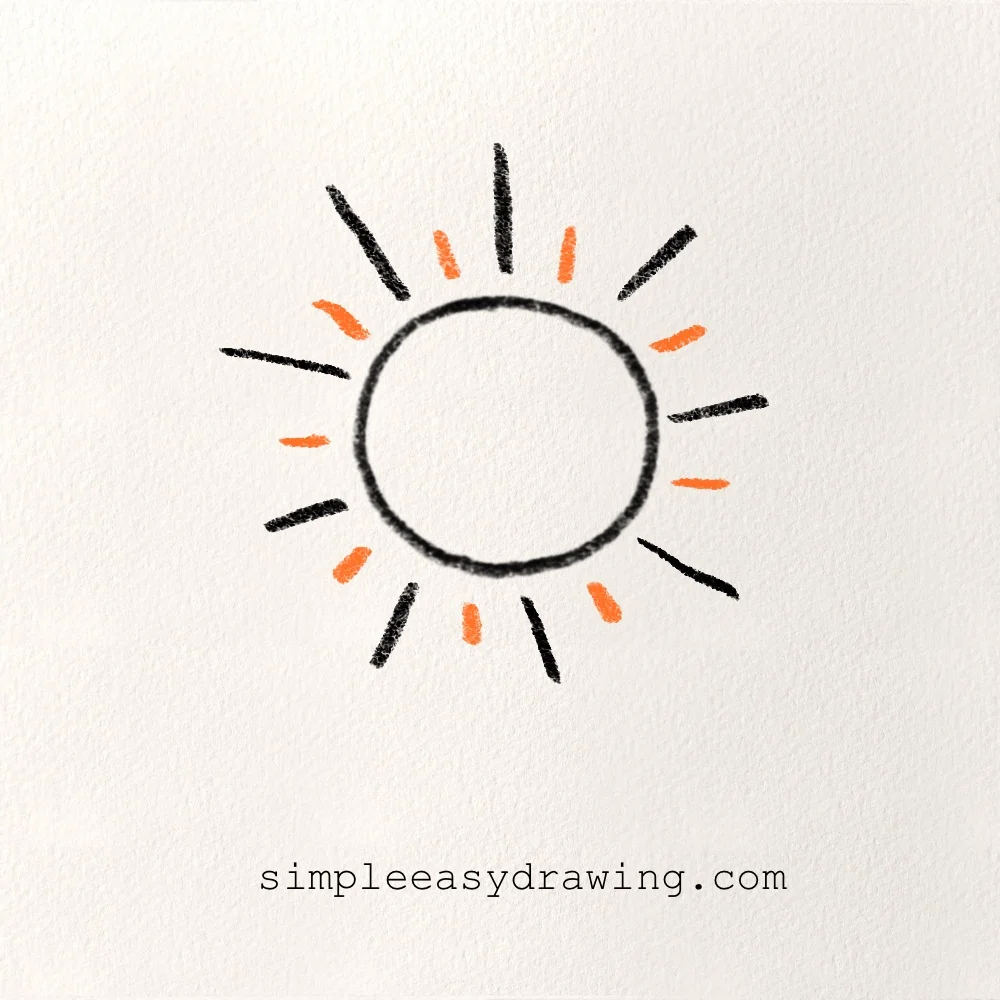
Go back around the circle and fill the gaps with more rays. You can make these a little longer than the first ones if you’d like, just like in the example. As you finish going around the circle, your drawing will really start to look like a bright sunny day.
Step 4: Color the sun
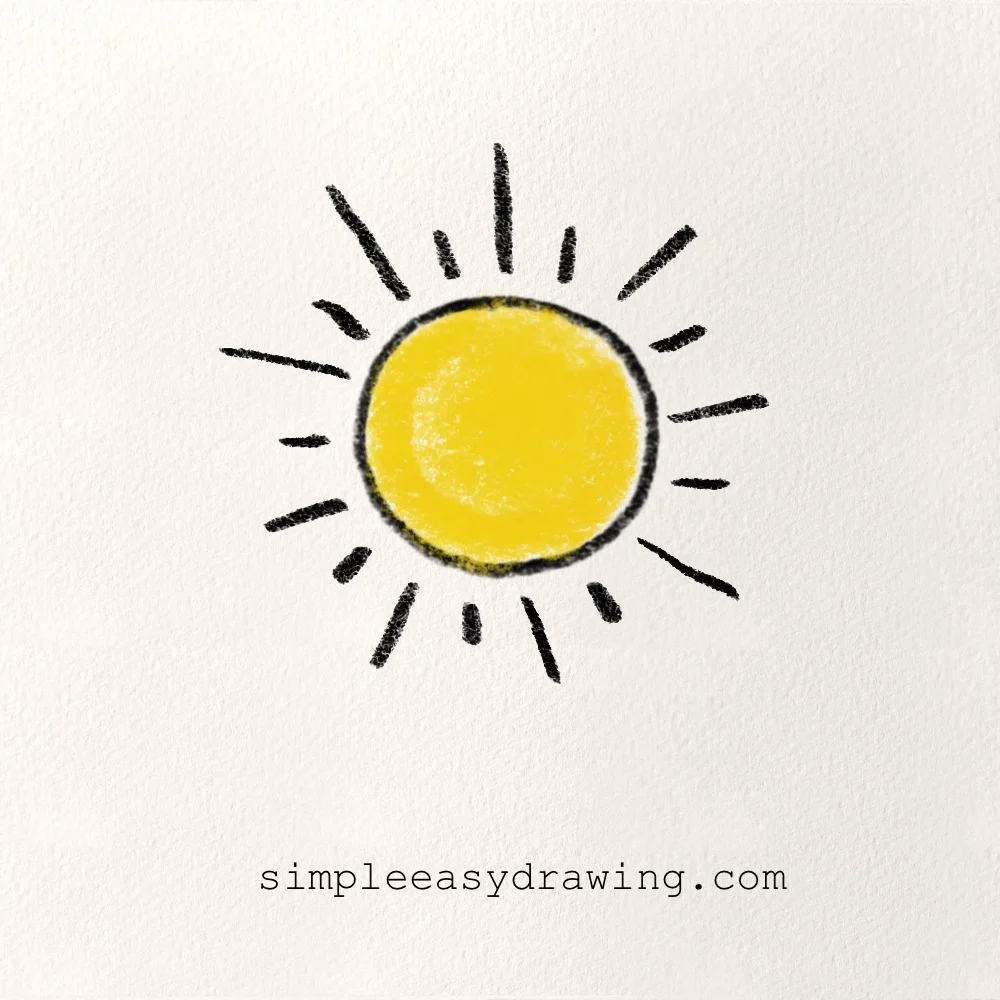

Now it’s time to bring your sun to life! Color the circle with a bright yellow crayon, colored pencil, or marker. If you’d like to give your sun a cheerful look, you can also draw two small eyes and a curved smile in the middle. Your sun drawing is now complete and ready to brighten any scenery.
We’re all done
Nice work! You just drew your very own smiling sun.
I hope you had fun drawing with me today. One thing I love about this little sun is that you can use it in so many other drawings. Try adding it to a beach scene, a farm, a camping picture, or any outdoor landscape that could use a little sunshine, and make it your summer drawing.
I’ve attached the full step by step picture so you can save it and come back whenever you’d like to practice again at your own pace. Keep drawing, keep experimenting, and don’t forget to check out my other easy tutorials here at Simple Easy Drawing.