Can you stand on one leg for hours? Flamingos do it even when they sleep! These birds have a very distinct outline because of their height and their long, flexible necks. Today, I’m going to show you how to draw a flamingo step by step. All you need is a pencil, a few colors, and a big imagination!
Drawing a flamingo might look tricky at first, but once you break it down into simple steps, it becomes super easy and enjoyable. You’ll be surprised at what you can create with just a few basic shapes and curves.
Shall we begin?

Materials you need:
- A piece of paper
- An HB pencil
- A dust-free eraser
- A black sketch pen for outlines
- Crayons or color pencils for coloring
Let’s now start our easy flamingo drawing!
Note: In each step, the new parts of the drawing will be highlighted in orange. Everything you’ve already drawn will remain in black, so it’s easy to follow along and keep your lines neat.
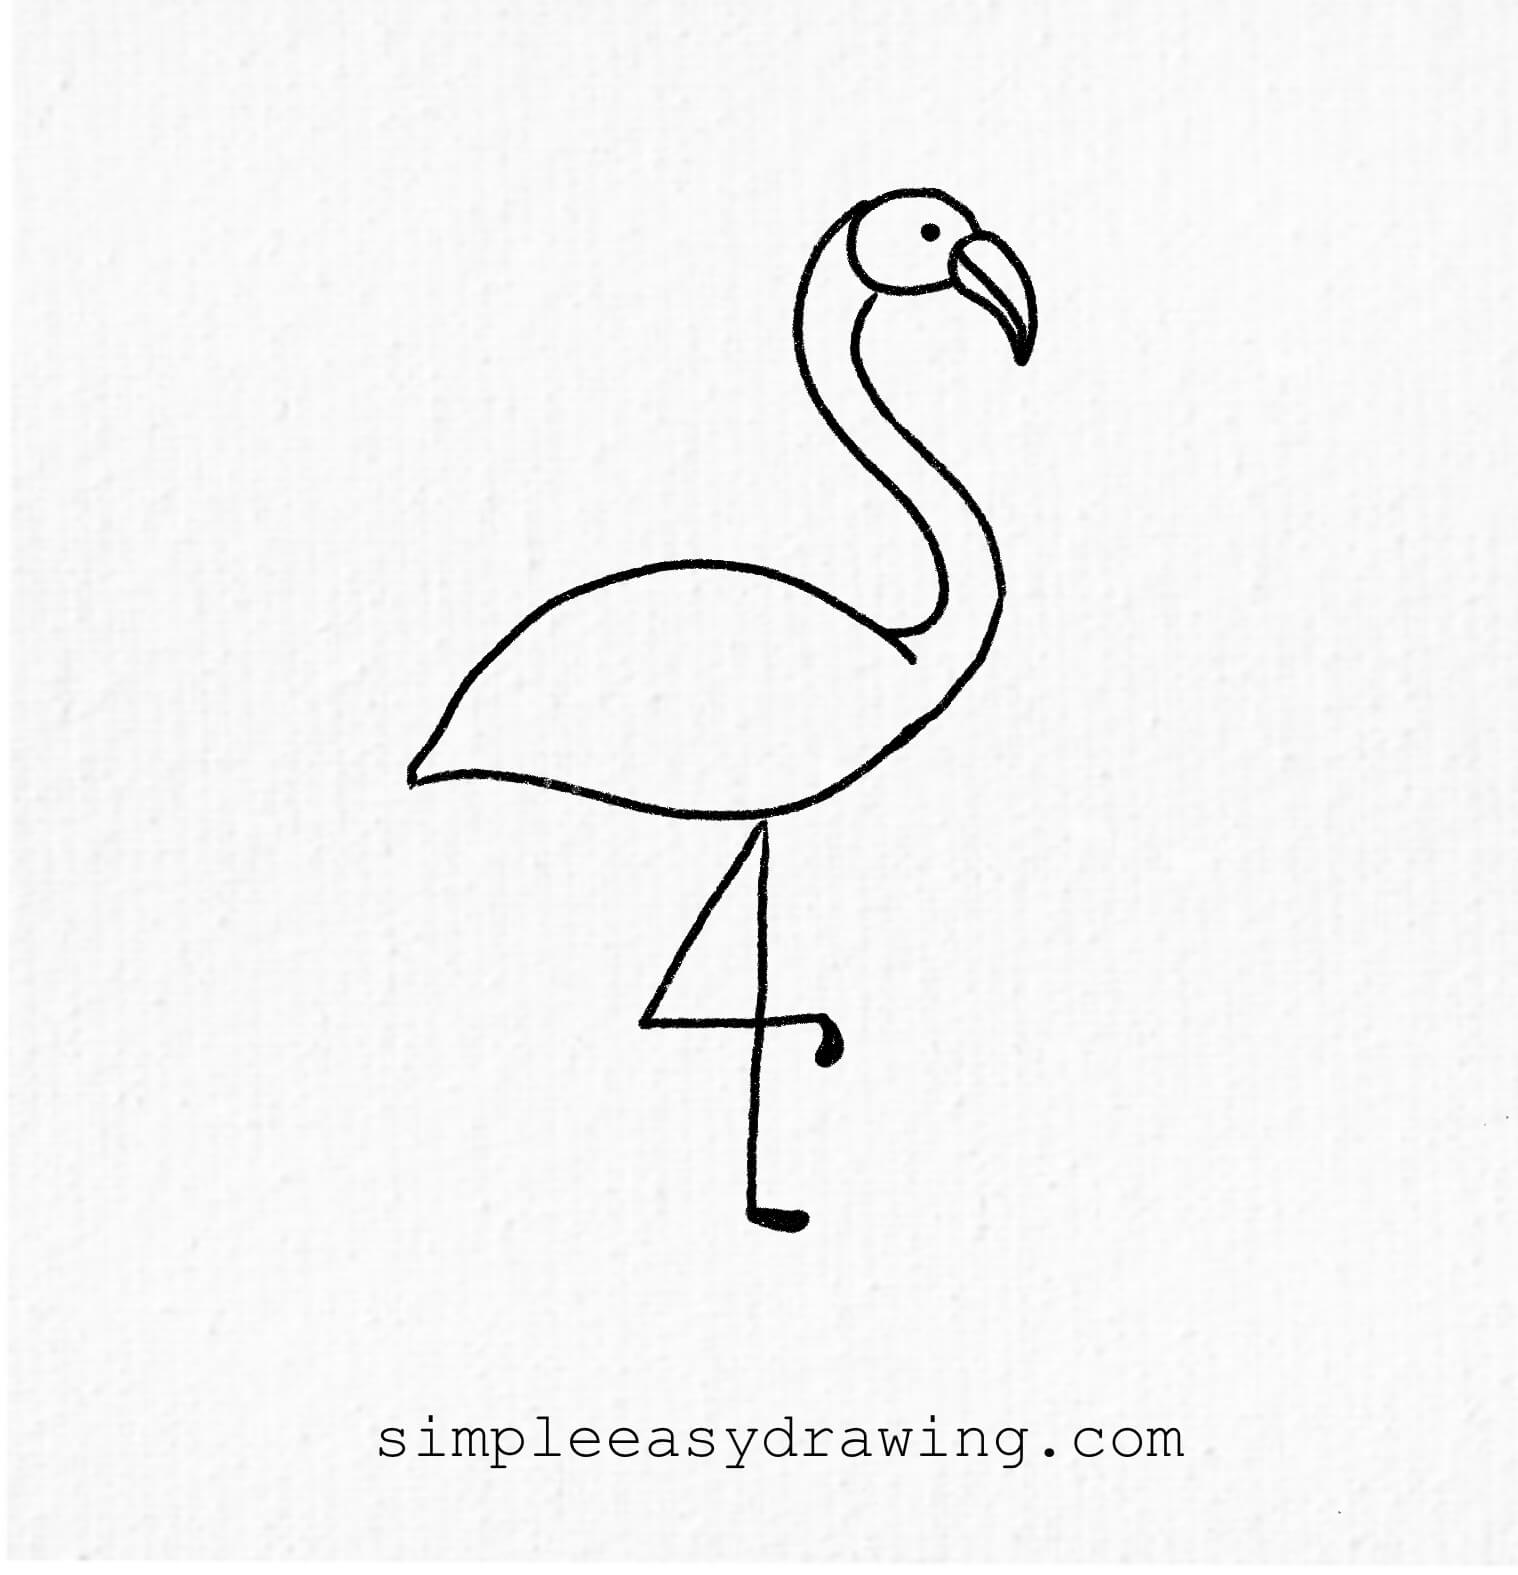
Step 1: Draw the flamingo’s legs
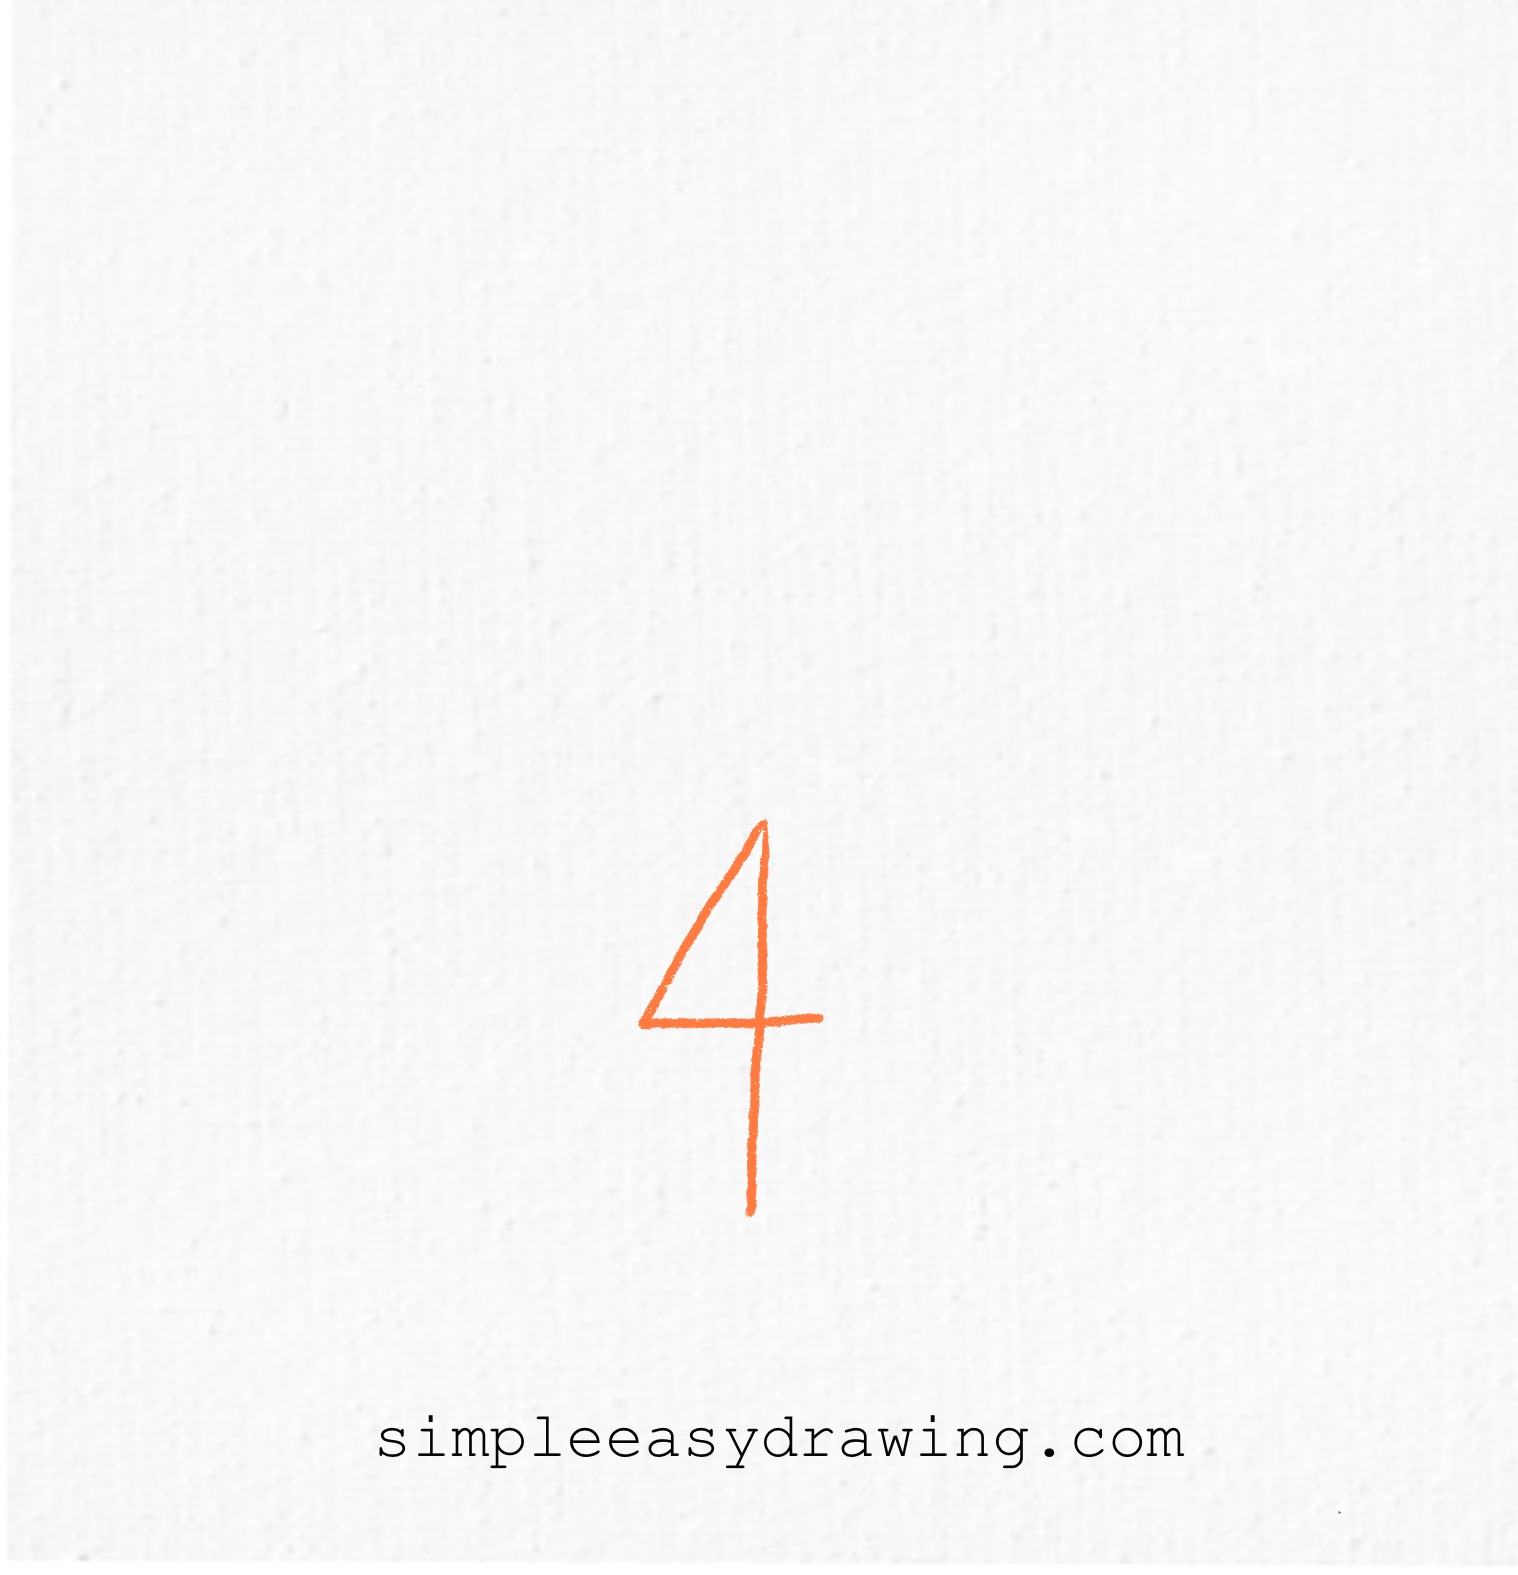
Start by drawing the number “4” near the bottom part of your paper. This will become one of the flamingo’s legs. Make sure it’s drawn slightly lower so there’s space above for the rest of the body.
Step 2: Draw the body base

From the top of the angled line in the “4,” draw a curved line that swoops downward and slightly back up. It’s kind of like the opposite of a hill—more like a slide or a gentle dip. This is the base curve that leads into the flamingo’s neck.
Step 3: Draw the flamingo’s neck

Now, from the end of that curve, draw a neck that looks like a stretched-out “S.” Flamingos have long, curvy necks, and this step captures their elegant shape. The curve should go upward to make room for the head at the top.
Step 4: Draw the head and beak

At the top of the “S” shape, draw a small circle or oval for the head. Then, add a curved beak pointing downward. You can make the beak a bit thicker at the top and narrow at the tip for that classic flamingo look.
Step 5: Complete the body

Now go back to the other side of the curve you made in Step 2. From there, draw another curve that swoops downward and then comes back up to meet the bottom of the neck. This shape will look a little like an eye or a leaf. It completes the flamingo’s body.
Step 6: Connect the neck
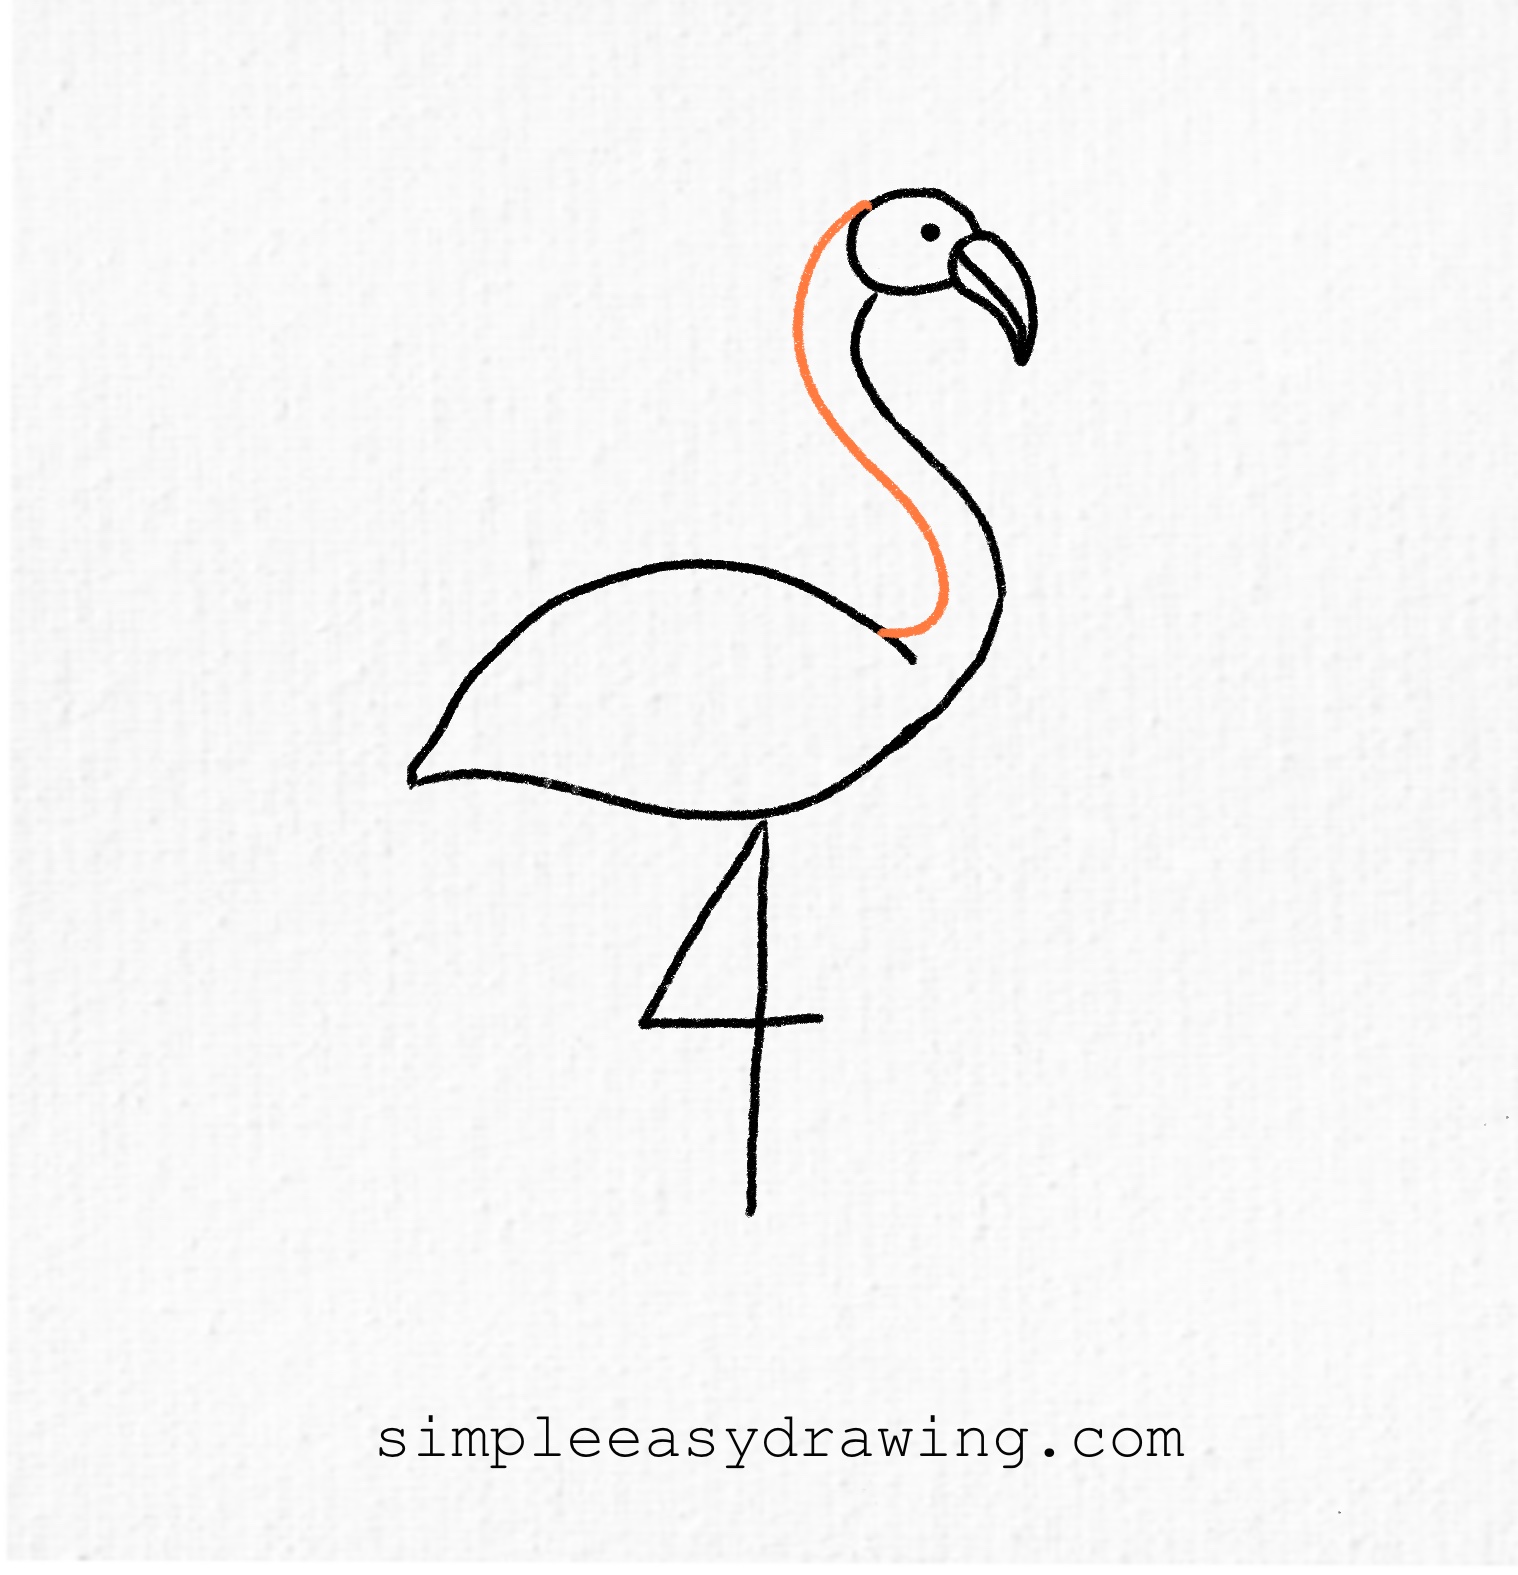
To make the neck look complete, draw a curved line that connects from slightly before the end of the back curve to the lower part of the head. This should follow the shape of the neck, almost like you’re repeating that “S” shape on the other side. It helps the neck look smooth and natural.
Step 7: Draw the flamingo’s feet

Add feet to your flamingo by extending lines from the bottom of the leg. You can draw one foot with a curved top and a straight bottom, or both feet straight—whatever feels easiest for you. Flamingos often stand on one leg, so you can even leave one foot out if you want!
Step 8: Color your flamingo
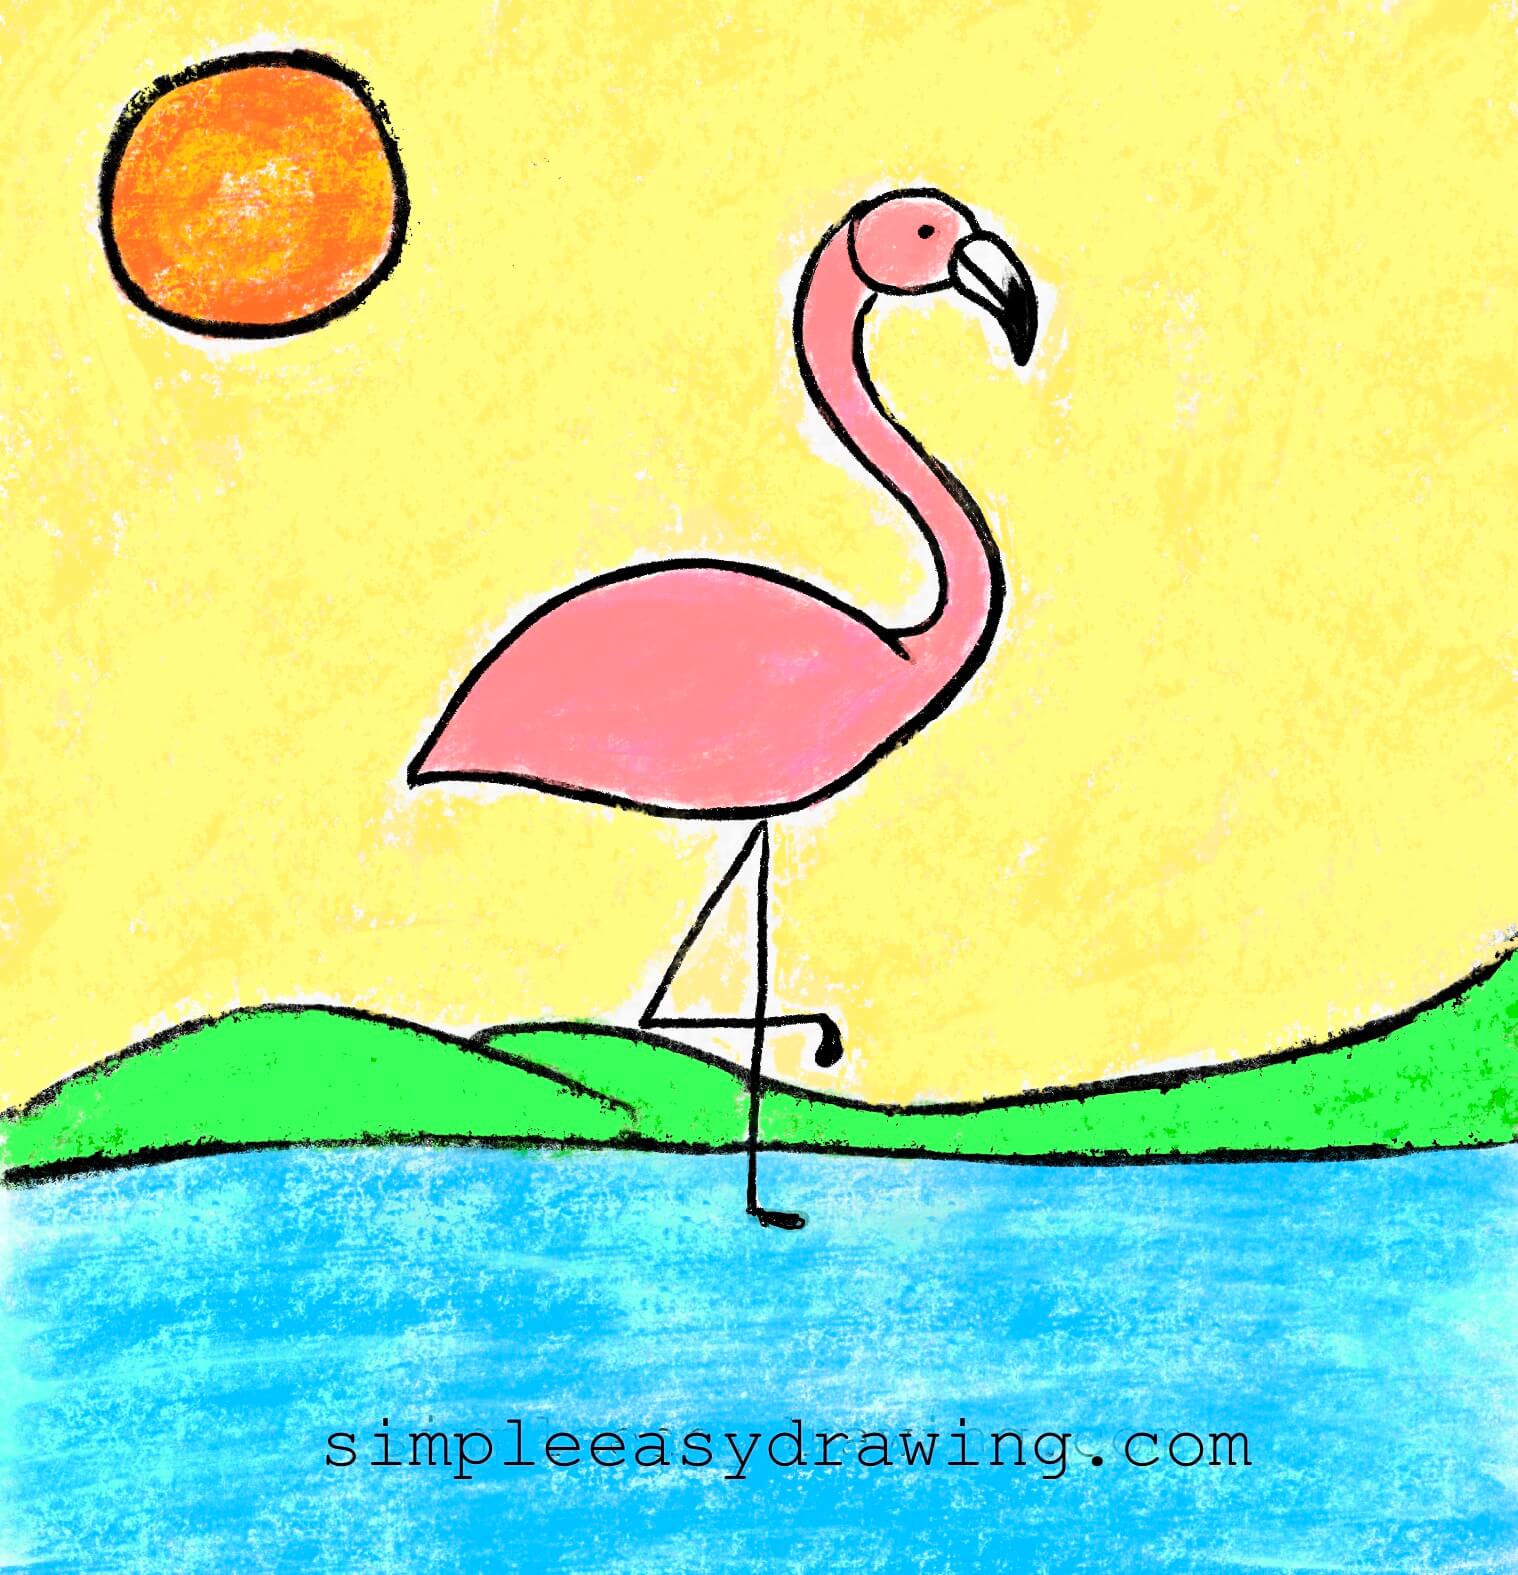
Now it’s time to bring your drawing to life! Use your black pen to outline the whole flamingo. Then, grab your crayons or color pencils and color it pink. You can also add some blue for water, green for grass, or even a sunset background if you feel creative.
We’re all done!
And that’s it—you’ve just learned how to draw a flamingo step by step. If you enjoyed this flamingo drawing easy tutorial, make sure to show your drawing to family and friends. I’ve attached a full step-by-step picture so you can save it and draw again later at your own pace.
I’ve also added a free printable flamingo coloring page. It’s a clean outline version of the drawing that you can print and use to color in.
Keep practicing, and soon, drawing a flamingo will feel like second nature. Until next time, happy drawing!