I don’t know about you, but I never need summer as an excuse to eat ice cream. I’ll happily enjoy one at any time of the year! That said, now that the weather is warming up now, seeing ice cream trucks around parks and walking through neighborhoods with cute ice cream parlors make it even more tempting.

Today, I wanted to keep things simple by teaching you how to draw ice cream with a classic cone. Whether you call it ice cream, gelato, or soft serve, I think we can all agree it’s a delicious treat to draw!
Don’t worry if you’re new to drawing. This is a directed drawing tutorial, where I’ll guide you through each step that will help you create a cute ice cream drawing.
Materials you will need:
- A piece of paper
- An HB pencil
- A dust-free eraser
- A black sketch pen for outlines
- Crayons or color pencils for coloring
Let’s get started!
Please note: In each step, the new parts of the drawing will be highlighted in orange, while everything you’ve already drawn will stay in black.
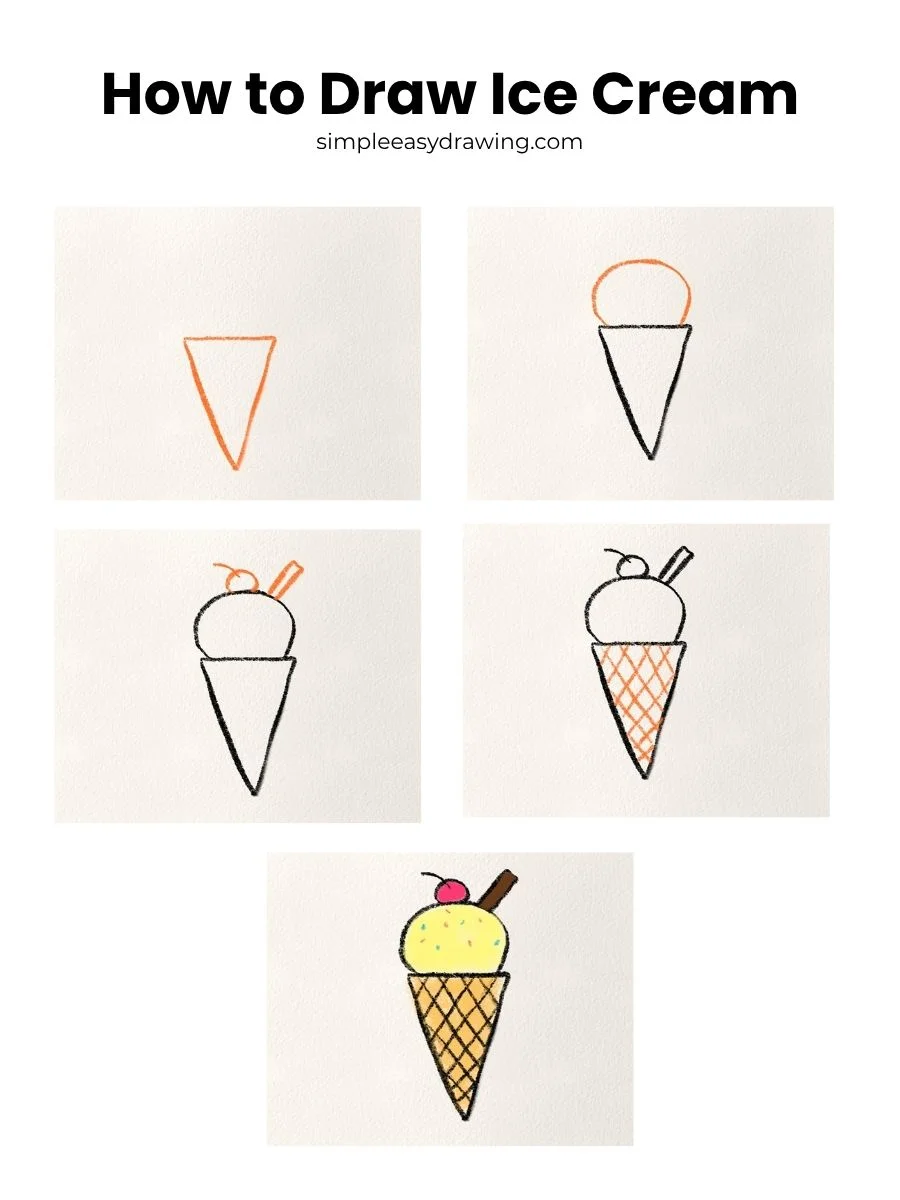
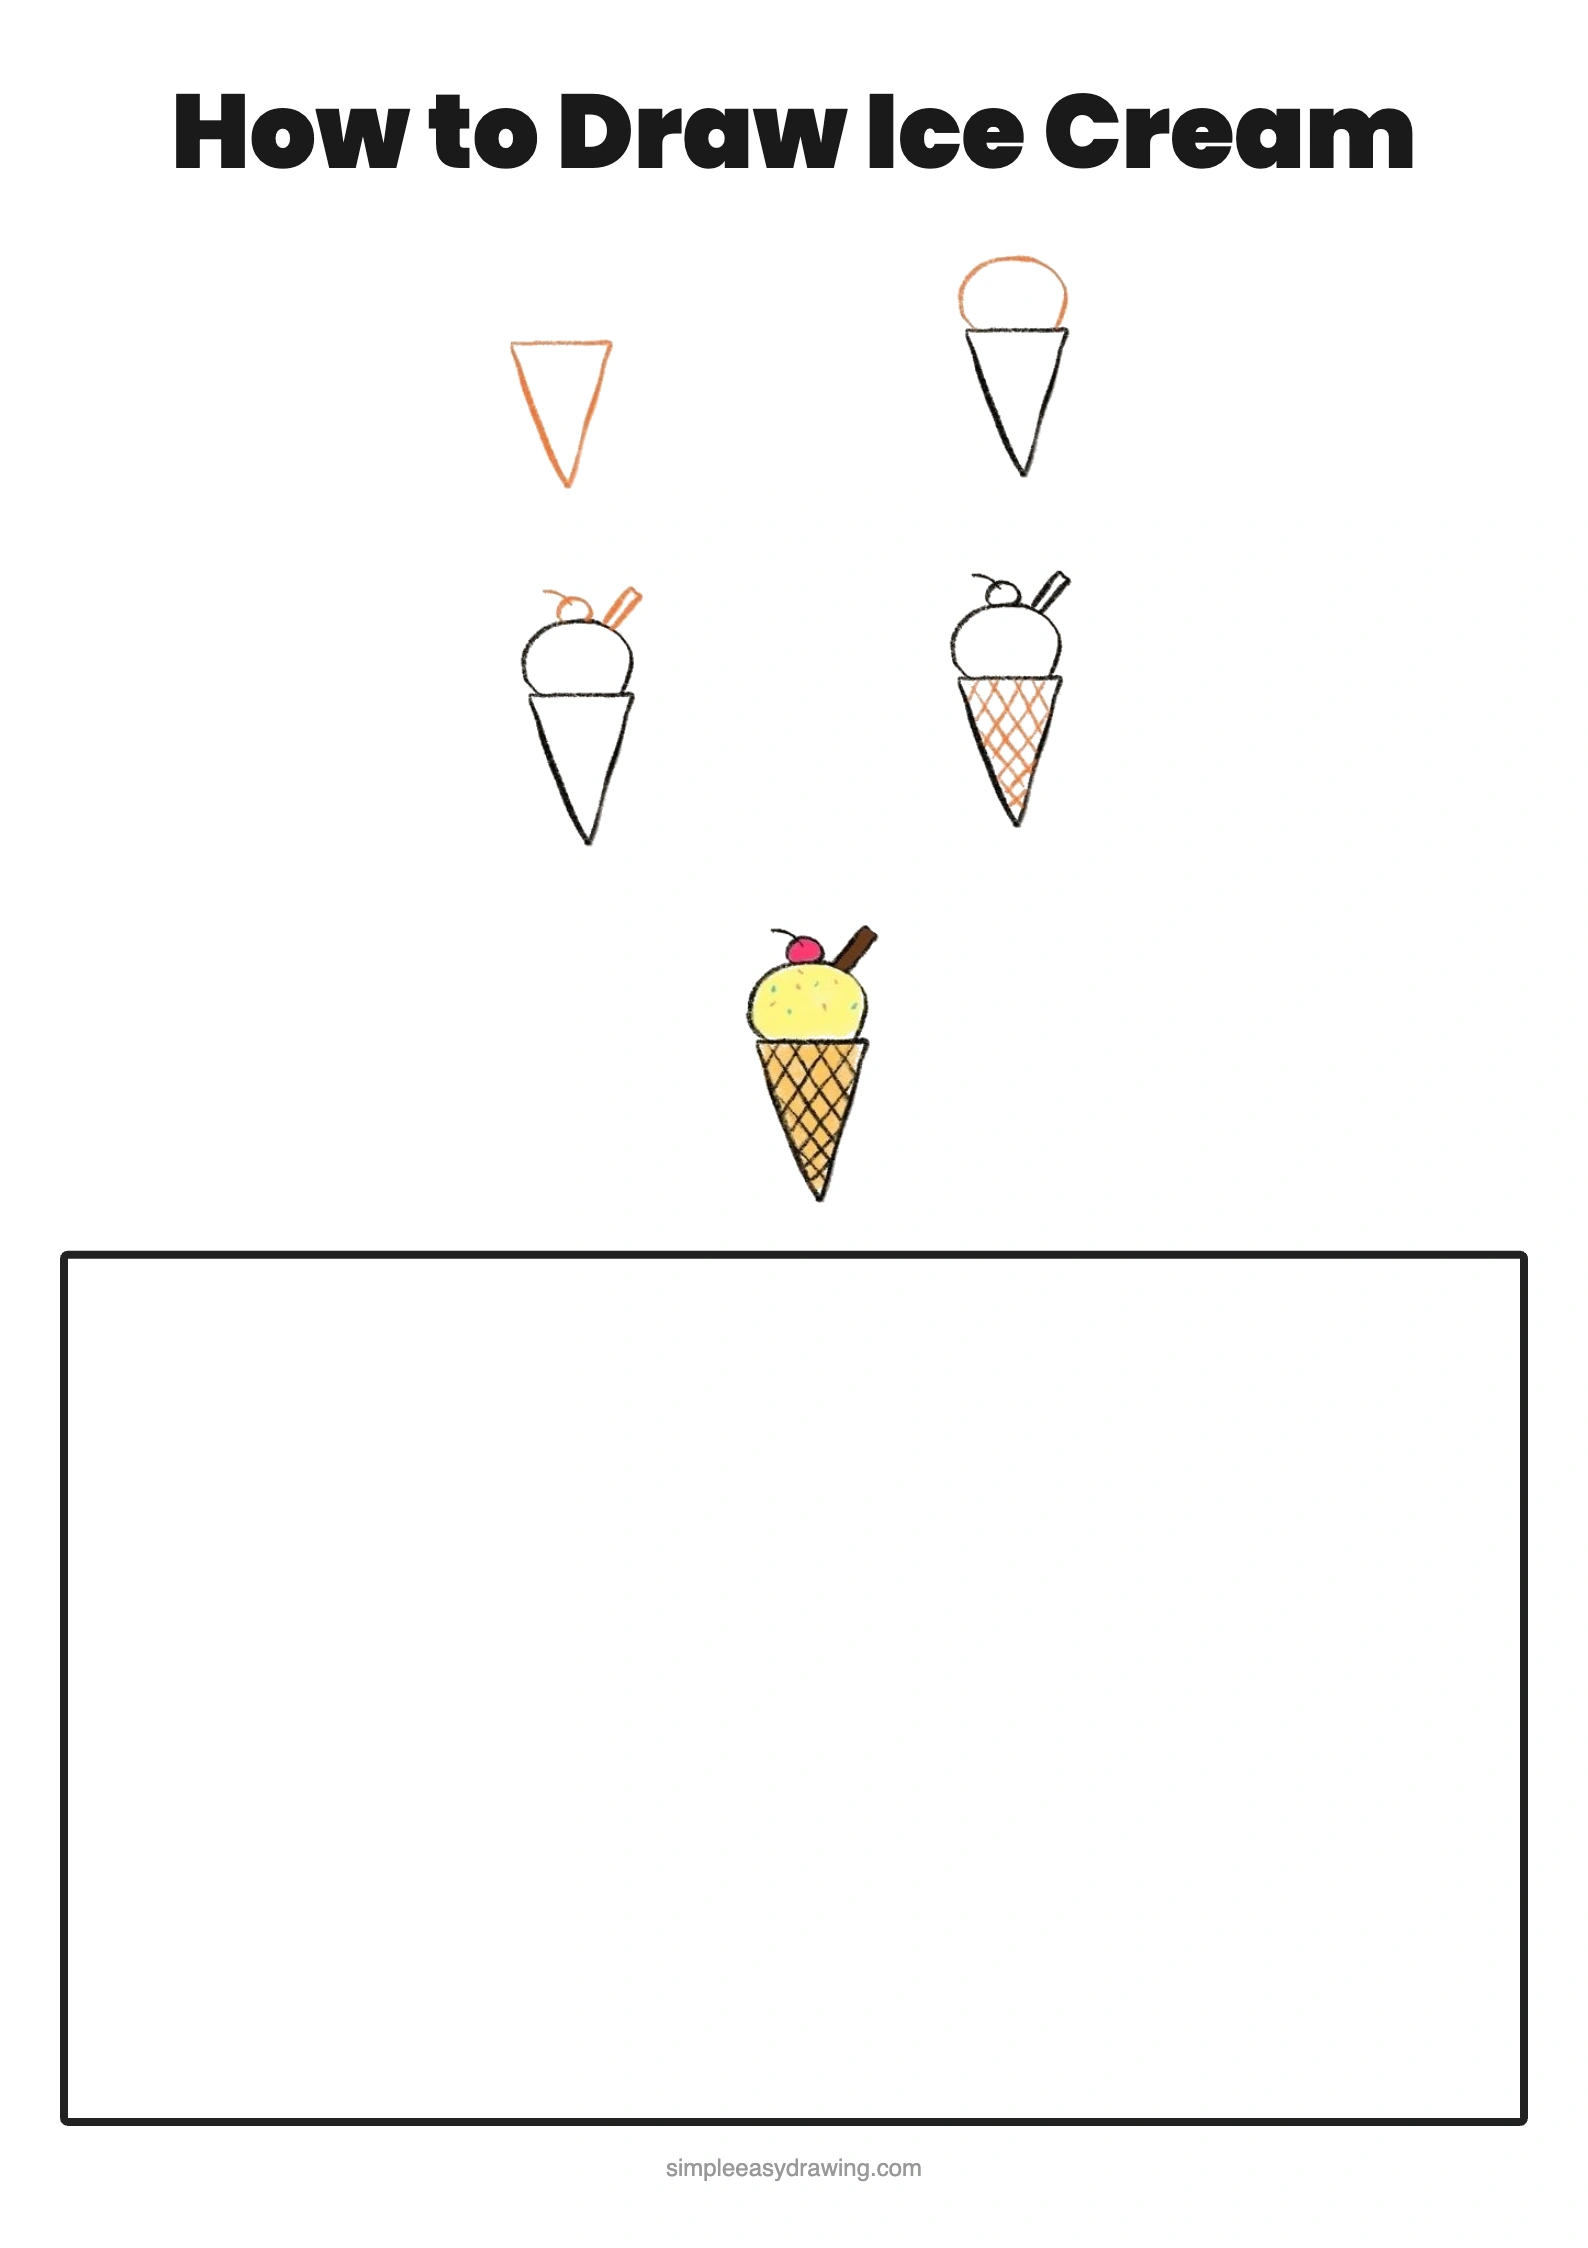
Step 1: Draw the ice cream cone
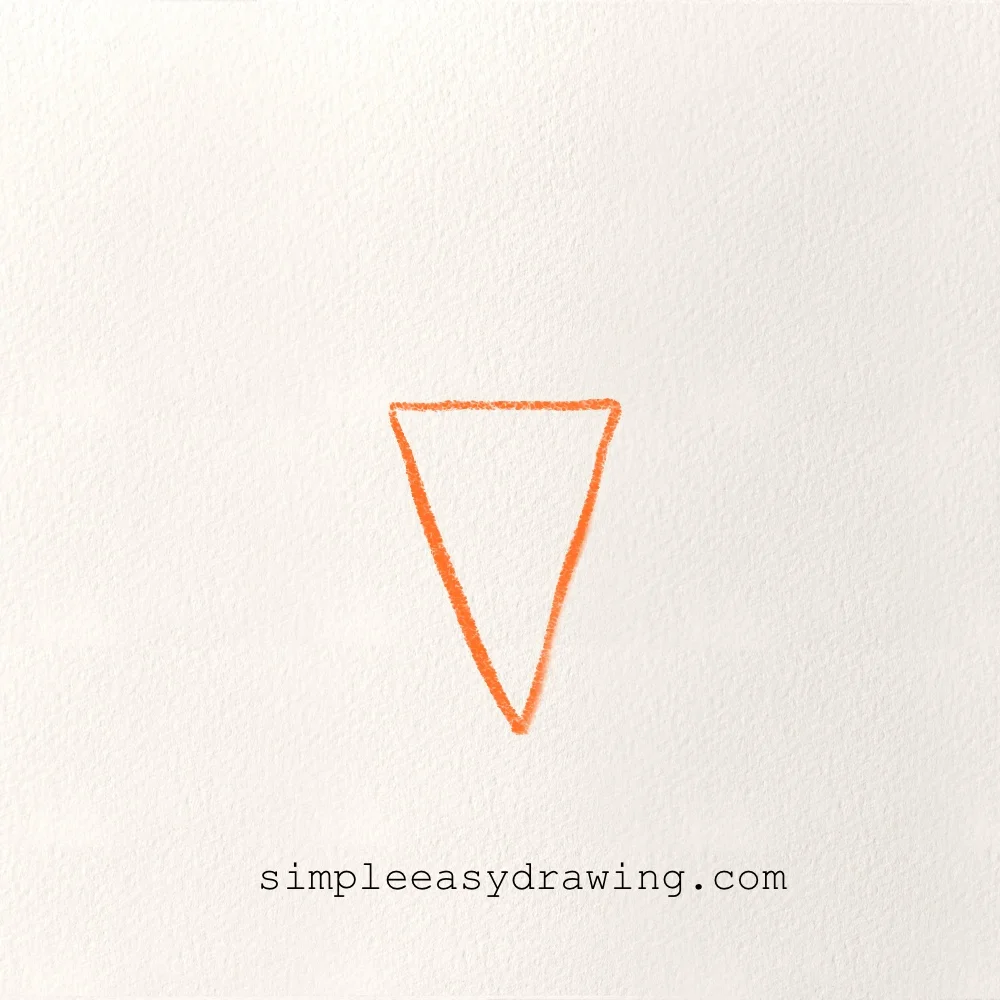
Let’s start with the cone. Draw an upside-down triangle with a wide opening at the top and a point at the bottom. Instead of making the sides perfectly straight, let them angle in gently so the cone looks a little more natural. Keep the top open because that’s where we’ll place the scoop of ice cream.
Step 2: Draw the ice cream scoop
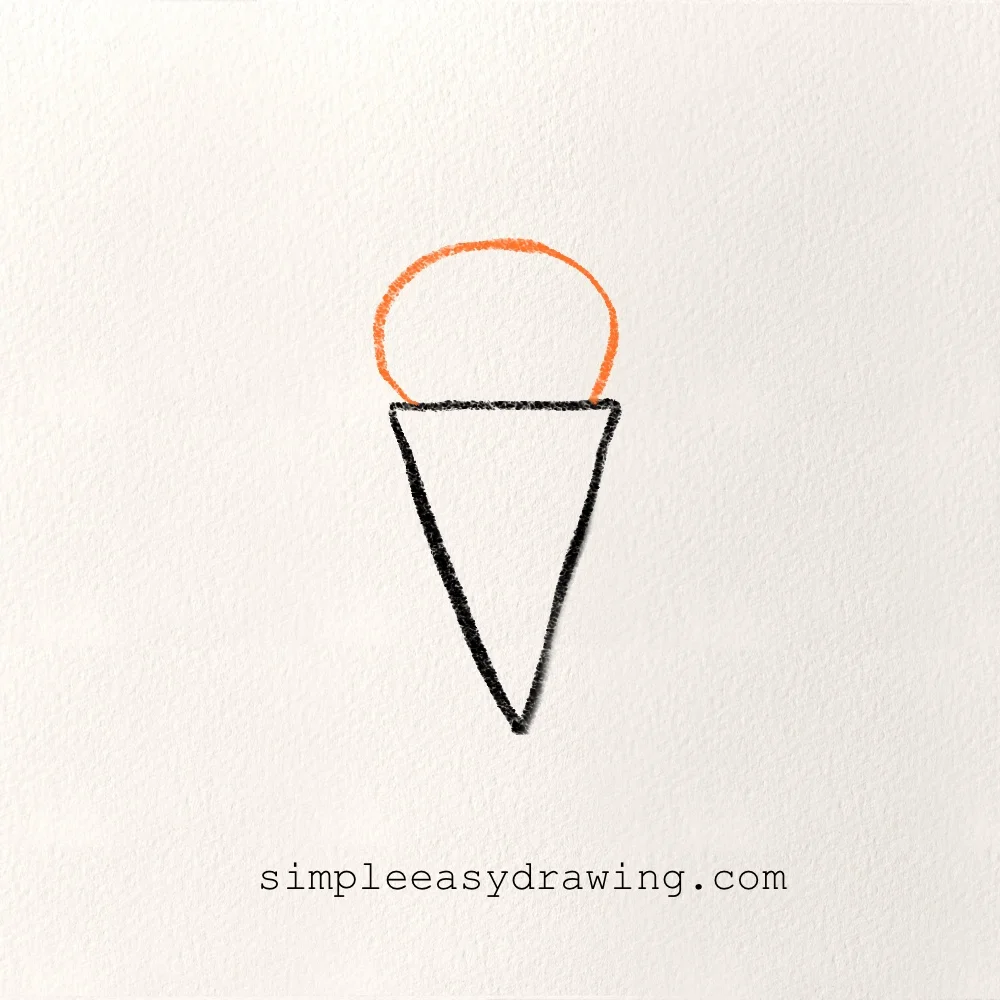
Now it’s time to add the ice cream! Draw a large round scoop sitting on top of the cone. The bottom of the scoop should overlap the opening just a little so it looks like the ice cream is resting inside the cone. Try to make the scoop nice and full.
Step 3: Add the ice cream toppings
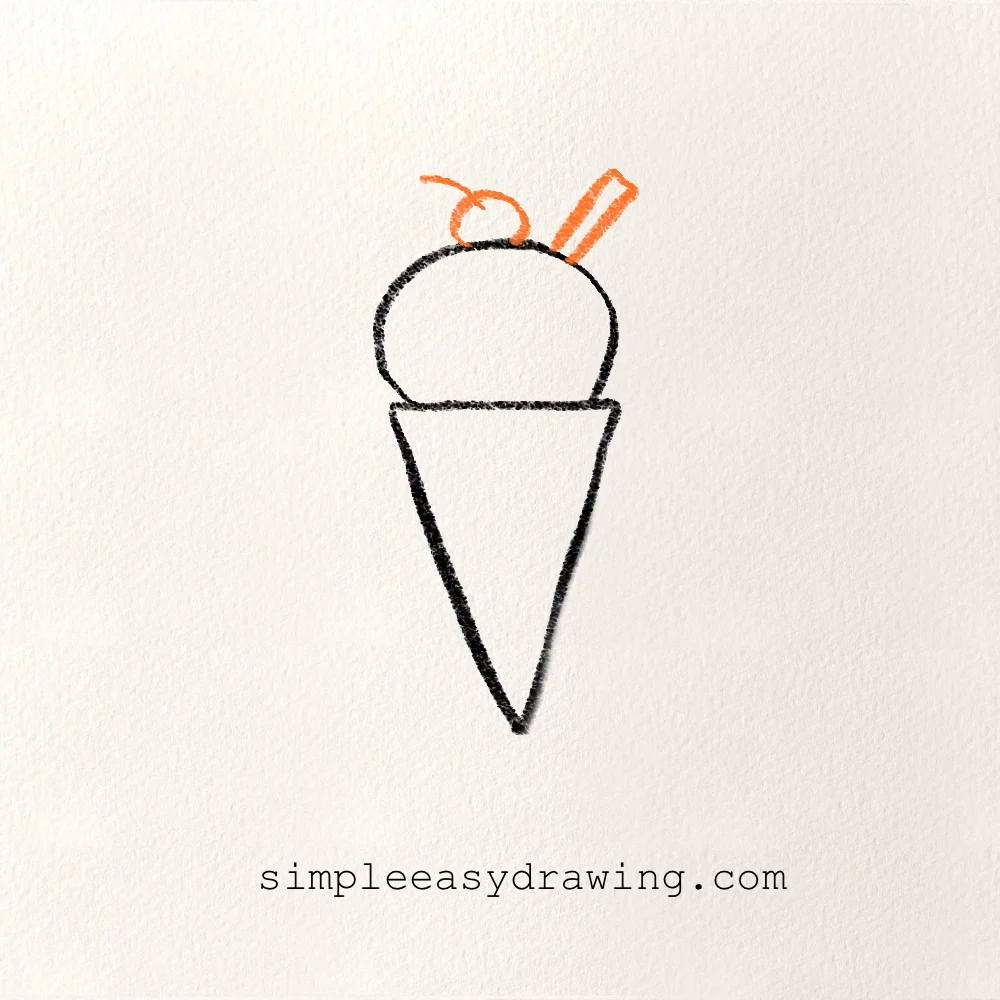
Every ice cream is better with toppings! Draw a small cherry near the top of the scoop, then add a short curved stem. Next, draw a chocolate wafer cookie behind the scoop, leaning slightly to one side. These simple details make the ice cream look much more delicious.
Step 4: Draw the waffle cone pattern
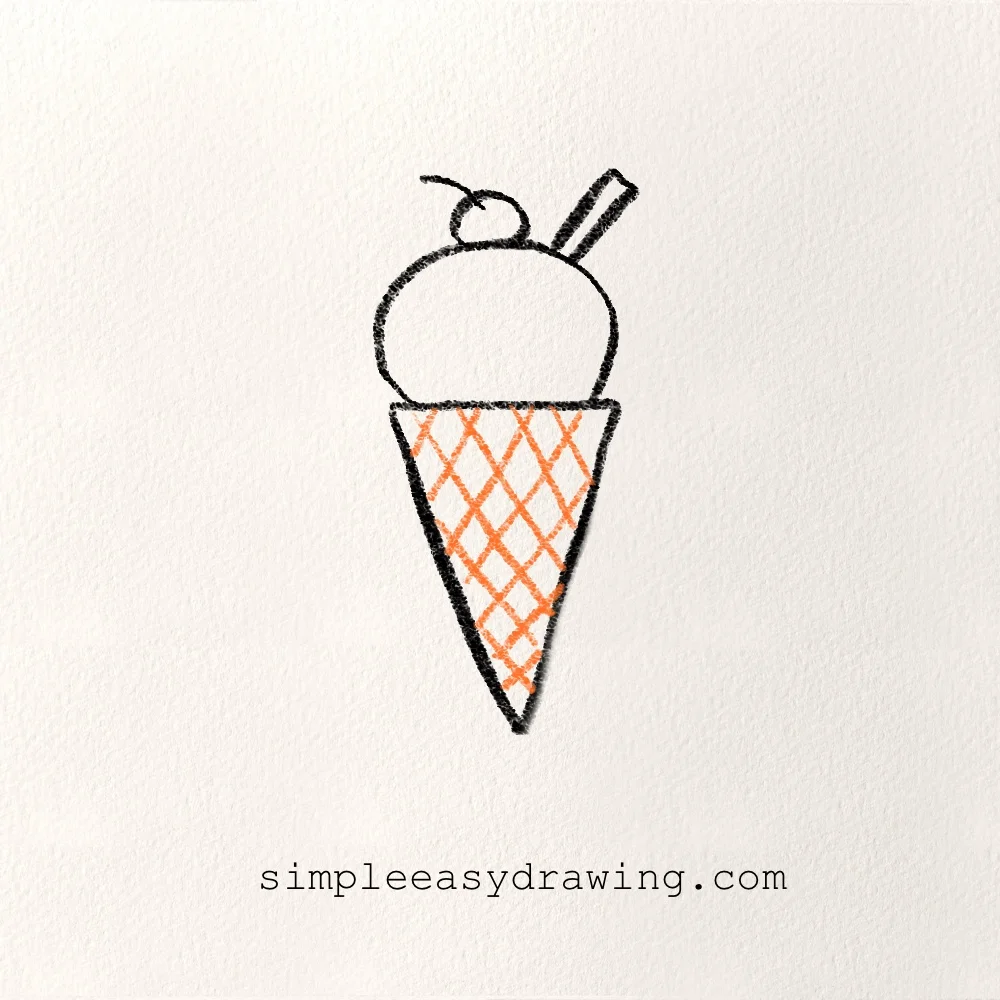
Let’s turn the plain cone into a waffle cone. Start by drawing several evenly spaced diagonal lines from one side of the cone to the other. Then draw another set of diagonal lines crossing in the opposite direction. The crisscross pattern is simple to draw, but it makes the cone look much more realistic.
Step 5: Color the ice cream
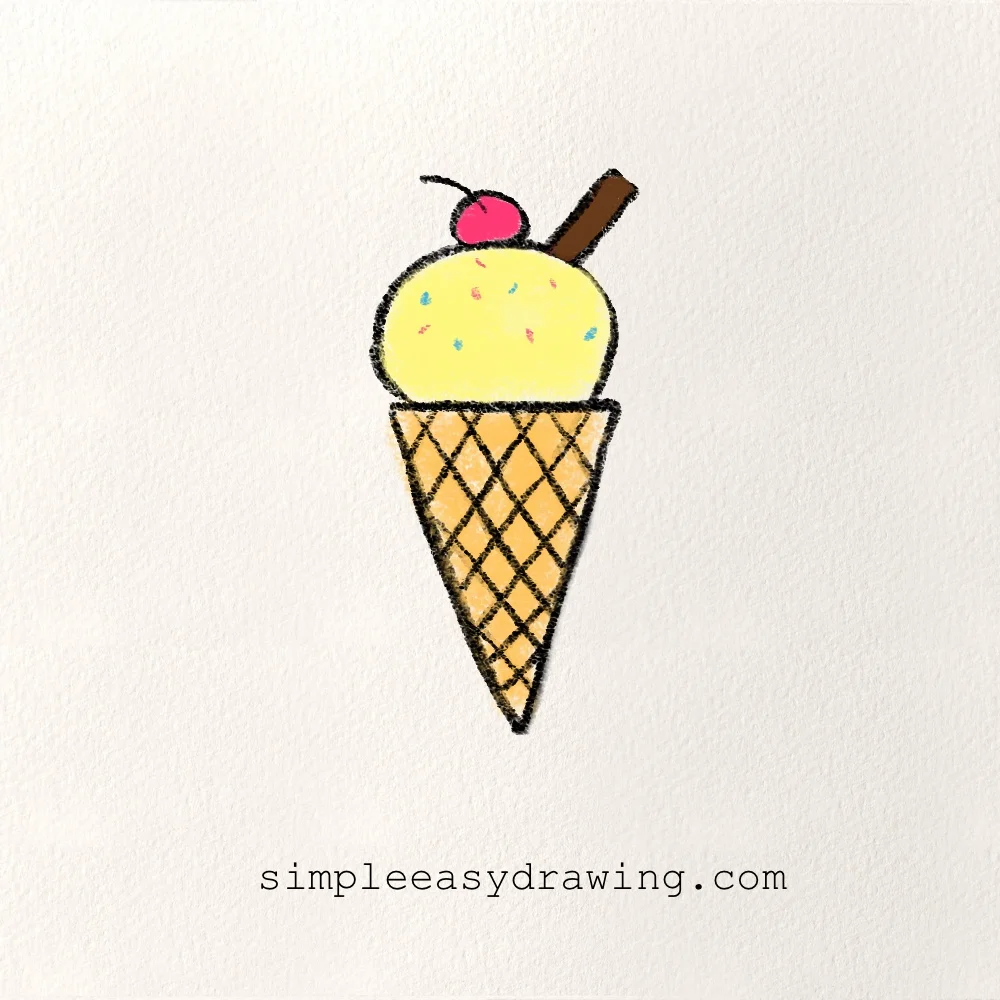
Now comes my favorite part, coloring! I used a light yellow for the ice cream scoop, but you can choose any flavor you like. Strawberry, chocolate, mint, blueberry, or even rainbow ice cream would all look great. Color the cone light brown, make the wafer dark brown, and color the cherry bright red. If you’d like, you can also add a few colorful sprinkles to make your drawing even more fun just like I did.
We’re all done
Nice work! You just finished drawing a classic ice cream cone, and I hope you enjoyed creating it with me.
One of the things I like most about this drawing is how easy it is to make it your own. Next time, try drawing two scoops instead of one, add colorful sprinkles, drizzle on some chocolate syrup, or even turn it into your favorite ice cream flavor. Every little change makes your artwork unique.
I’ve attached the full step by step picture and drawing worksheet so you can save it, print, and practice whenever you’d like. Drawing the same picture a few times is a great way to build confidence and improve your skills.
If you enjoyed today’s lesson, be sure to explore my other easy directed drawing tutorials. I have plenty of beginner-friendly lessons waiting for you. Keep practicing, keep experimenting, and most of all, have fun drawing!